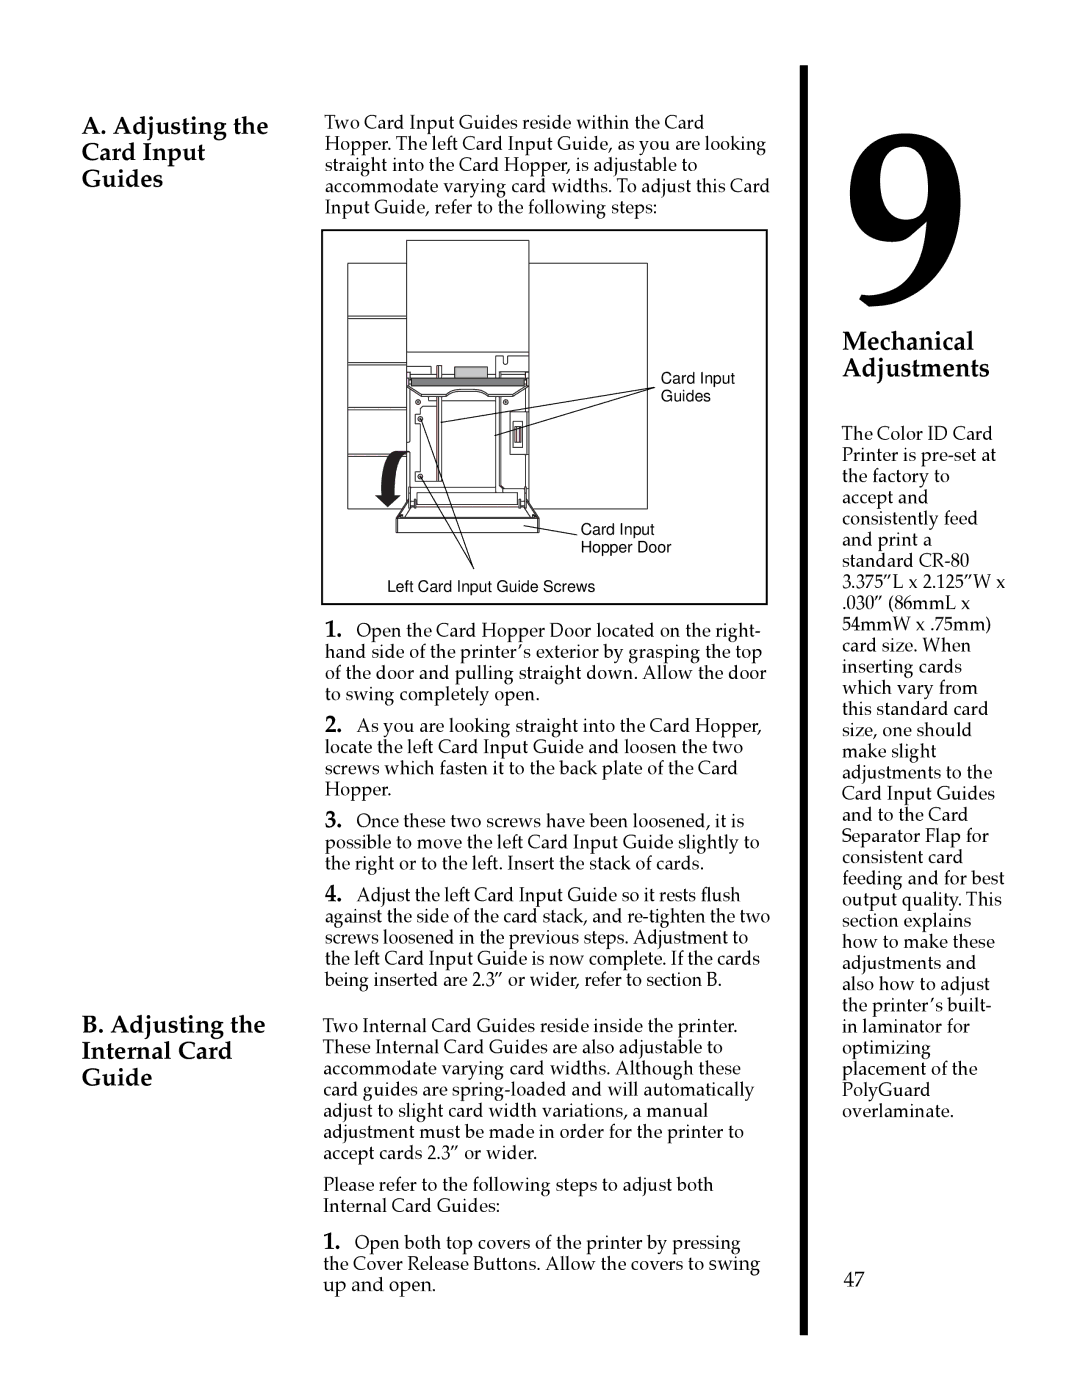
A. Adjusting the | Two Card Input Guides reside within the Card |
Card Input | Hopper. The left Card Input Guide, as you are looking |
Guides | straight into the Card Hopper, is adjustable to |
accommodate varying card widths. To adjust this Card | |
| Input Guide, refer to the following steps: |
9
B. Adjusting the
Internal Card
Guide
Card Input
Guides
Card Input
Hopper Door
Left Card Input Guide Screws
1.Open the Card Hopper Door located on the right- hand side of the printerÕs exterior by grasping the top of the door and pulling straight down. Allow the door to swing completely open.
2.As you are looking straight into the Card Hopper, locate the left Card Input Guide and loosen the two screws which fasten it to the back plate of the Card Hopper.
3.Once these two screws have been loosened, it is possible to move the left Card Input Guide slightly to the right or to the left. Insert the stack of cards.
4.Adjust the left Card Input Guide so it rests flush against the side of the card stack, and
Two Internal Card Guides reside inside the printer. These Internal Card Guides are also adjustable to accommodate varying card widths. Although these card guides are
Please refer to the following steps to adjust both Internal Card Guides:
1.Open both top covers of the printer by pressing the Cover Release Buttons. Allow the covers to swing up and open.
Mechanical Adjustments
The Color ID Card Printer is
.030Ó (86mmL x 54mmW x .75mm) card size. When inserting cards which vary from this standard card size, one should make slight adjustments to the Card Input Guides and to the Card Separator Flap for consistent card feeding and for best output quality. This section explains how to make these adjustments and also how to adjust the printerÕs built- in laminator for optimizing placement of the PolyGuard overlaminate.
47