A.Applying Power
1.Locate the power cord supplied with your printer.
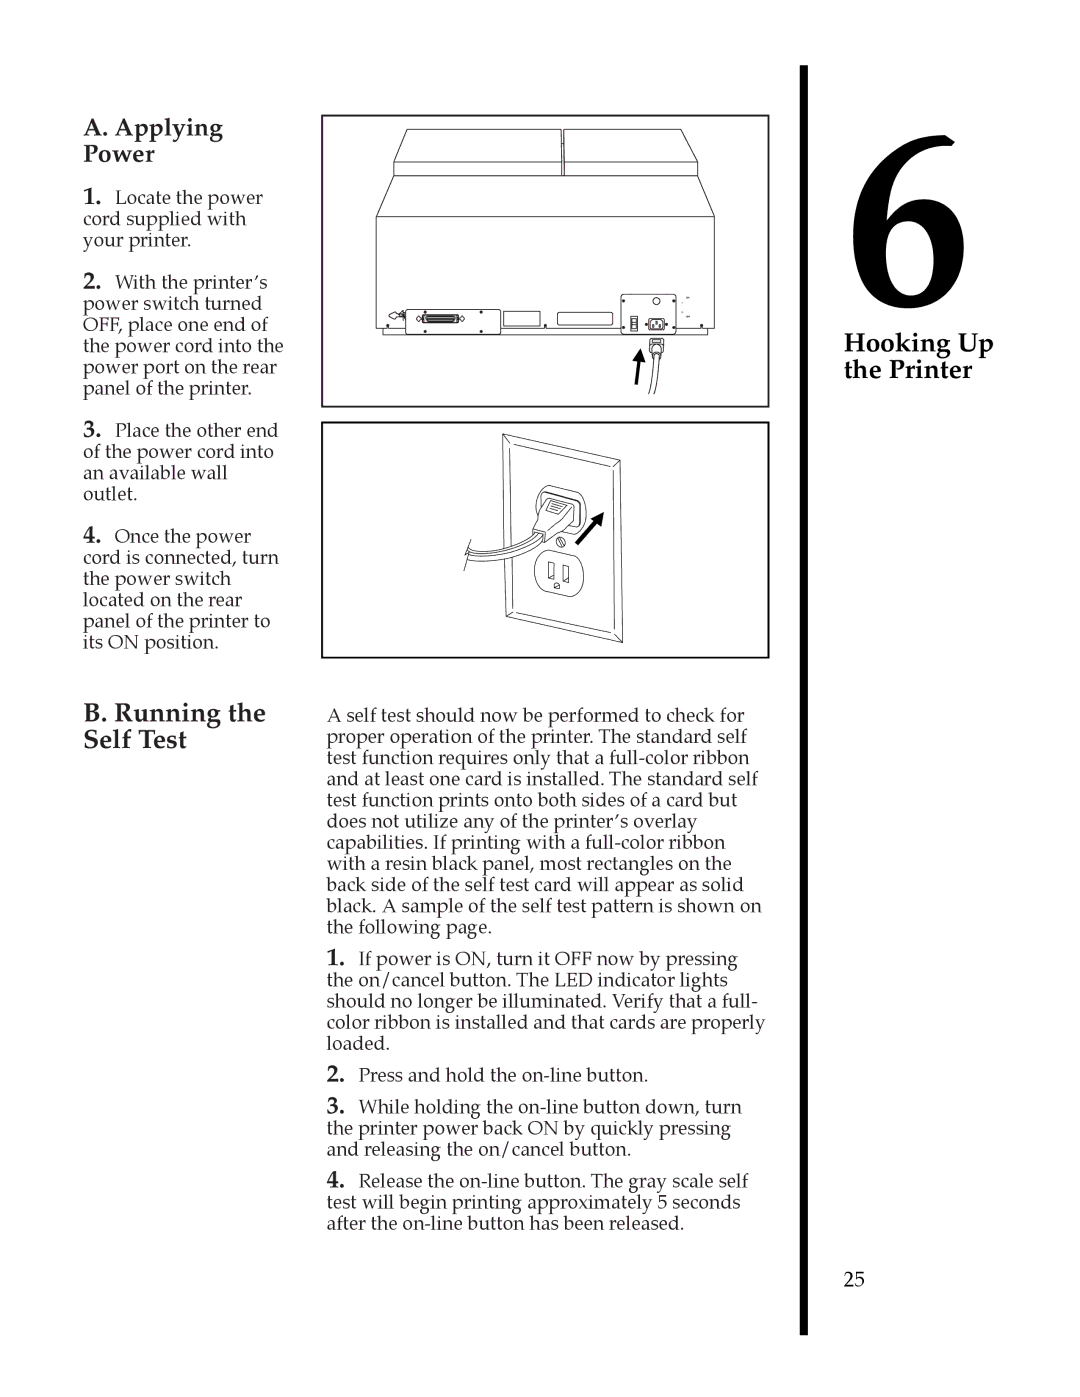
2.With the printerÕs power switch turned OFF, place one end of the power cord into the power port on the rear panel of the printer.
3.Place the other end of the power cord into an available wall outlet.
4.Once the power cord is connected, turn the power switch located on the rear panel of the printer to its ON position.
B. Running the Self Test
|
| ON |
|
| I |
|
| O |
| AC POWER | OFF |
PARALLEL | SW1 |
|
A self test should now be performed to check for proper operation of the printer. The standard self test function requires only that a
1.If power is ON, turn it OFF now by pressing the on/cancel button. The LED indicator lights should no longer be illuminated. Verify that a full- color ribbon is installed and that cards are properly loaded.
2.Press and hold the
3.While holding the
4.Release the
6
Hooking Up the Printer
25