B. Loading Ribbon into the Printer
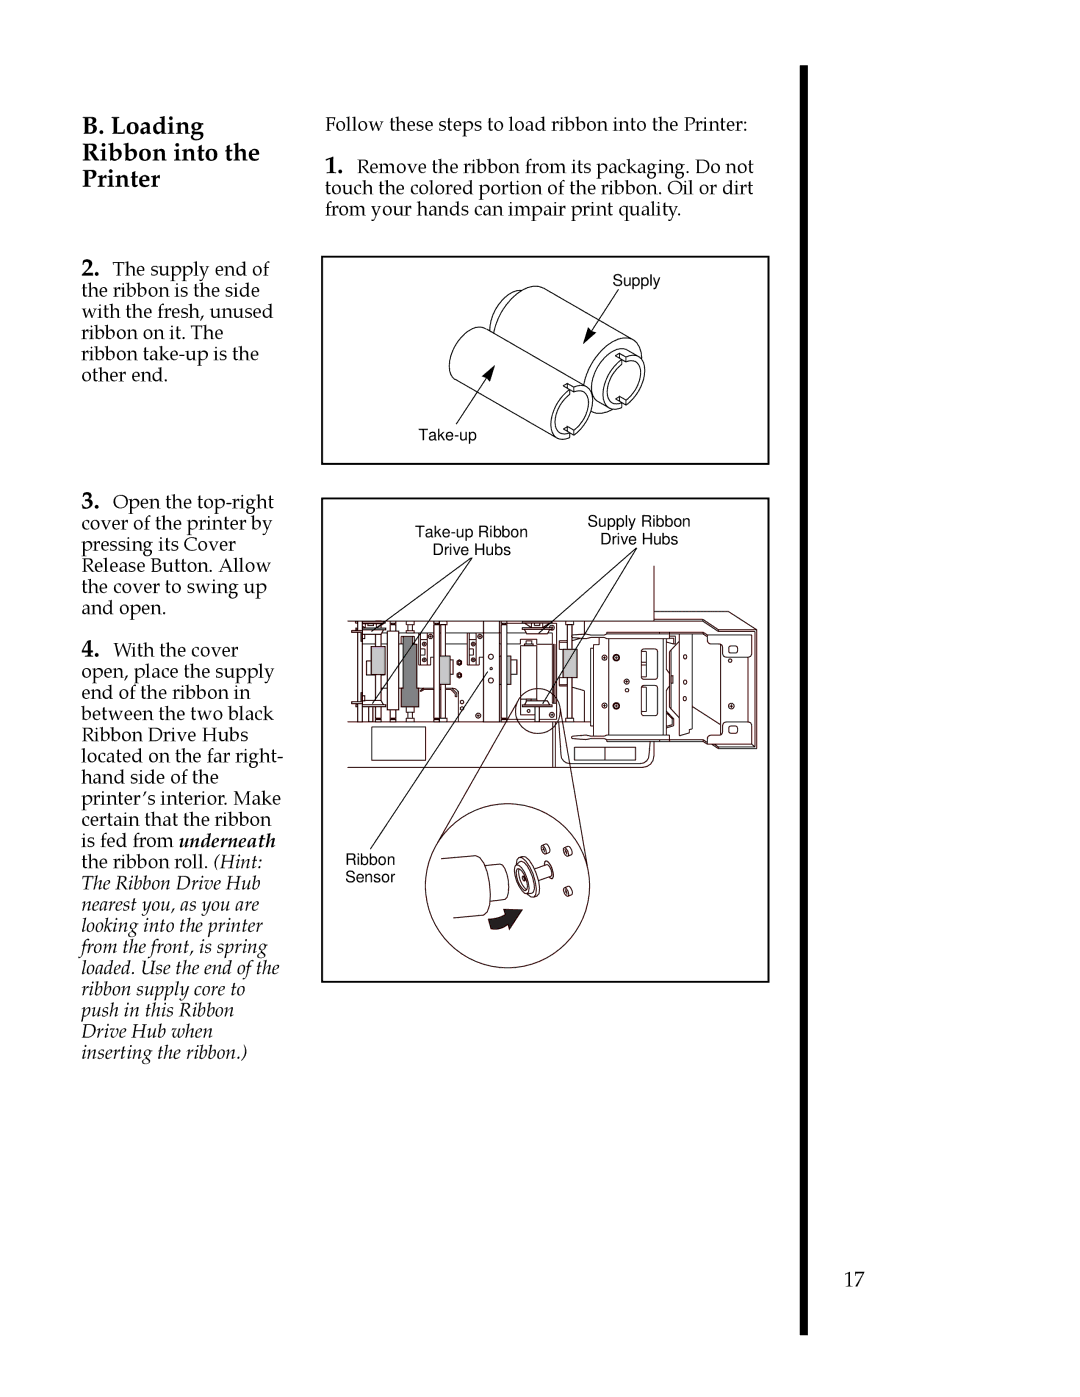
2.The supply end of the ribbon is the side with the fresh, unused ribbon on it. The ribbon
Follow these steps to load ribbon into the Printer:
1.Remove the ribbon from its packaging. Do not touch the colored portion of the ribbon. Oil or dirt from your hands can impair print quality.
Supply
3.Open the
4.With the cover open, place the supply end of the ribbon in between the two black Ribbon Drive Hubs located on the far right- hand side of the printerÕs interior. Make certain that the ribbon is fed from underneath the ribbon roll. (Hint: The Ribbon Drive Hub nearest you, as you are looking into the printer from the front, is spring loaded. Use the end of the ribbon supply core to push in this Ribbon Drive Hub when inserting the ribbon.)
Supply Ribbon | ||
Drive Hubs | ||
Drive Hubs | ||
| ||
Ribbon |
| |
Sensor |
|
17