50
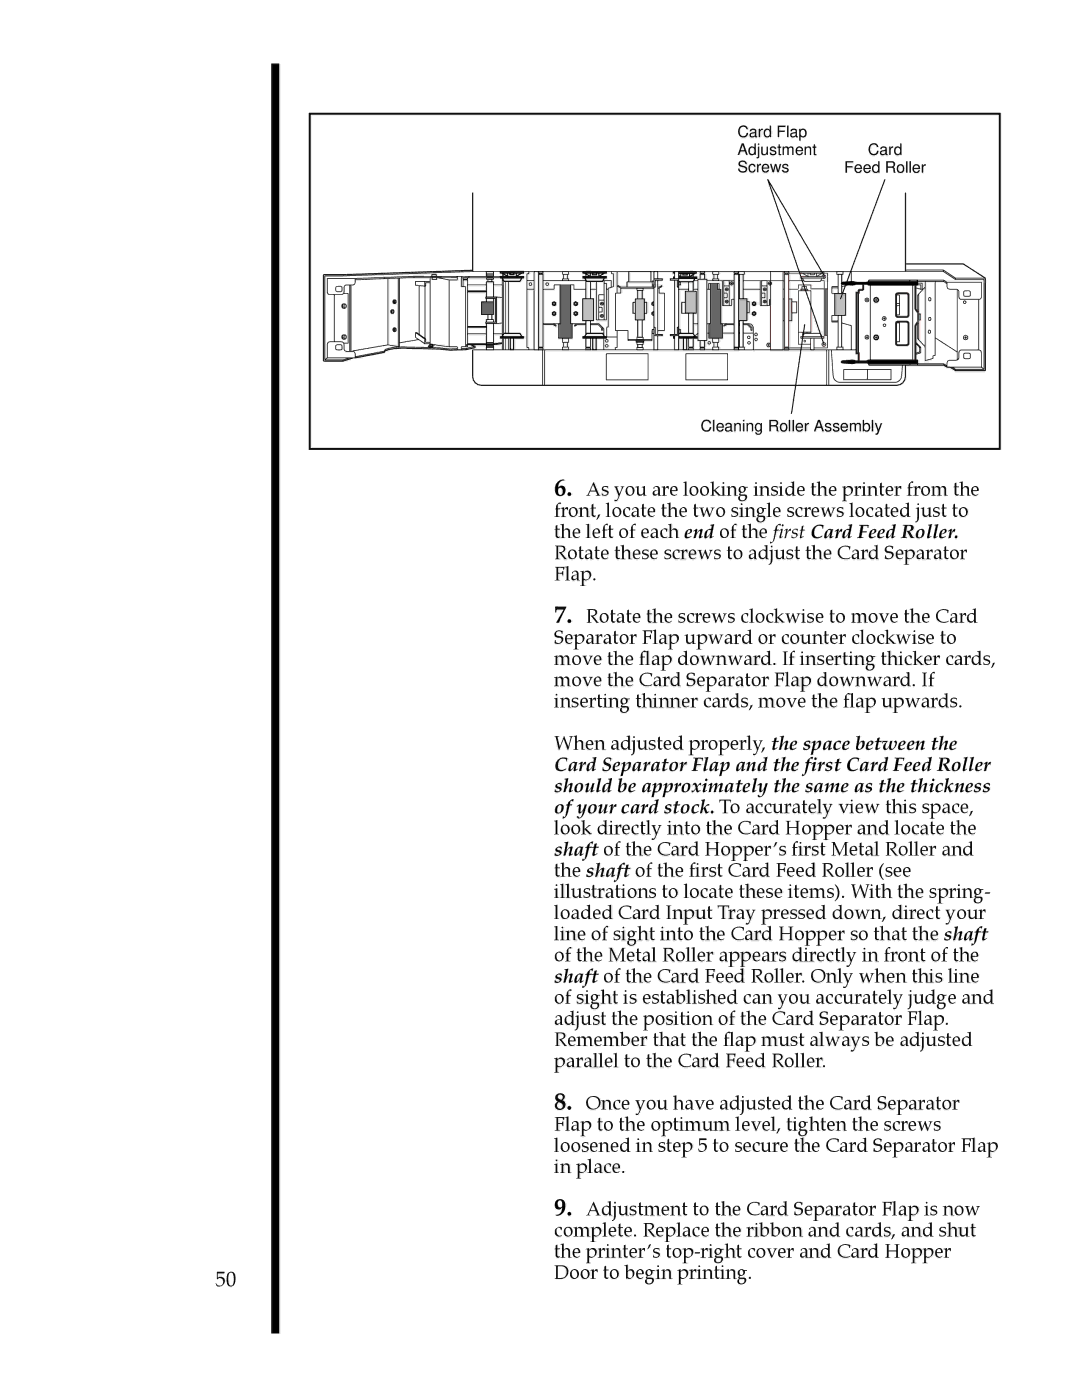
Card Flap |
|
Adjustment | Card |
Screws | Feed Roller |
Cleaning Roller Assembly | |
6.As you are looking inside the printer from the front, locate the two single screws located just to the left of each end of the first Card Feed Roller. Rotate these screws to adjust the Card Separator Flap.
7.Rotate the screws clockwise to move the Card Separator Flap upward or counter clockwise to move the flap downward. If inserting thicker cards, move the Card Separator Flap downward. If inserting thinner cards, move the flap upwards.
When adjusted properly, the space between the
Card Separator Flap and the first Card Feed Roller should be approximately the same as the thickness of your card stock. To accurately view this space, look directly into the Card Hopper and locate the shaft of the Card HopperÕs first Metal Roller and the shaft of the first Card Feed Roller (see illustrations to locate these items). With the spring- loaded Card Input Tray pressed down, direct your line of sight into the Card Hopper so that the shaft of the Metal Roller appears directly in front of the shaft of the Card Feed Roller. Only when this line of sight is established can you accurately judge and adjust the position of the Card Separator Flap. Remember that the flap must always be adjusted parallel to the Card Feed Roller.
8.Once you have adjusted the Card Separator Flap to the optimum level, tighten the screws loosened in step 5 to secure the Card Separator Flap in place.
9.Adjustment to the Card Separator Flap is now complete. Replace the ribbon and cards, and shut the printerÕs