System Board
Description | Spare part number |
|
|
System board for use in Windows 7 models (includes thermal material) | |
|
|
System board for use in NetClone models (includes replacement thermal material) | |
|
|
1.Prepare the computer for disassembly (Preparation for Disassembly on page 49).
2.Remove the access panel (Computer Access Panel on page 50).
3.Remove the front fan assembly (Front Fan Assembly on page 78).
4.When replacing the system board, make sure the following components are removed from the defective system board and installed on the replacement system board:
●Memory modules (Memory on page 55)
●Expansion cards (Expansion Cards on page 58)
●Heat sink (Heat sink on page 82).
●Processor (Processor on page 84)
5.Disconnect all cables connected to the system board, noting their location for reinstallation.
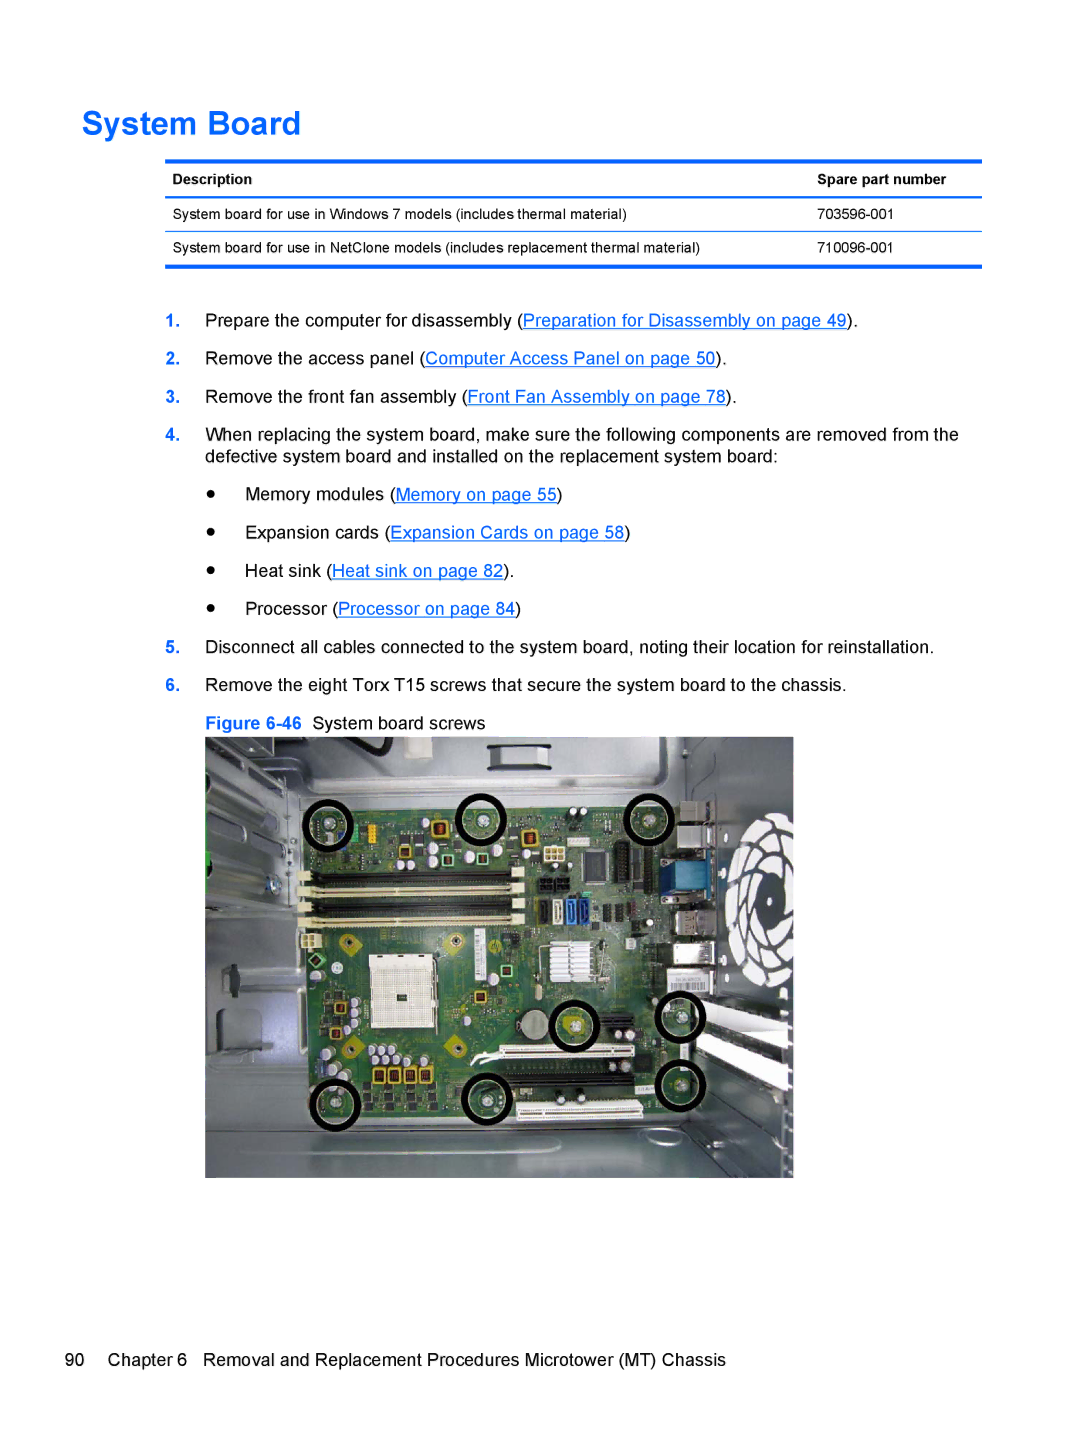
6.Remove the eight Torx T15 screws that secure the system board to the chassis. Figure
90 Chapter 6 Removal and Replacement Procedures Microtower (MT) Chassis
