System Upgrades
System Upgrades
Installing and Removing the Hard Disk Drives
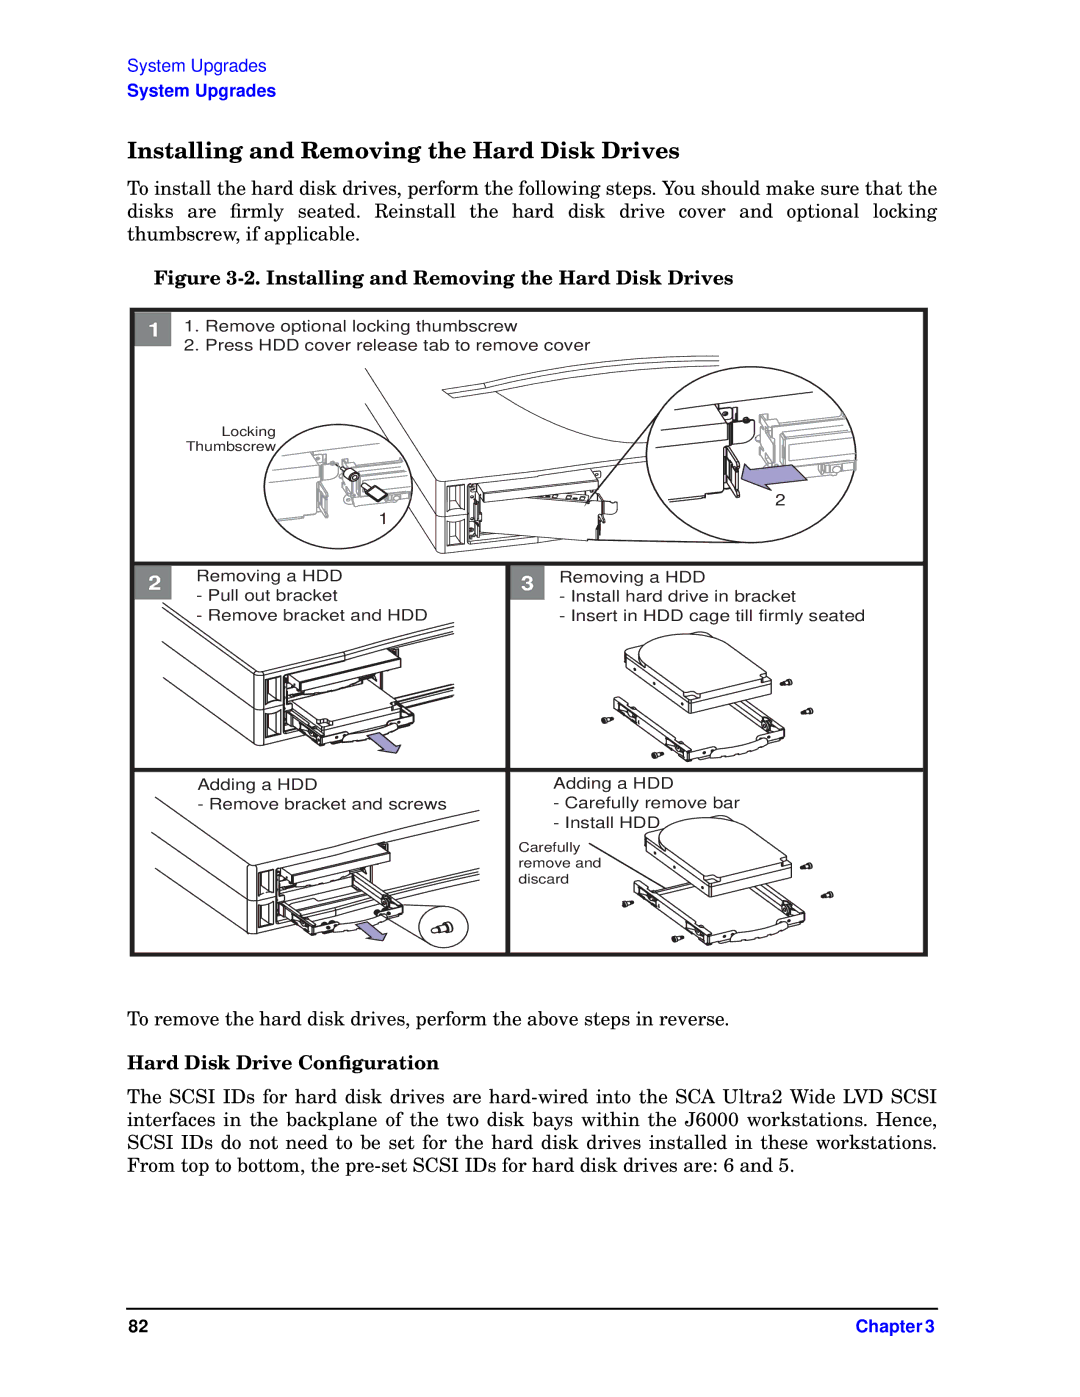
To install the hard disk drives, perform the following steps. You should make sure that the disks are firmly seated. Reinstall the hard disk drive cover and optional locking thumbscrew, if applicable.
Figure 3-2. Installing and Removing the Hard Disk Drives
1 | 1. Remove optional locking thumbscrew |
|
|
| 2. Press HDD cover release tab to remove cover | ||
| Locking |
|
|
| Thumbscrew |
|
|
|
|
| 2 |
| 1 |
|
|
2 | Removing a HDD | 3 | Removing a HDD |
| - Pull out bracket |
| - Install hard drive in bracket |
| - Remove bracket and HDD |
| - Insert in HDD cage till firmly seated |
| Adding a HDD |
| Adding a HDD |
| - Remove bracket and screws |
| - Carefully remove bar |
|
|
| - Install HDD |
|
| Carefully | |
|
| remove and | |
|
| discard | |
To remove the hard disk drives, perform the above steps in reverse.
Hard Disk Drive Configuration
The SCSI IDs for hard disk drives are
82 | Chapter 3 |
