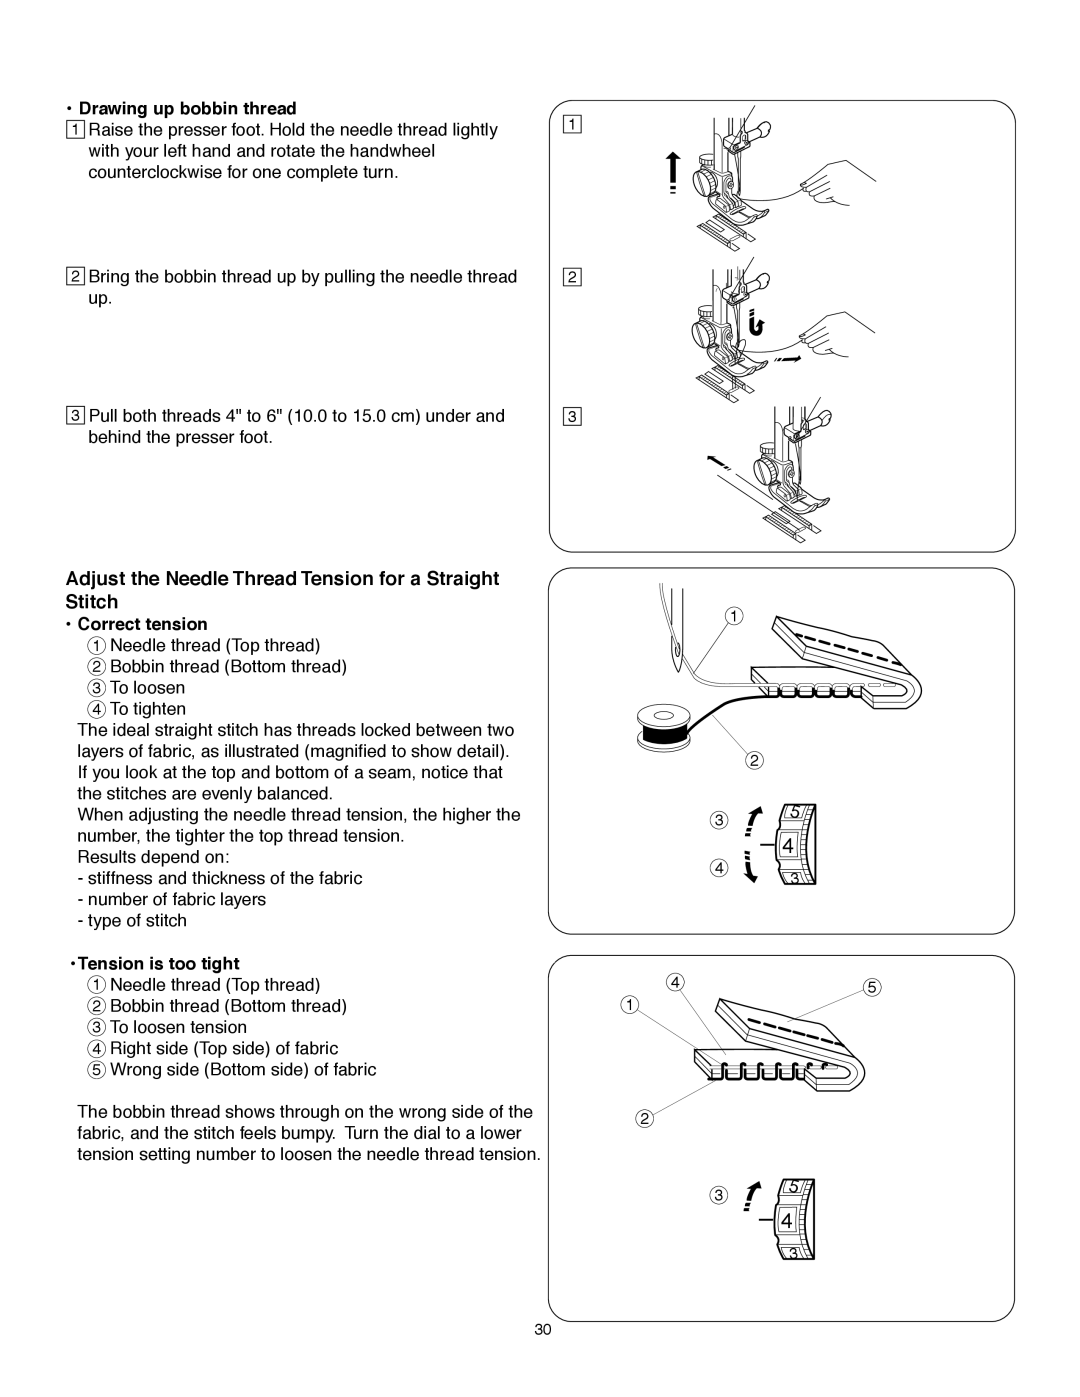
•Drawing up bobbin thread
1 Raise the presser foot. Hold the needle thread lightly with your left hand and rotate the handwheel counterclockwise for one complete turn.
2Bring the bobbin thread up by pulling the needle thread up.
3Pull both threads 4" to 6" (10.0 to 15.0 cm) under and behind the presser foot.
1
2
3
Adjust the Needle Thread Tension for a Straight Stitch
• Correct tension
1Needle thread (Top thread)
2Bobbin thread (Bottom thread)
3 To loosen
4 To tighten
The ideal straight stitch has threads locked between two layers of fabric, as illustrated (magnified to show detail). If you look at the top and bottom of a seam, notice that the stitches are evenly balanced.
When adjusting the needle thread tension, the higher the number, the tighter the top thread tension.
Results depend on:
-stiffness and thickness of the fabric
-number of fabric layers
-type of stitch
•Tension is too tight
1Needle thread (Top thread)
2Bobbin thread (Bottom thread)
3 To loosen tension
4 Right side (Top side) of fabric
5 Wrong side (Bottom side) of fabric
The bobbin thread shows through on the wrong side of the fabric, and the stitch feels bumpy. Turn the dial to a lower tension setting number to loosen the needle thread tension.
1
2
3 | 5 |
| |
| 4 |
4 | 3 |
|
45
1
2
3 | 5 |
| |
| 4 |
| 3 |
30
