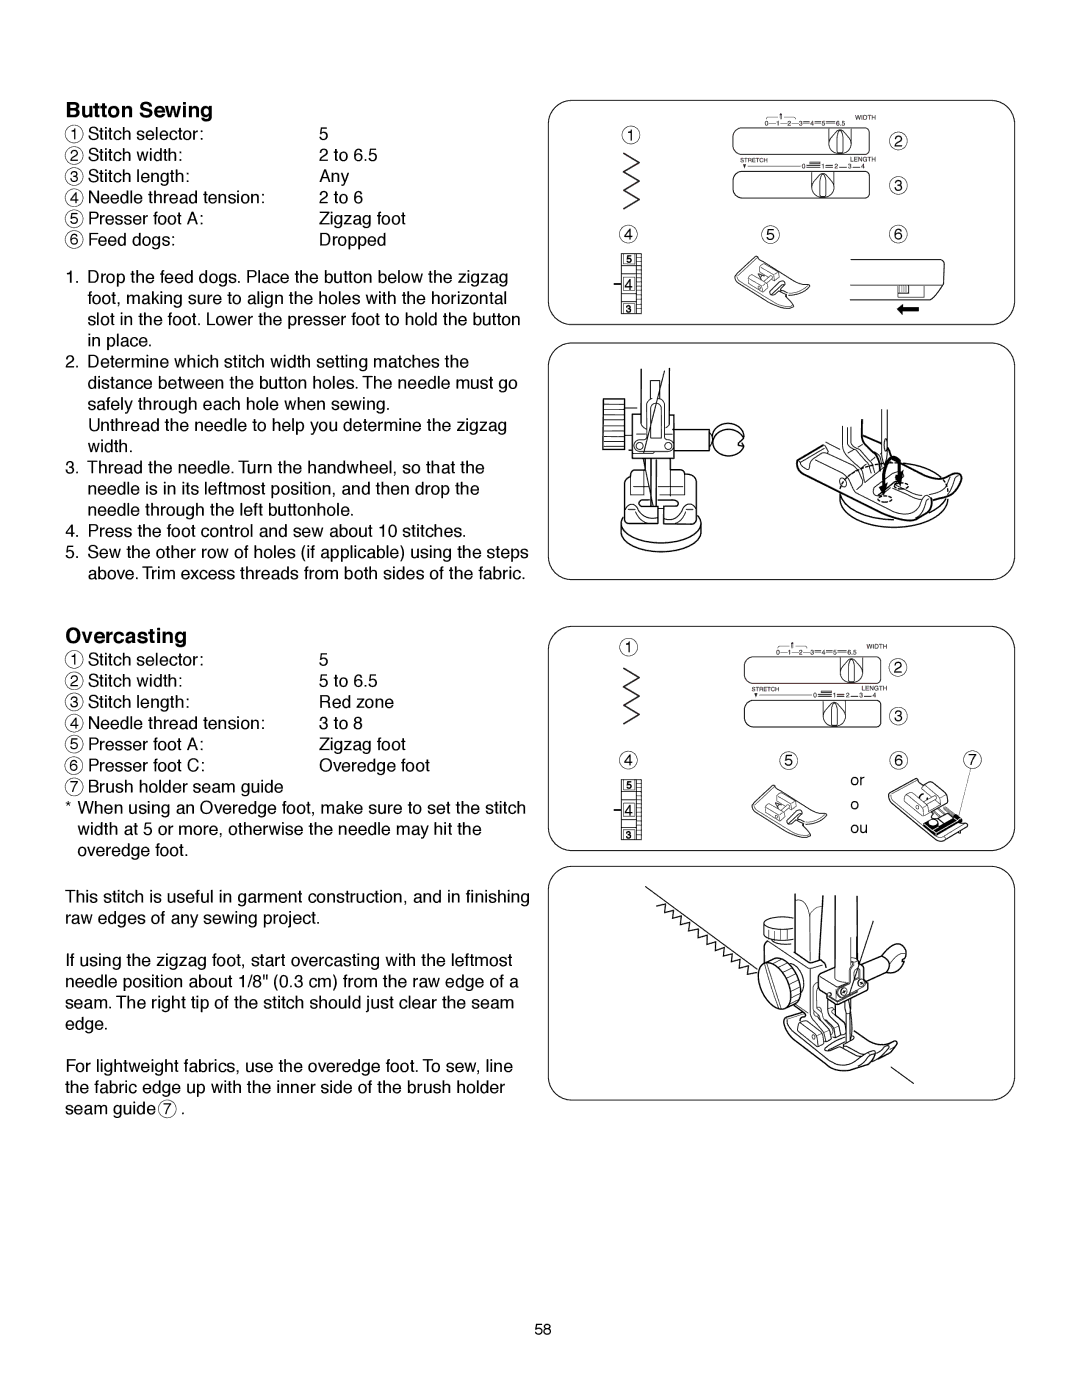
Button Sewing
1 | Stitch selector: | 5 |
2 | Stitch width: | 2 to 6.5 |
3 | Stitch length: | Any |
4 | Needle thread tension: | 2 to 6 |
5 | Presser foot A: | Zigzag foot |
6 | Feed dogs: | Dropped |
1.Drop the feed dogs. Place the button below the zigzag foot, making sure to align the holes with the horizontal slot in the foot. Lower the presser foot to hold the button in place.
2.Determine which stitch width setting matches the distance between the button holes. The needle must go safely through each hole when sewing.
Unthread the needle to help you determine the zigzag width.
3.Thread the needle. Turn the handwheel, so that the needle is in its leftmost position, and then drop the needle through the left buttonhole.
4.Press the foot control and sew about 10 stitches.
5.Sew the other row of holes (if applicable) using the steps above. Trim excess threads from both sides of the fabric.
Overcasting
1 | Stitch selector: | 5 |
2 | Stitch width: | 5 to 6.5 |
3 | Stitch length: | Red zone |
4 | Needle thread tension: | 3 to 8 |
5 | Presser foot A: | Zigzag foot |
6 | Presser foot C: | Overedge foot |
7Brush holder seam guide
* When using an Overedge foot, make sure to set the stitch width at 5 or more, otherwise the needle may hit the overedge foot.
This stitch is useful in garment construction, and in finishing raw edges of any sewing project.
If using the zigzag foot, start overcasting with the leftmost needle position about 1/8" (0.3 cm) from the raw edge of a seam. The right tip of the stitch should just clear the seam edge.
For lightweight fabrics, use the overedge foot. To sew, line the fabric edge up with the inner side of the brush holder seam guide 7 .
1
4
5
![]()
![]() 4
4
3
1
4
5
![]()
![]() 4
4
3
2
3
56
2
3
5 | 6 | 7 |
or o ou
58