KODAK 1200i
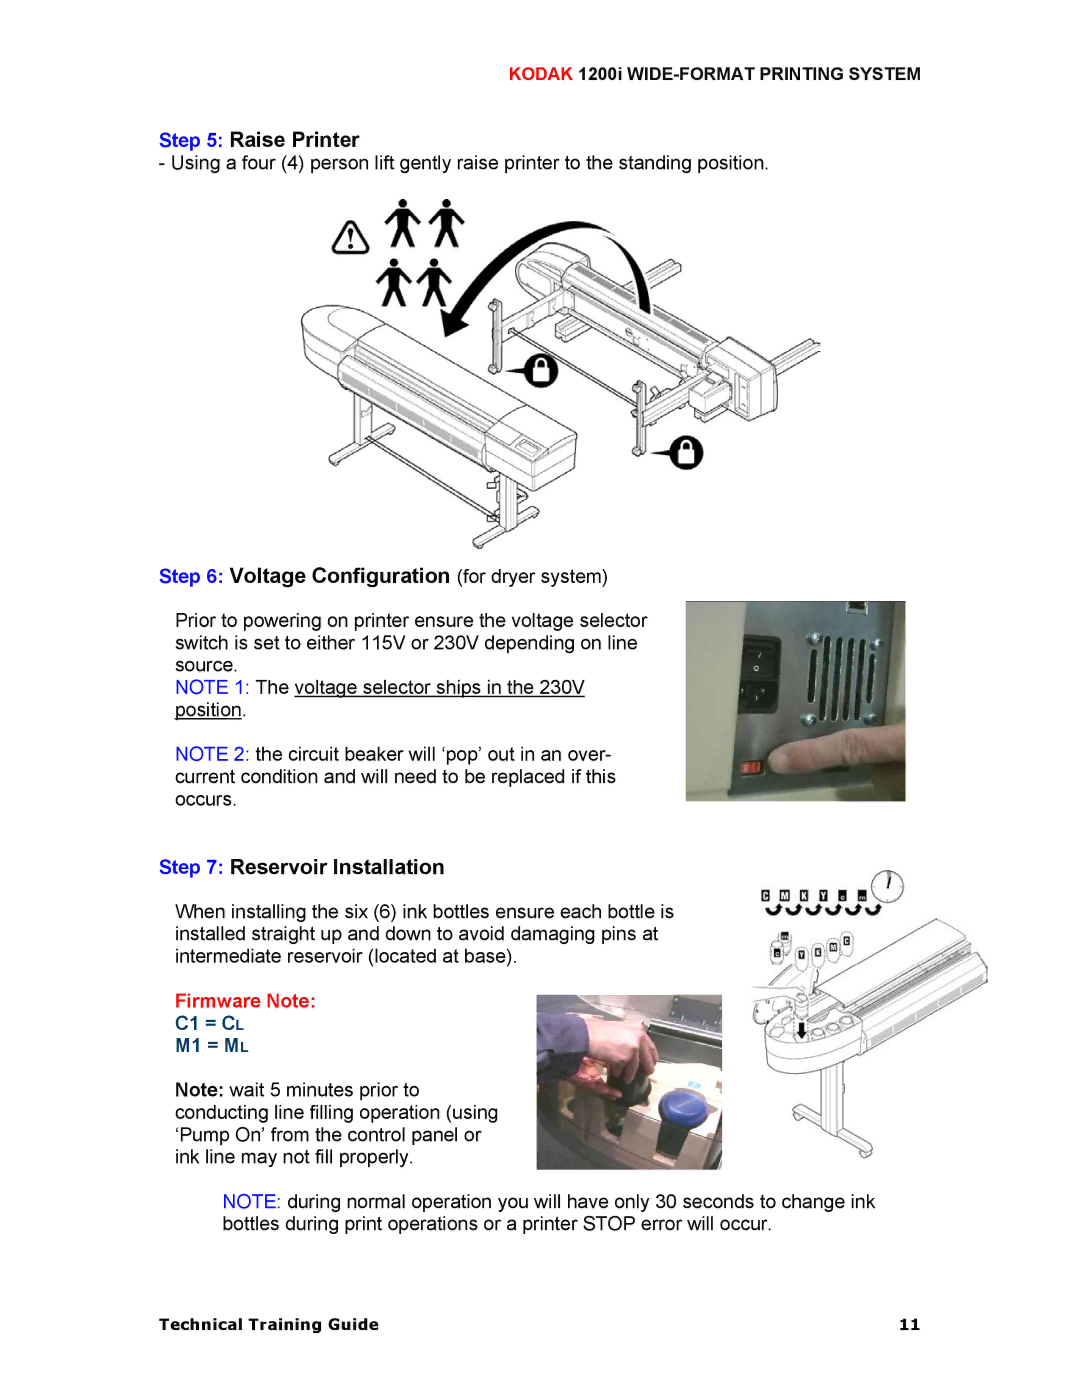
Step 5: Raise Printer
- Using a four (4) person lift gently raise printer to the standing position.
Step 6: Voltage Configuration (for dryer system)
Prior to powering on printer ensure the voltage selector switch is set to either 115V or 230V depending on line source.
NOTE 1: The voltage selector ships in the 230V position.
NOTE 2: the circuit beaker will ‘pop’ out in an over- current condition and will need to be replaced if this occurs.
Step 7: Reservoir Installation
When installing the six (6) ink bottles ensure each bottle is installed straight up and down to avoid damaging pins at intermediate reservoir (located at base).
Firmware Note:
C1 = CL
M1 = ML
Note: wait 5 minutes prior to conducting line filling operation (using ‘Pump On’ from the control panel or ink line may not fill properly.
NOTE: during normal operation you will have only 30 seconds to change ink bottles during print operations or a printer STOP error will occur.
Technical Training Guide | 11 |
