KODAK 1200i WIDE-FORMAT PRINTING SYSTEM
4. Rear Static Strip Condition & Grounding
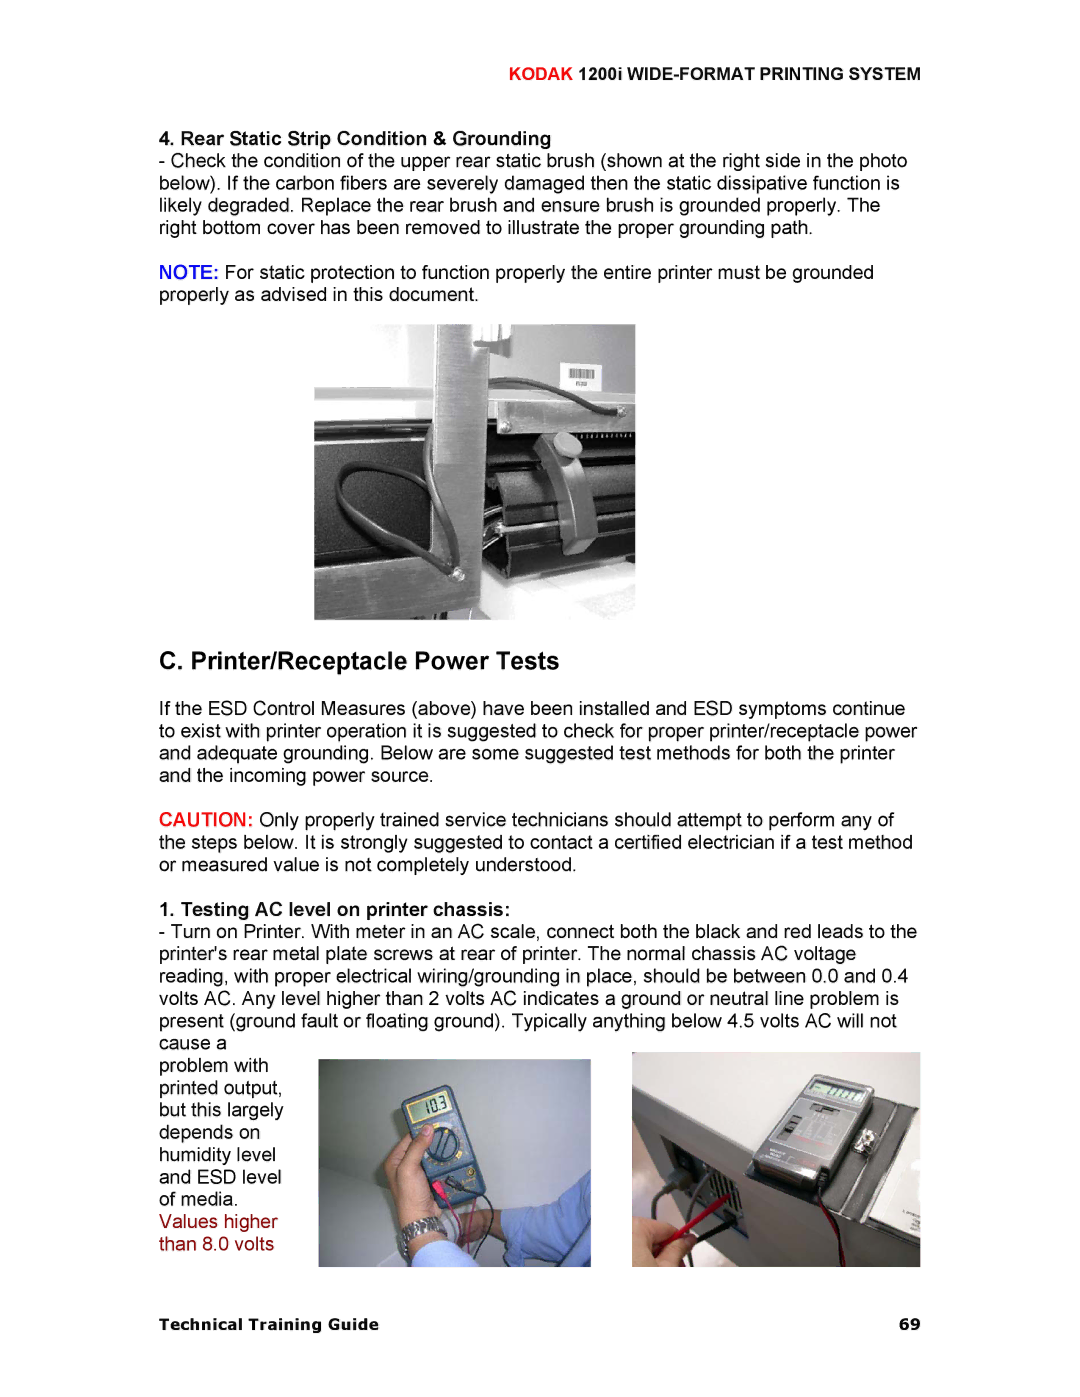
-Check the condition of the upper rear static brush (shown at the right side in the photo below). If the carbon fibers are severely damaged then the static dissipative function is likely degraded. Replace the rear brush and ensure brush is grounded properly. The right bottom cover has been removed to illustrate the proper grounding path.
NOTE: For static protection to function properly the entire printer must be grounded properly as advised in this document.
C. Printer/Receptacle Power Tests
If the ESD Control Measures (above) have been installed and ESD symptoms continue to exist with printer operation it is suggested to check for proper printer/receptacle power and adequate grounding. Below are some suggested test methods for both the printer and the incoming power source.
CAUTION: Only properly trained service technicians should attempt to perform any of the steps below. It is strongly suggested to contact a certified electrician if a test method or measured value is not completely understood.
1. Testing AC level on printer chassis:
-Turn on Printer. With meter in an AC scale, connect both the black and red leads to the printer's rear metal plate screws at rear of printer. The normal chassis AC voltage reading, with proper electrical wiring/grounding in place, should be between 0.0 and 0.4 volts AC. Any level higher than 2 volts AC indicates a ground or neutral line problem is present (ground fault or floating ground). Typically anything below 4.5 volts AC will not cause a
problem with printed output, but this largely depends on humidity level and ESD level of media. Values higher than 8.0 volts
Technical Training Guide | 69 |
