Basic Copying
Using the Sorter (continued)
Staple-Sort Modes for ST-104
![]() CAUTION
CAUTION
To avoid injury when using the stapling sorter, do not insert your fingers around staple unit.
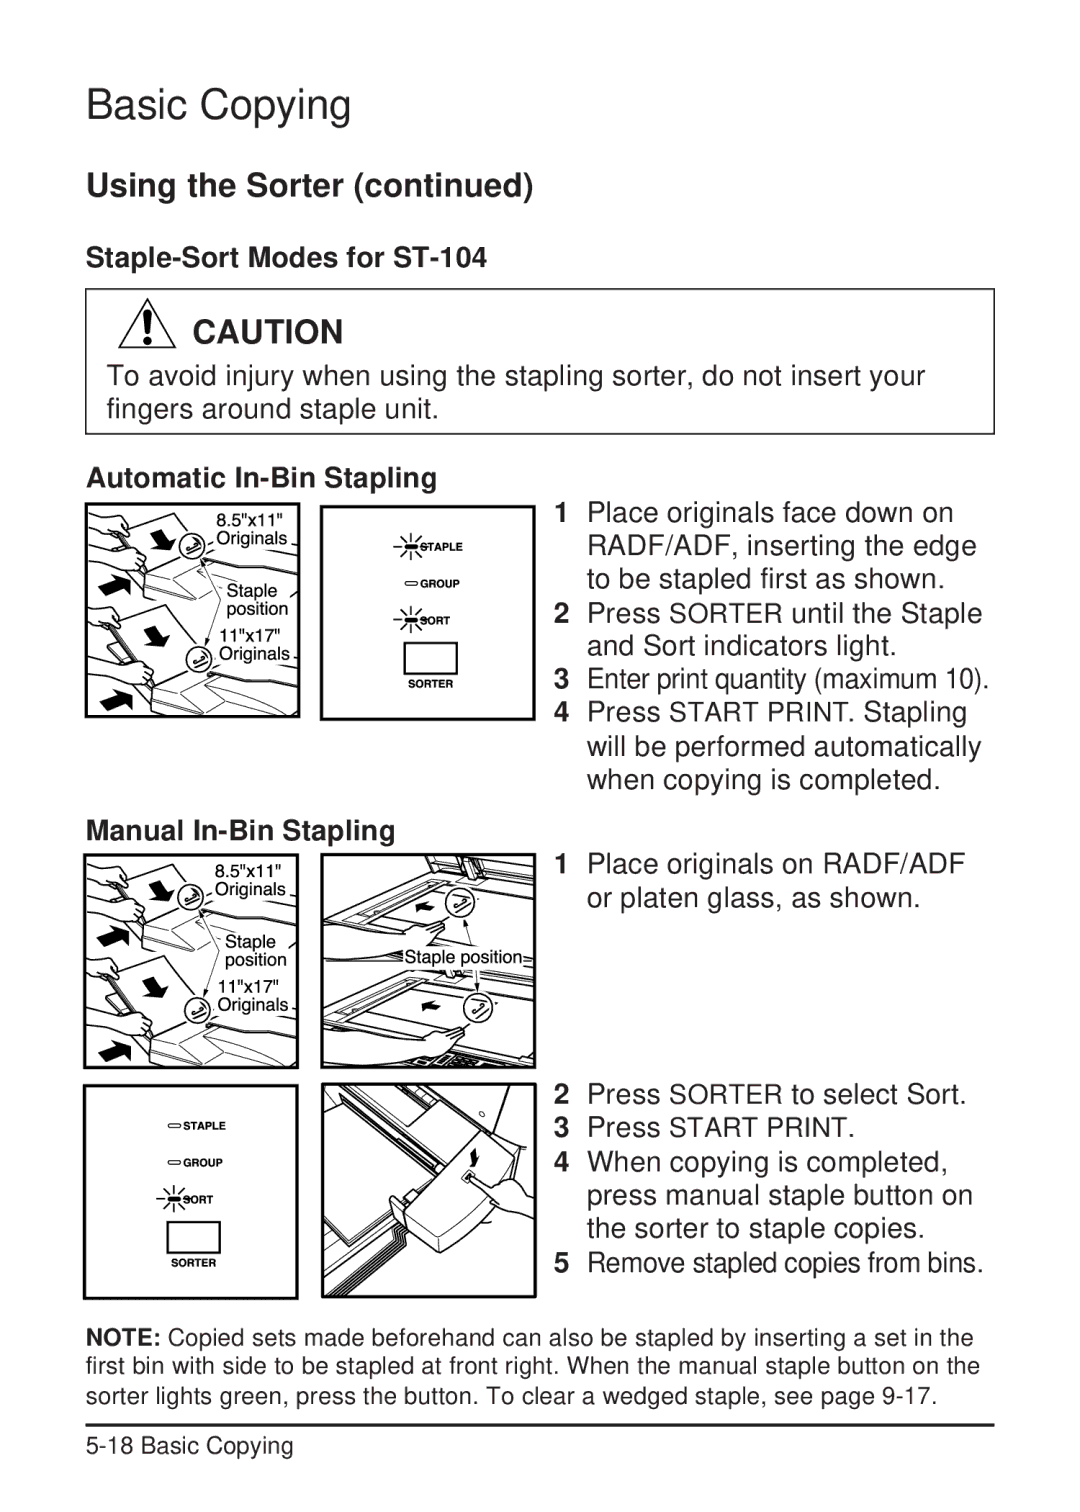
Automatic In-Bin Stapling
1 Place originals face down on RADF/ADF, inserting the edge to be stapled first as shown.
2 Press SORTER until the Staple and Sort indicators light.
3 Enter print quantity (maximum 10).
4 Press START PRINT. Stapling will be performed automatically when copying is completed.
Manual In-Bin Stapling
1 Place originals on RADF/ADF or platen glass, as shown.
2 Press SORTER to select Sort.
3 Press START PRINT.
4 When copying is completed, press manual staple button on the sorter to staple copies.
5 Remove stapled copies from bins.
NOTE: Copied sets made beforehand can also be stapled by inserting a set in the first bin with side to be stapled at front right. When the manual staple button on the sorter lights green, press the button. To clear a wedged staple, see page