DIMAGE SCAN DUAL III UTILITY – IMAGE PROCESSING
White, gray, and black point corrections
On the tone curve / histogram palette, corrections can be made by specifying a white, black, and gray point within the image. Locating an appropriate neutral area within the image is critical to cor- rectly calibrate the software. When the dropper tool is selected, the RGB display is active and can be used to evaluate the image area. All changes are immediately reflected in the display image.
Click the
With the dropper tool, click on the brightest neutral area of the image to define it as the white point. The values of the image will be adjusted based on the selected point. The default level for the white point is 255 for each RGB channel.
Click the
With the dropper tool, click on the darkest neutral area of the image to define it as the black point. The values of the image will be adjusted based on the selected point. The default level for the black point is 0 for each RGB channel.
Click the
With the dropper tool, click a neutral area of the image to be defined as the gray point. The area used to calibrate the gray point must be neutral. The brightness level of the area is not important, but if the area has a definite color, the image will not be color balanced correctly.
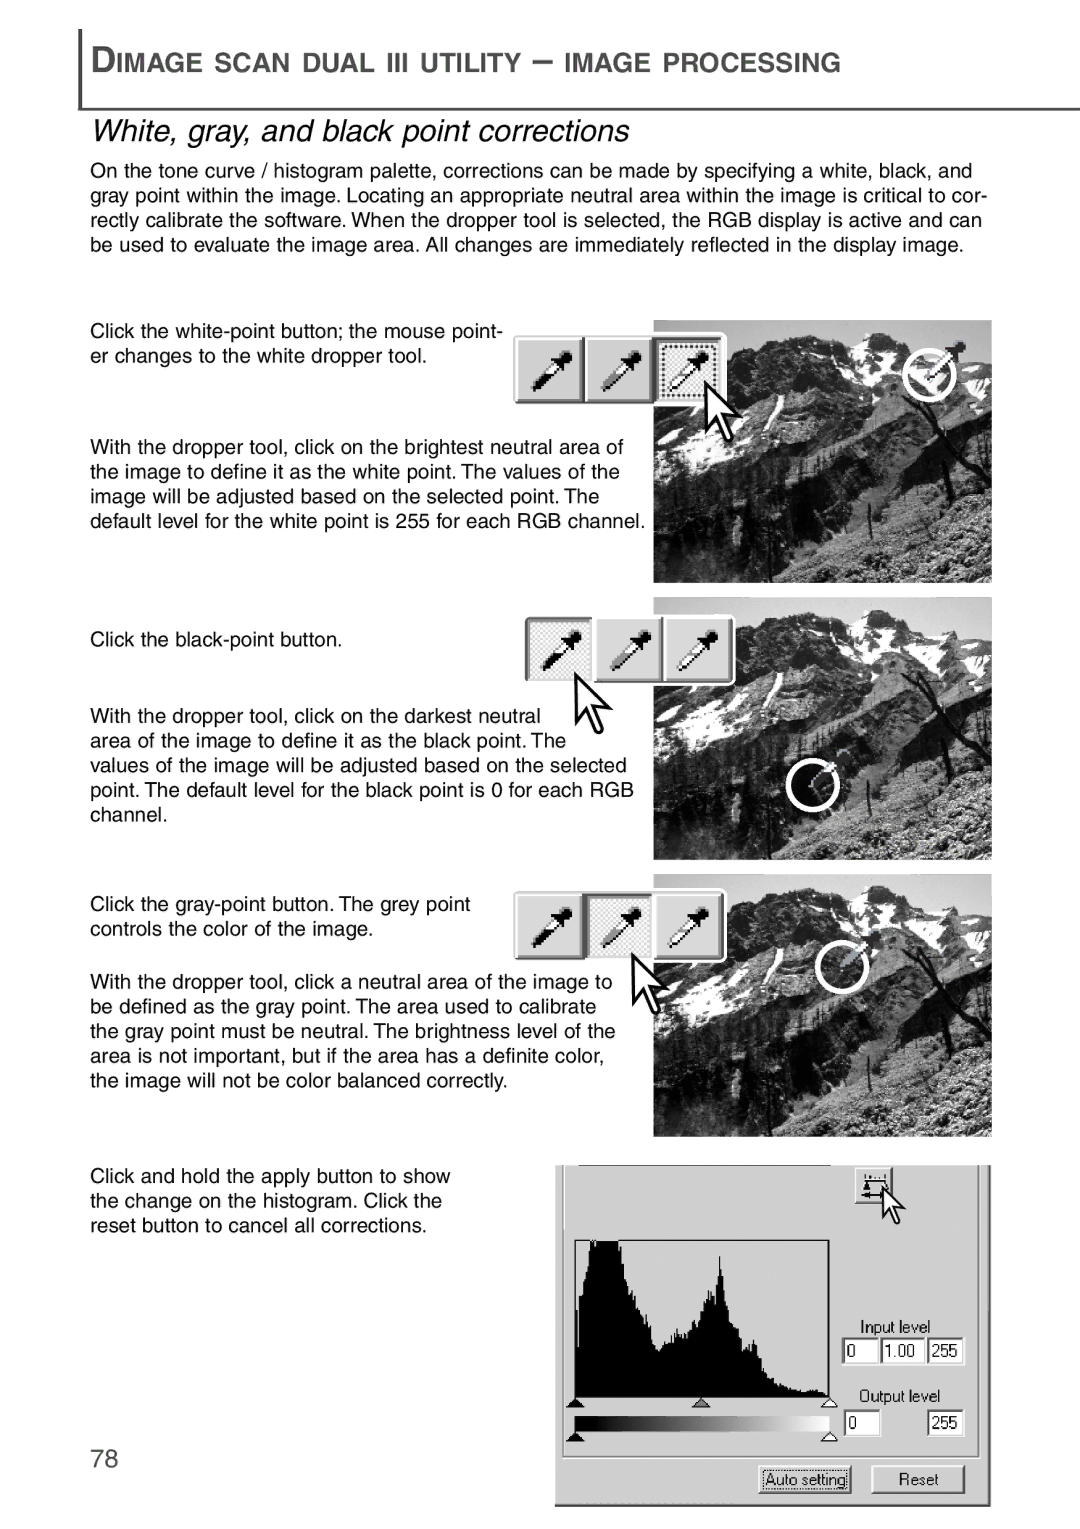
Click and hold the apply button to show the change on the histogram. Click the reset button to cancel all corrections.
78