7. Assembly
Oblique Incident Illumination
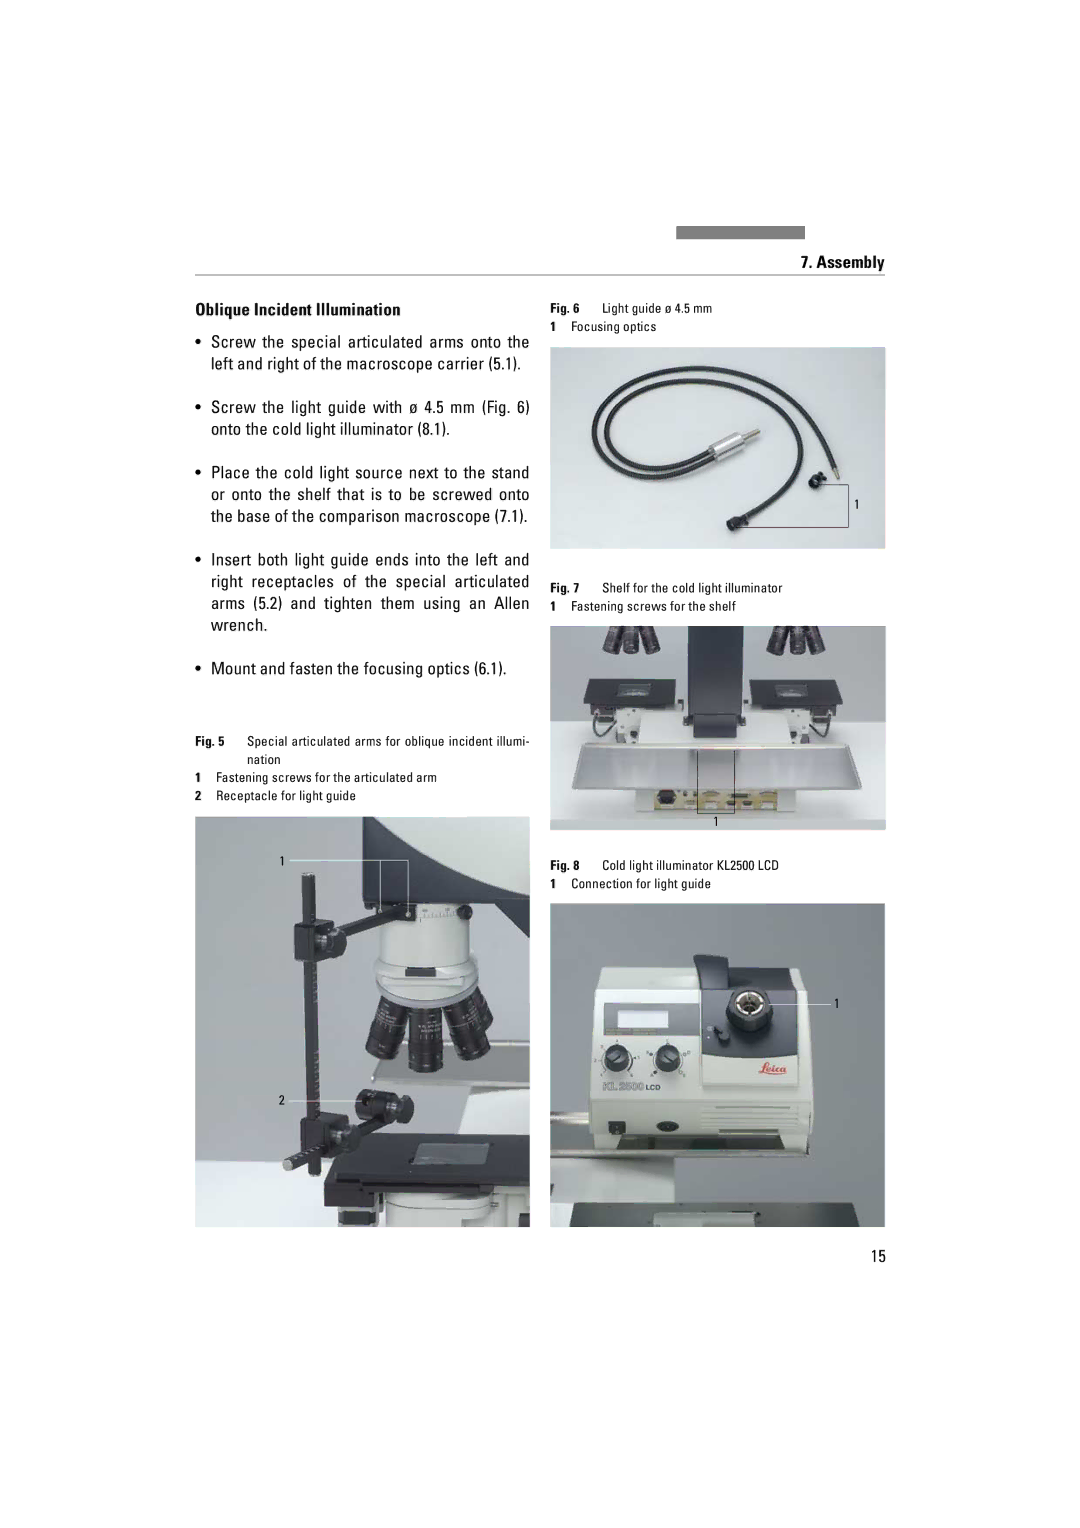
•Screw the special articulated arms onto the left and right of the macroscope carrier (5.1).
•Screw the light guide with ø 4.5 mm (Fig. 6) onto the cold light illuminator (8.1).
•Place the cold light source next to the stand or onto the shelf that is to be screwed onto the base of the comparison macroscope (7.1).
•Insert both light guide ends into the left and right receptacles of the special articulated arms (5.2) and tighten them using an Allen wrench.
•Mount and fasten the focusing optics (6.1).
Fig. 5 Special articulated arms for oblique incident illumi- nation
1Fastening screws for the articulated arm
2Receptacle for light guide
1
2
Fig. 6 Light guide ø 4.5 mm
1Focusing optics
1
Fig. 7 Shelf for the cold light illuminator
1Fastening screws for the shelf
1
Fig. 8 Cold light illuminator KL2500 LCD
1Connection for light guide
1
15
