Controls & Connections
Volume to maximum, when setting levels.
15Clip Light – this lights when clipping is detected, which generally means unpleasantly distorted, bad sound. Try reducing the output level of the device that’s feeding your POD X3, or reducing the Tone Volume for Tone 1 or Tone 2, or the volume of Tone
1+ Tone 2 that can be adjusted from the right knob below the Home Page.
16Input 1/Guitar In – plug your guitar or bass in here. You techies will want to know this is a mono, unbalanced connection. The Inputs page is where you assign
whether this input feeds Tone 1, Tone 2 or both. See Chapter 6 for more info. | 3•5 |
|
17Phones – plug your headphones in here to avoid noise complaints from the neighbors (or the rest of your family). The volume is set by the Master Volume knob. Any time you use headphones, it important to be sure they’re not set for ridiculous volume before your slap them on your ears. Try a MasterVolume knob setting of about 10 o’clock to start, then turn up from there if you need more volume.
To give you great sound through the headphones, your POD X3 automatically switches to Studio Mode whenever headphones are connected (for more on Studio Mode, see Outputs in Chapter 6.).
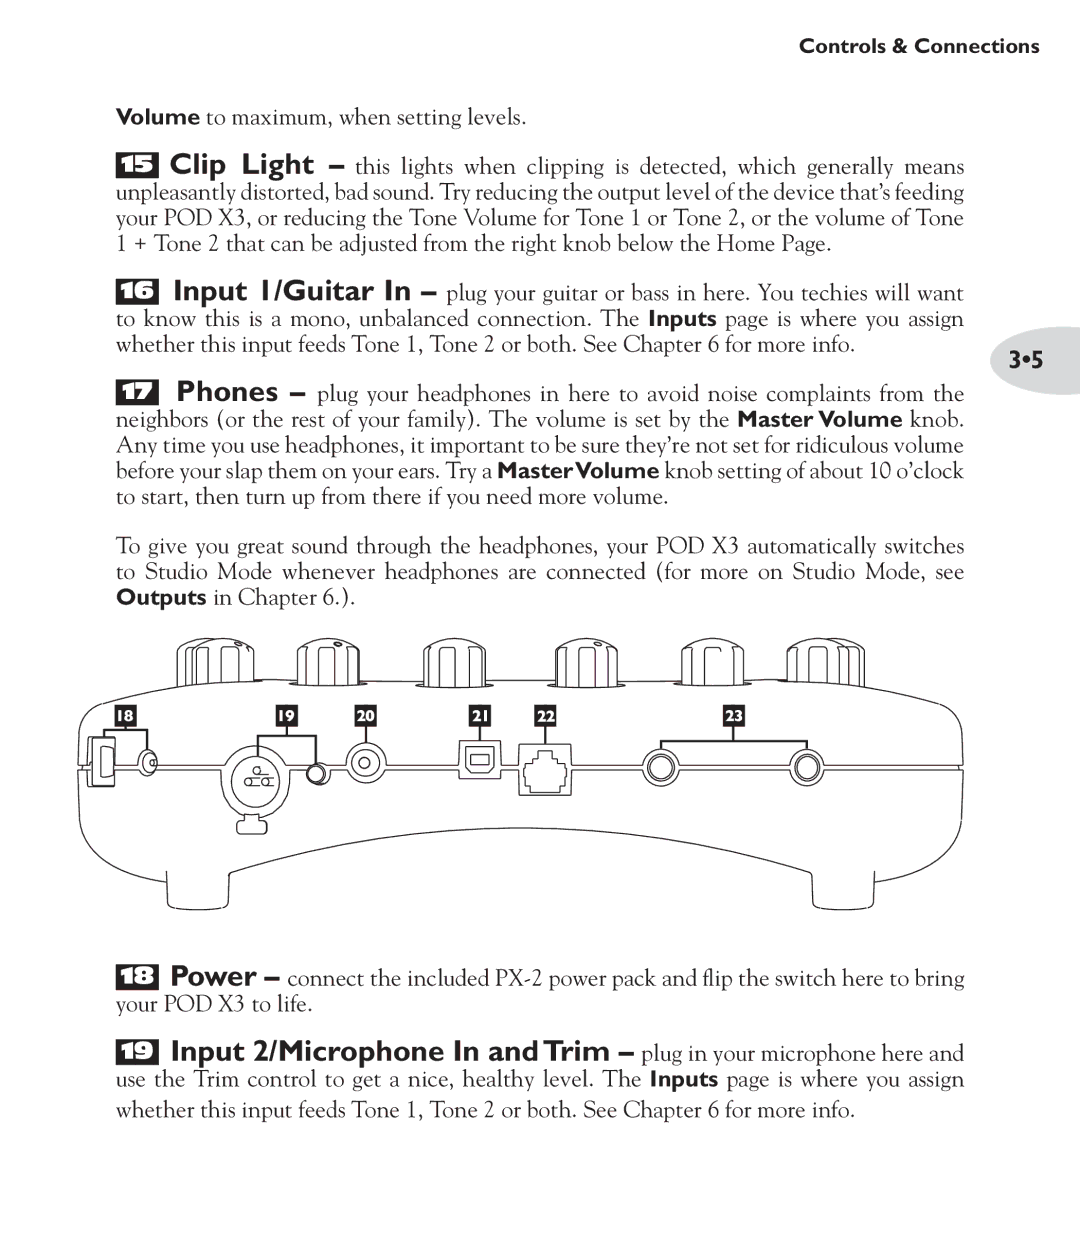
18Power – connect the included
19Input 2/Microphone In and Trim – plug in your microphone here and
use the Trim control to get a nice, healthy level. The Inputs page is where you assign whether this input feeds Tone 1, Tone 2 or both. See Chapter 6 for more info.