Controls & Connections
17a Guitar In Pad – engage this Pad to tame hotter signals at the Guitar In jack when you use guitars with active pickups or other high output sources.
18Low Cut Filter – push this button in to engage the Low Cut Filter for the Mic Input. It cuts 75Hz and below, which is useful for eliminating rumble from mic sources.
18a Mic Pad – for hot mics, engage this pad to attenuate the Mic Input by
19Phantom Power – pushing in this button activates 48V Phantom Power for
3•20 | both Channel Strip Mic Inputs. An LED will light when Phantom Power is activated. |
|
20 Clip Light – this lights when input clipping is detected at the Channel Strip Mic or Guitar Inputs. To avoid clipping, engage the Mic Pad or Guitar Pad or reduce the output level of the device that’s feeding your POD X3 Pro. Another Clip Light for Tone Volume clipping is located under the Outputs button, as described on Page 3•5, item 15.
21Signal Present LED – this LED will light when an input signal is present.
22 Power Switch – flip the switch here to bring your POD X3 Pro to life.
23Phones – plug your headphones in here to avoid noise complaints from the neighbors (or the rest of your family). The volume is set by the Master Volume knob. Any time you use headphones, it important to be sure they’re not set for ridiculous volume before your slap them on your ears. Try a MasterVolume knob setting of about 10 o’clock to start, then turn up from there if you need more volume.
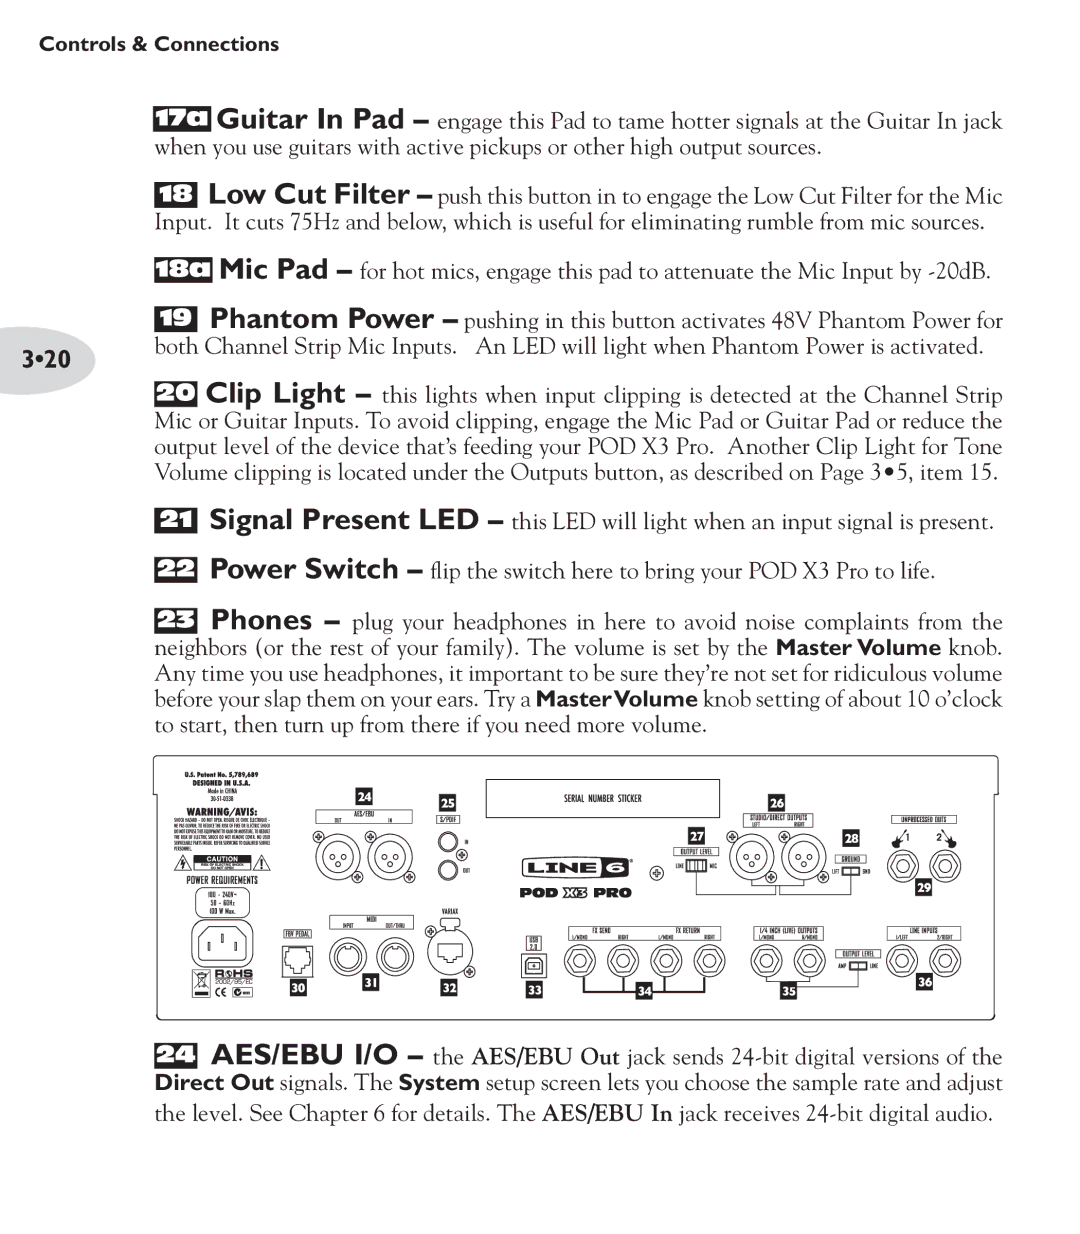
24AES/EBU I/O – the AES/EBU Out jack sends