Setup
Connecting CellPipe 20 Series products
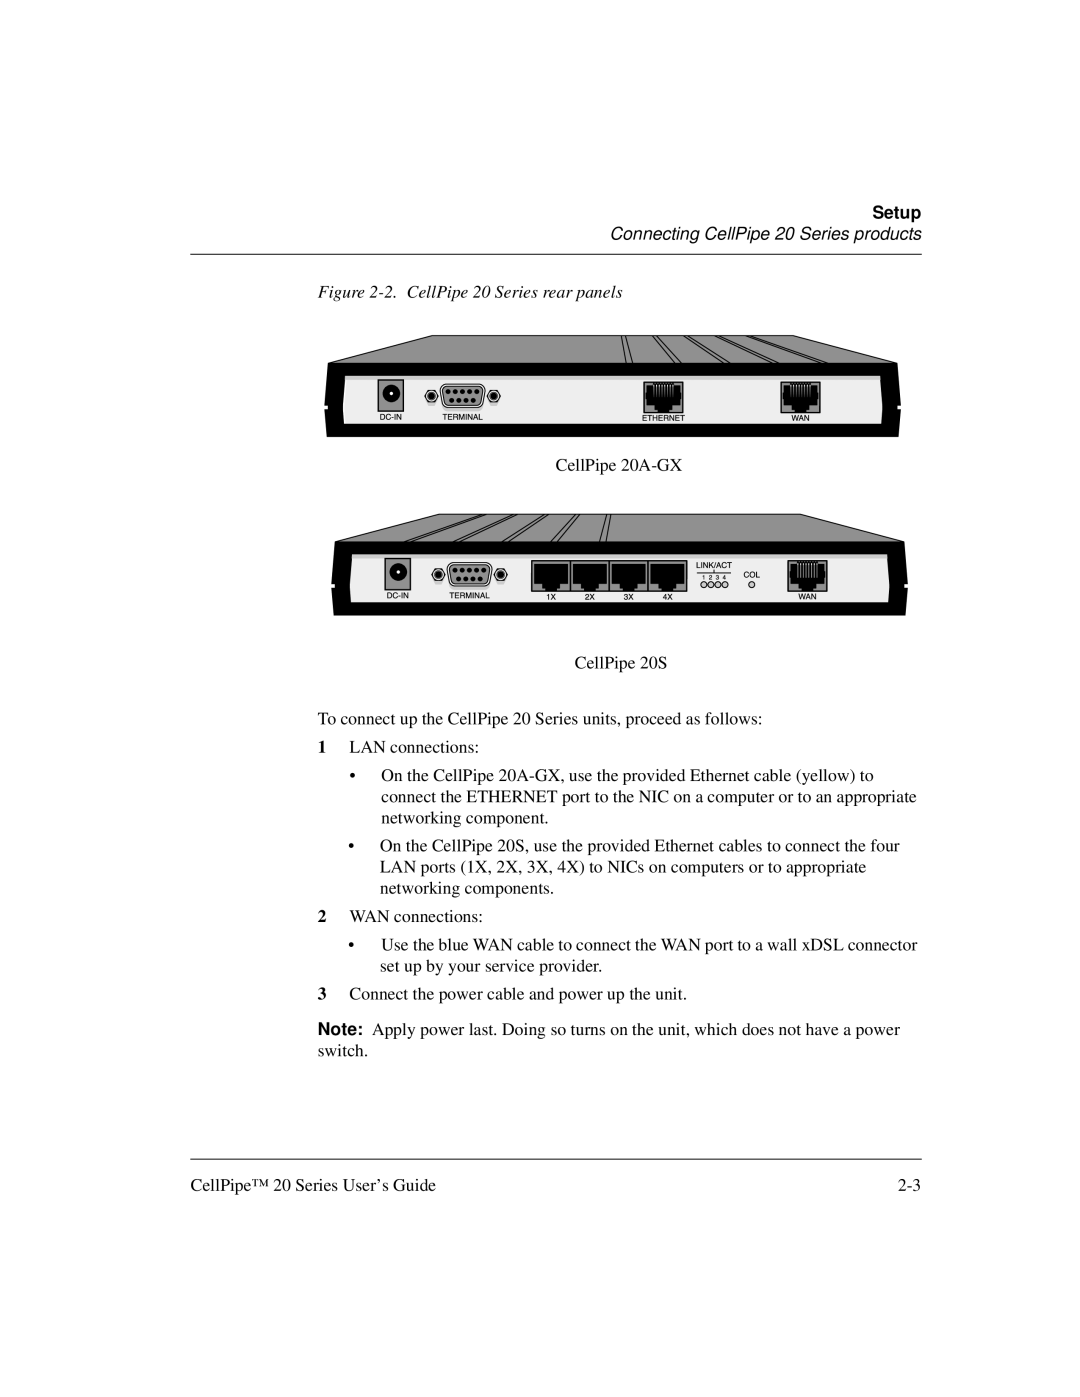
Figure 2-2. CellPipe 20 Series rear panels
CellPipe
CellPipe 20S
To connect up the CellPipe 20 Series units, proceed as follows:
1LAN connections:
•On the CellPipe
•On the CellPipe 20S, use the provided Ethernet cables to connect the four LAN ports (1X, 2X, 3X, 4X) to NICs on computers or to appropriate networking components.
2WAN connections:
•Use the blue WAN cable to connect the WAN port to a wall xDSL connector set up by your service provider.
3Connect the power cable and power up the unit.
Note: Apply power last. Doing so turns on the unit, which does not have a power switch.
CellPipe™ 20 Series User’s Guide |