3. Image Memory Input
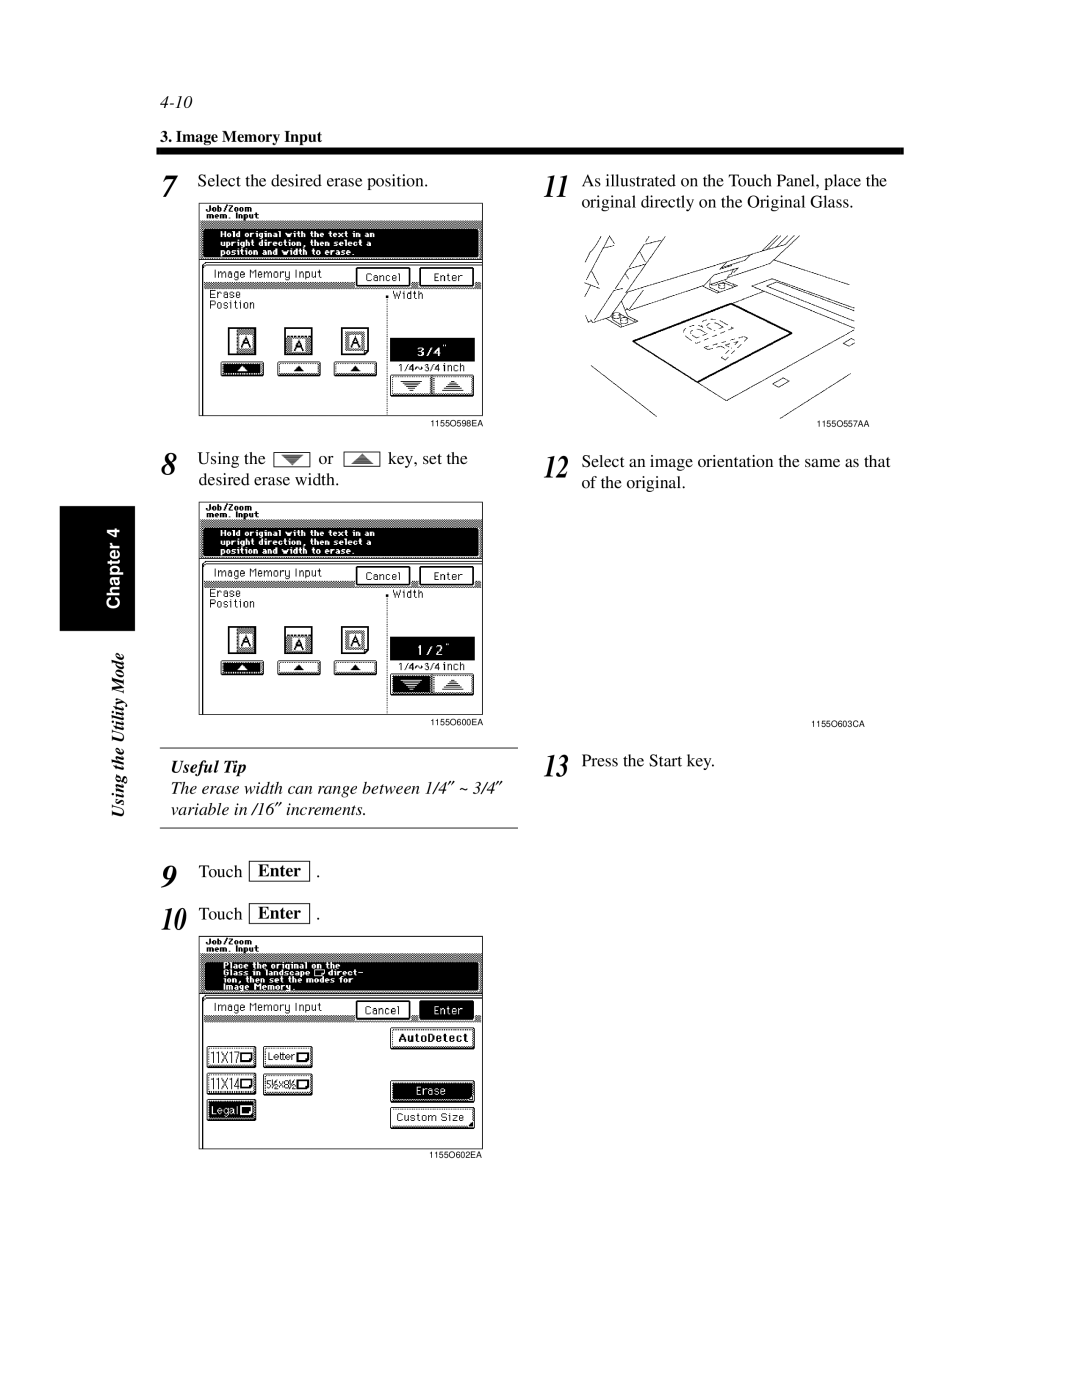
7 Select the desired erase position.
11 As illustrated on the Touch Panel, place the original directly on the Original Glass.
Using the Utility Mode Chapter 4
|
|
|
|
|
|
|
|
|
|
|
|
|
|
|
|
|
|
|
| 1155O598EA |
8 | Using the |
|
|
|
|
|
|
|
|
| or |
|
|
|
|
|
|
| key, set the | |
|
|
|
|
|
|
|
|
|
|
|
|
|
|
|
| |||||
|
|
|
|
|
|
|
|
|
|
|
|
|
| |||||||
|
|
|
|
|
|
|
|
|
|
|
|
|
|
|
| |||||
| desired erase width. |
|
|
|
|
|
|
| ||||||||||||
|
|
|
|
|
|
|
|
|
|
|
|
|
|
|
|
|
|
|
|
|
|
|
|
|
|
|
|
|
|
|
|
|
|
|
|
|
|
|
|
|
|
1155O600EA
Useful Tip
The erase width can range between 1/4″ ~ 3/4″ variable in /16″ increments.
9 Touch | Enter | . | |
|
| ||
10 Touch | Enter | . | |
|
| ||
|
|
|
|
1155O557AA
12 Select an image orientation the same as that of the original.
1155O603CA
13 Press the Start key.
1155O602EA