R-4106.A
REASSEMBL Y PROCEDURE | 3. UW·tube |
|
|
6)Insert lenses +® and @ into (®, and tlx thern with retammg rmg 1'IV(to be positioned
as ~- th.i cker). t:;:ttz:Pl!::J _
()own !
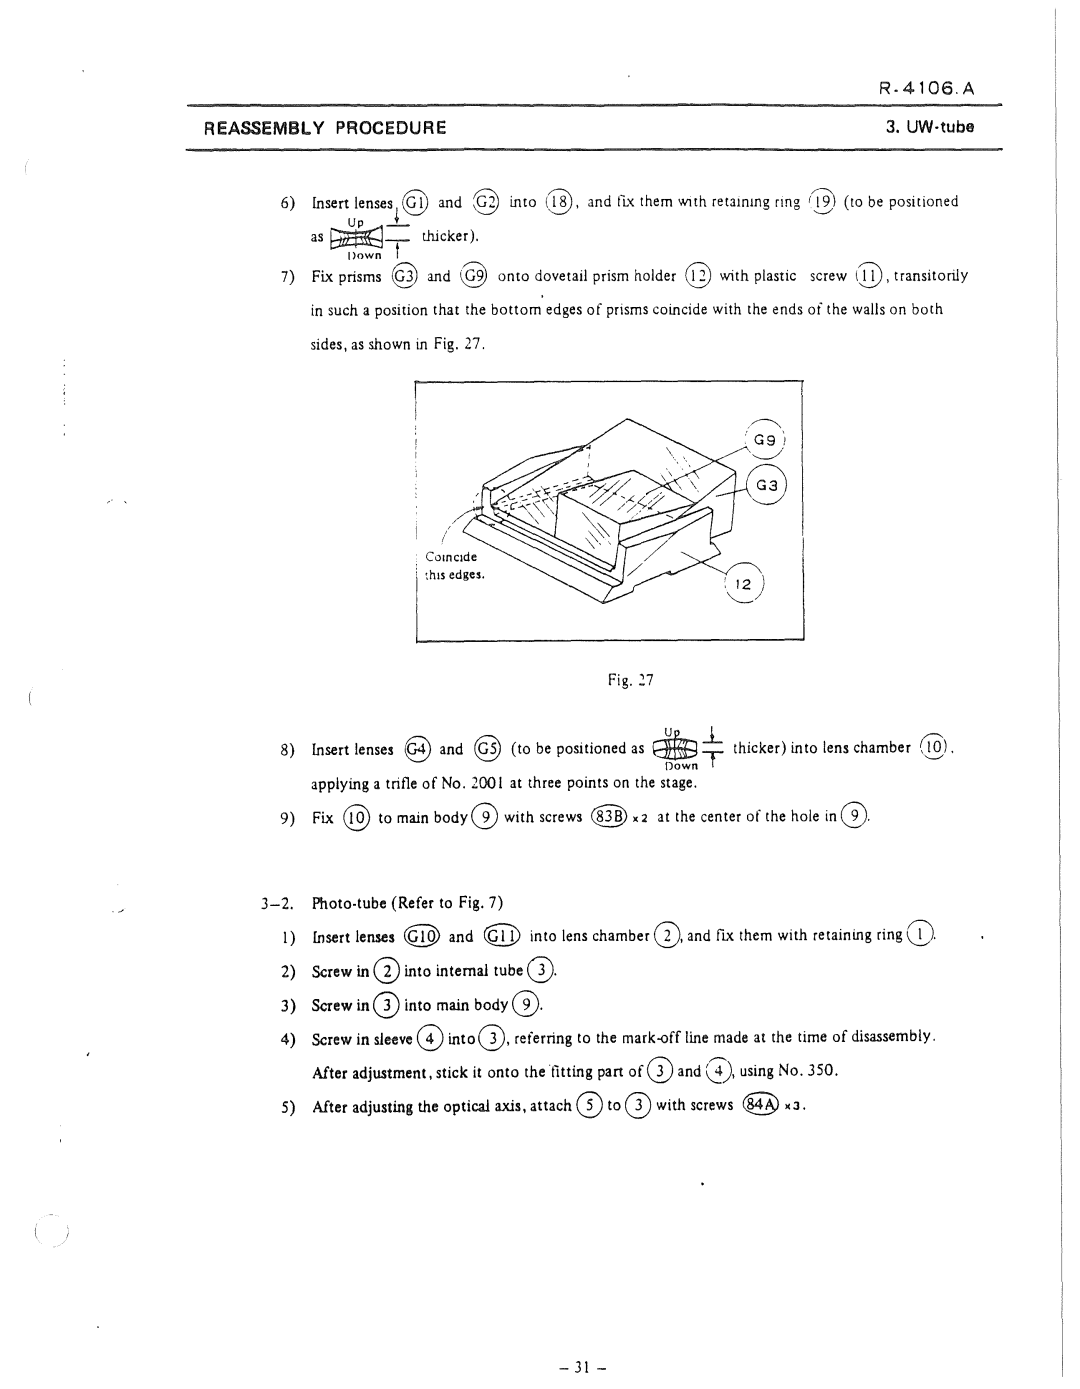
7)Fix prisrns @ and @ onto dovetail prisrn holder @ with plastic screw (IJ), transitorily in such a position that the bottorn edges of prisrns coincide with the ends of the walls on both sides, as shown in Fig. 27.
' th1s edges.
Fig. 27
8)Insert lenses @ and @ (to be positioned as 8ffiBTJ_ thicker) into tens charnber (ÍÜ).
'- '
Oown
apptying a trifle of No. 2001 at three points on the stage.
9)Fix @ to main body@ with screws e@ x 2 at the center of the hote in @.
1)Insert lenses @ and @ into tens charnber G), and fix thern with retaining ring G).
2)Screw in G) into intemal tube Q).
3)Screw in Q) into rnain body G).
4)Screw in sleeve G) into(D, referring to the
5)After adjusting the optical axis, attach (D to Q) with screws @ x J.
