R-4104A
ADJUSTMENT | 5. Centering the Tube Attaching and Stage Attaching Parts |
|
|
5.Centering the Tube Attaching and Stage Attaching Parts
To perform the centering, use the three to ois, as foilows:
|
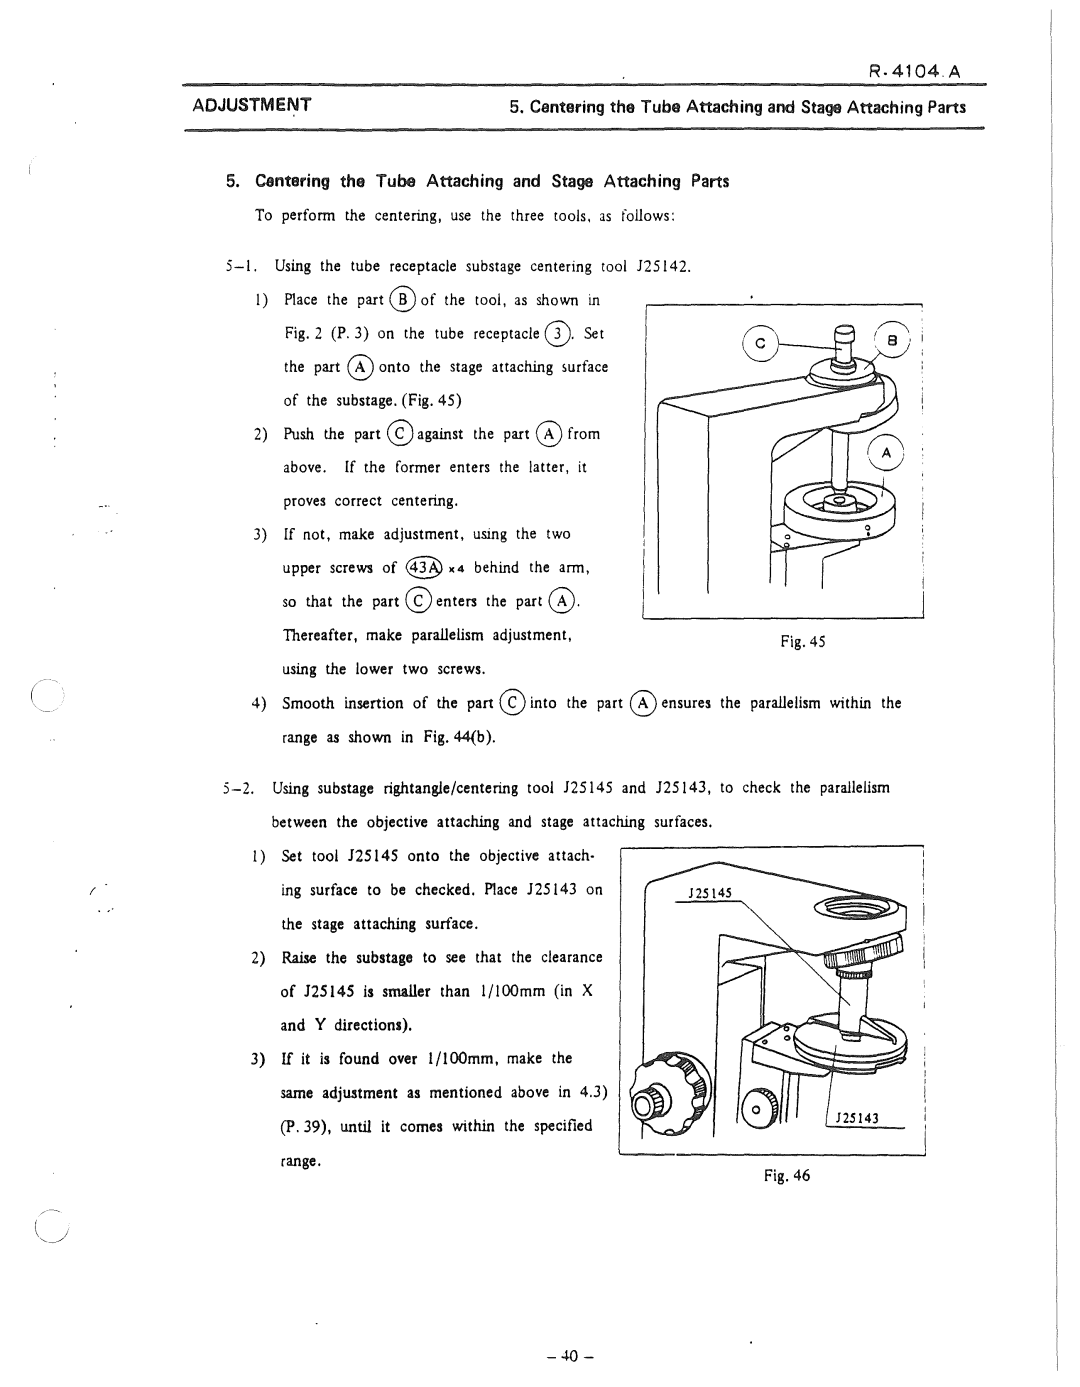
| Fig. 2 (P. 3) on the tube receptacle 0·Set |
| ||
|
| the part @ onto the stage attaching mrface |
| ||
|
| of the substage. (Fig. 45) |
| ||
| 2) | Push the part @) against the part @ from |
| ||
|
| above. If the former enters the latter, it |
| ||
|
| proves correct centering. |
| ||
| 3) If not, make adjustment, using the two |
| |||
|
| upper screws of ~ •4 behind the arm, |
| ||
|
| so that the part@ enters the part @. |
| ||
|
|
|
|
| |
|
| Thereafter, make parallelism adjustment, | Fig. 45 | ||
|
|
|
|
| |
|
| using the lower two screws. |
| ||
( | 4) | Smooth insertion of the part @ into the part @ ensures the parailelism within the | |||
| |||||
|
| range as shown in Fig. 44(b ). |
| ||
|
| ||||
|
| between the objective attaching and stage attaching surfaces. |
| ||
| 1) Set tool 125145 onto the objective attach· |
| |||
| ( | ing | surface to be checked. Place 125143 on |
| |
|
| the | stage attaching surface. |
| |
| 2) | Raise the substage to see that the clearance |
| ||
|
| of 125145 is smaller than 1/1 OOmm (in X |
| ||
|
| and | Y directions). |
| |
| 3) If it is found over l/IOOmm, make the |
| |||
|
| sarne adjustment as mentioned above in 4.3) |
| ||
|
| (P. 39), until it comes within the specified |
| ||
range.
Fig. 46
- 40 -
