Before Using the Interactive Function
■Setting the Electronic Pen
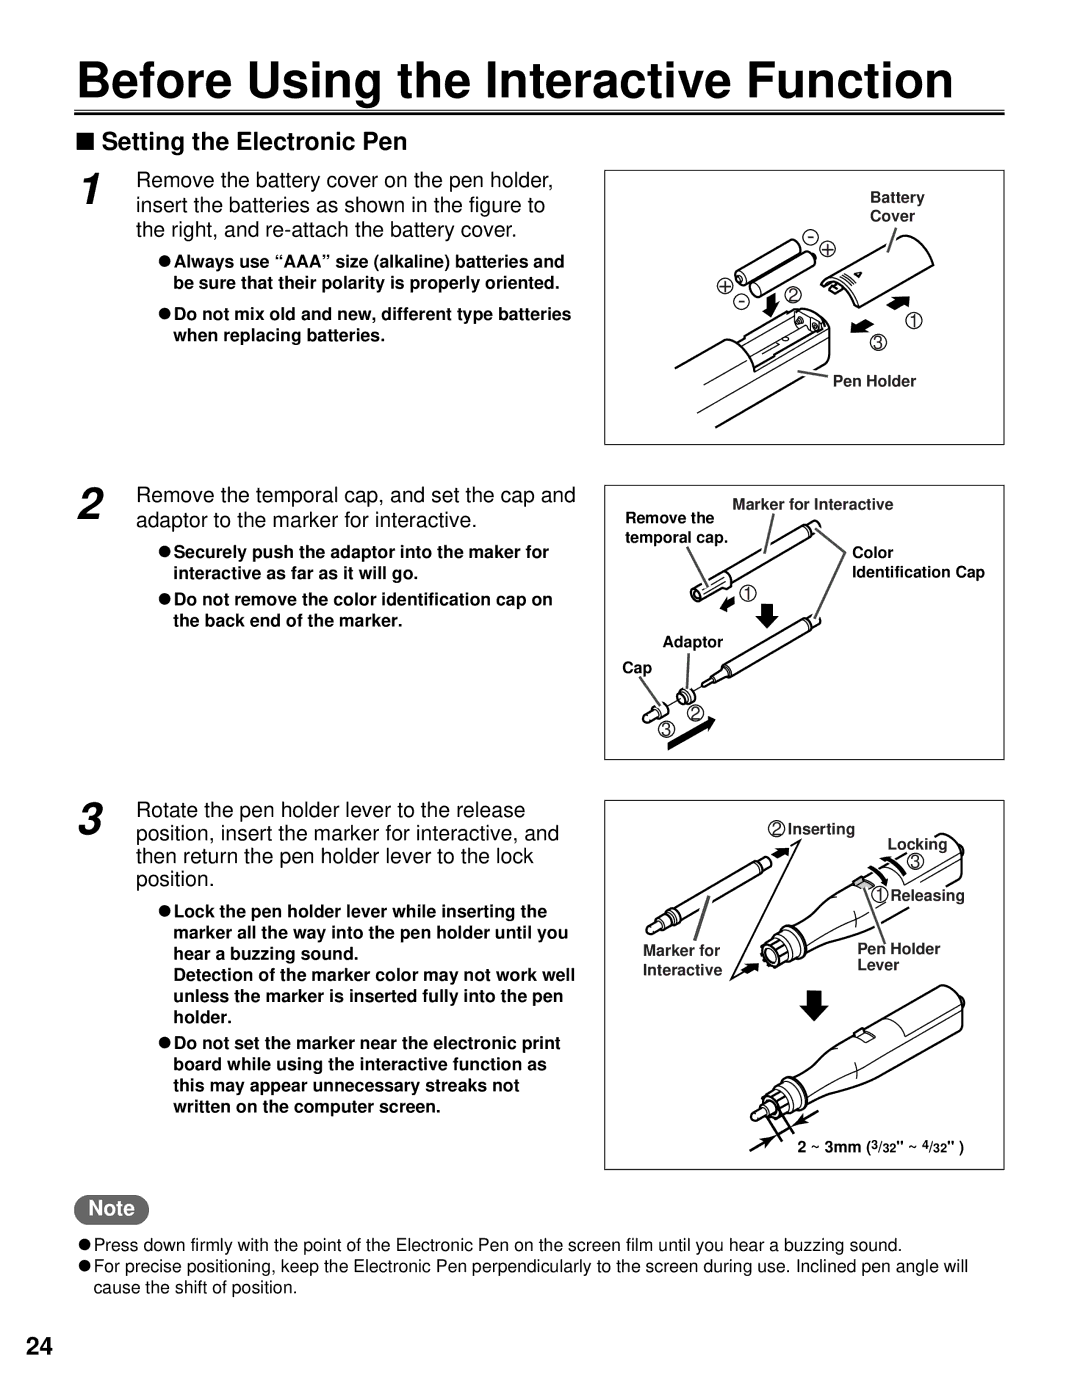
1 | Remove the battery cover on the pen holder, |
insert the batteries as shown in the figure to | |
| the right, and |
CAlways use “AAA” size (alkaline) batteries and be sure that their polarity is properly oriented.
CDo not mix old and new, different type batteries when replacing batteries.
Battery
Cover
- +
+ - ![]()
![]() 2
2
1
3
Pen Holder
2
3
Remove the temporal cap, and set the cap and adaptor to the marker for interactive.
CSecurely push the adaptor into the maker for interactive as far as it will go.
CDo not remove the color identification cap on the back end of the marker.
Rotate the pen holder lever to the release position, insert the marker for interactive, and then return the pen holder lever to the lock position.
CLock the pen holder lever while inserting the marker all the way into the pen holder until you hear a buzzing sound.
Detection of the marker color may not work well unless the marker is inserted fully into the pen holder.
CDo not set the marker near the electronic print board while using the interactive function as this may appear unnecessary streaks not written on the computer screen.
Marker for Interactive
Remove the temporal cap.
| Color |
| Identification Cap |
| 1 |
Adaptor |
|
Cap |
|
2 |
|
3 |
|
| 2 Inserting |
| Locking |
| 3 |
| 1 Releasing |
Marker for | Pen Holder |
Interactive | Lever |
| |
| 2 ~ 3mm (3/32" ~ 4/32" ) |
Note
CPress down firmly with the point of the Electronic Pen on the screen film until you hear a buzzing sound.
CFor precise positioning, keep the Electronic Pen perpendicularly to the screen during use. Inclined pen angle will cause the shift of position.
24
