Wall-mounting Kit (KX-B063)
■Wall-mounting procedure
1 Confirm that the wall is strong enough to support the weight of the print board. (Please refer to page 81.)
Caution:
The wall must be capable of supporting at least
1,005N [ 103 kgf (227 Ibs) ] for
2 Tape the wall-mounting template to the wall.
BDo not use the template included in the
BWhen taping the template to the wall, make sure it is level.
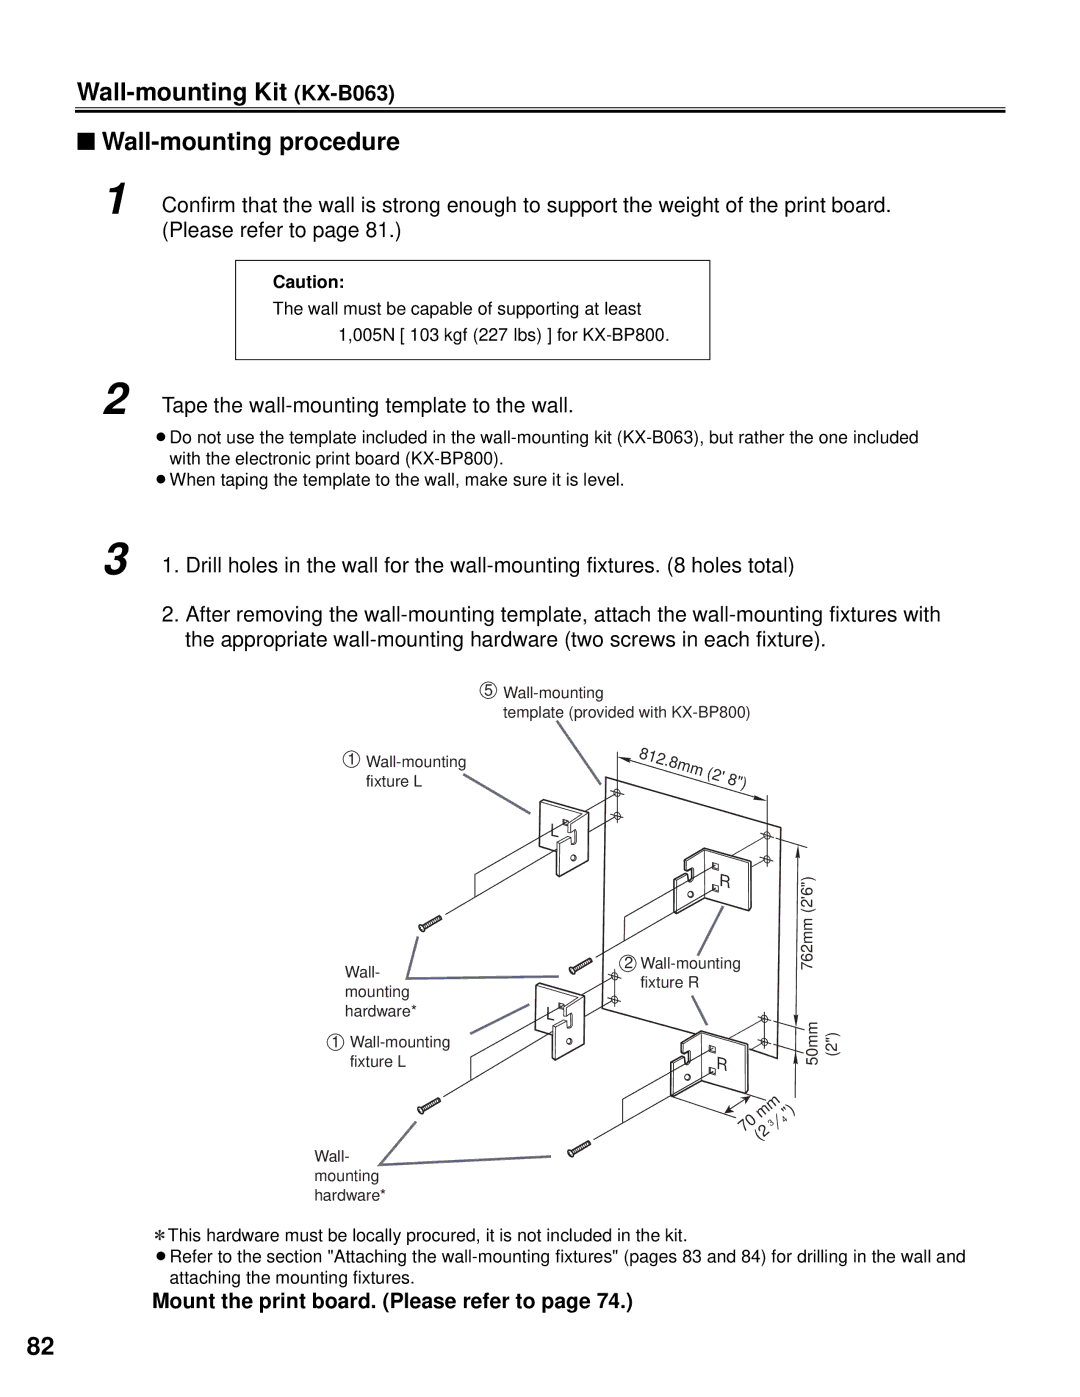
3 1. Drill holes in the wall for the
2.After removing the
5
template (provided with
1
812. |
|
|
8mm | (2' | 8") |
| ||
|
|
Wall- mounting hardware*
1
Wall- mounting hardware*
L![]()
L![]()
2 |
| 762mm(2'6") |
|
R |
|
|
|
fixture R |
|
|
|
R |
| 50mm | (2") |
|
|
| |
| mm ") |
| |
70 | 3 | 4 |
|
| (2 |
|
|
![]() This hardware must be locally procured, it is not included in the kit.
This hardware must be locally procured, it is not included in the kit.
BRefer to the section "Attaching the
Mount the print board. (Please refer to page 74.)
82