Installing Thermal Transfer Film
4
5
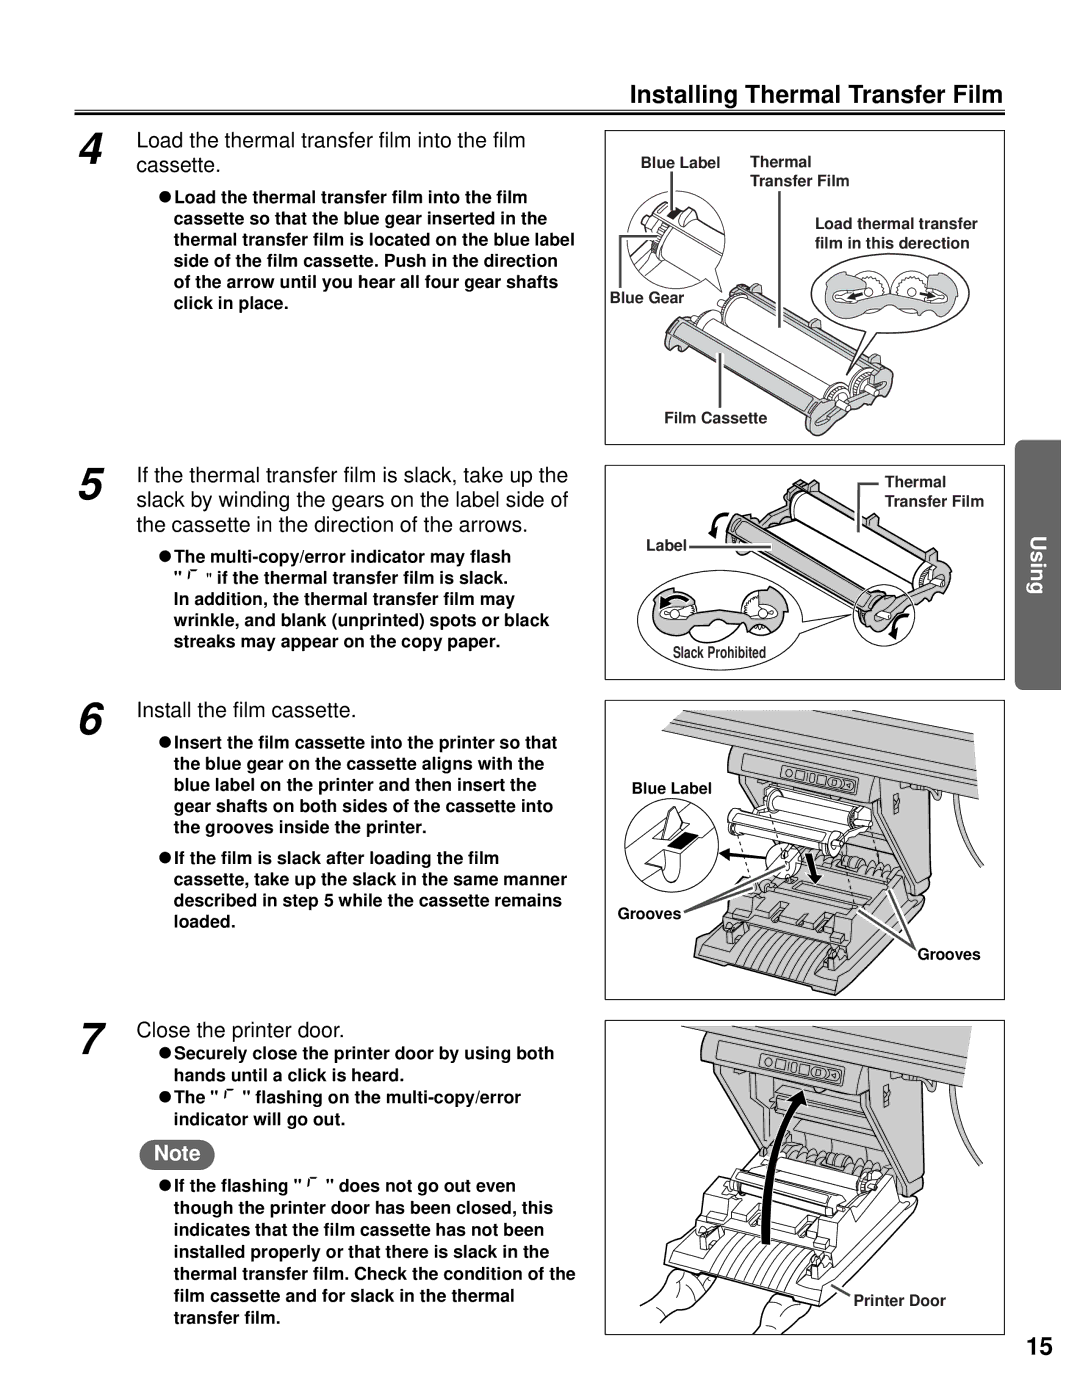
Load the thermal transfer film into the film cassette.
CLoad the thermal transfer film into the film cassette so that the blue gear inserted in the thermal transfer film is located on the blue label side of the film cassette. Push in the direction of the arrow until you hear all four gear shafts click in place.
If the thermal transfer film is slack, take up the slack by winding the gears on the label side of the cassette in the direction of the arrows.
CThe
"![]() " if the thermal transfer film is slack.
" if the thermal transfer film is slack.
In addition, the thermal transfer film may wrinkle, and blank (unprinted) spots or black streaks may appear on the copy paper.
Blue Label | Thermal |
| Transfer Film |
| Load thermal transfer |
| film in this derection |
Blue Gear |
|
Film Cassette | |
| Thermal |
| Transfer Film |
Label
Slack Prohibited
Using
6
7
Install the film cassette.
CInsert the film cassette into the printer so that the blue gear on the cassette aligns with the blue label on the printer and then insert the gear shafts on both sides of the cassette into the grooves inside the printer.
CIf the film is slack after loading the film cassette, take up the slack in the same manner described in step 5 while the cassette remains loaded.
Close the printer door.
CSecurely close the printer door by using both hands until a click is heard.
CThe " ![]() " flashing on the
" flashing on the
Note
CIf the flashing " ![]() " does not go out even though the printer door has been closed, this indicates that the film cassette has not been installed properly or that there is slack in the thermal transfer film. Check the condition of the film cassette and for slack in the thermal transfer film.
" does not go out even though the printer door has been closed, this indicates that the film cassette has not been installed properly or that there is slack in the thermal transfer film. Check the condition of the film cassette and for slack in the thermal transfer film.
Blue Label |
Grooves |
Grooves |
Printer Door |
15
