■Controller Number Setting
Set this switch always to 1 when using the System Controller with the
9 | 0 | 1 |
8 |
| 2 |
|
| |
7 |
| 3 |
6 | 5 | 4 |
|
CONTROLLER No.
●Switch Setting Procedures
Set the MODE DIP switch and CONTROLLER NO. switch as follows.
1.Remove the DC plug from the rear of the controller.
2.Set the MODE switches.
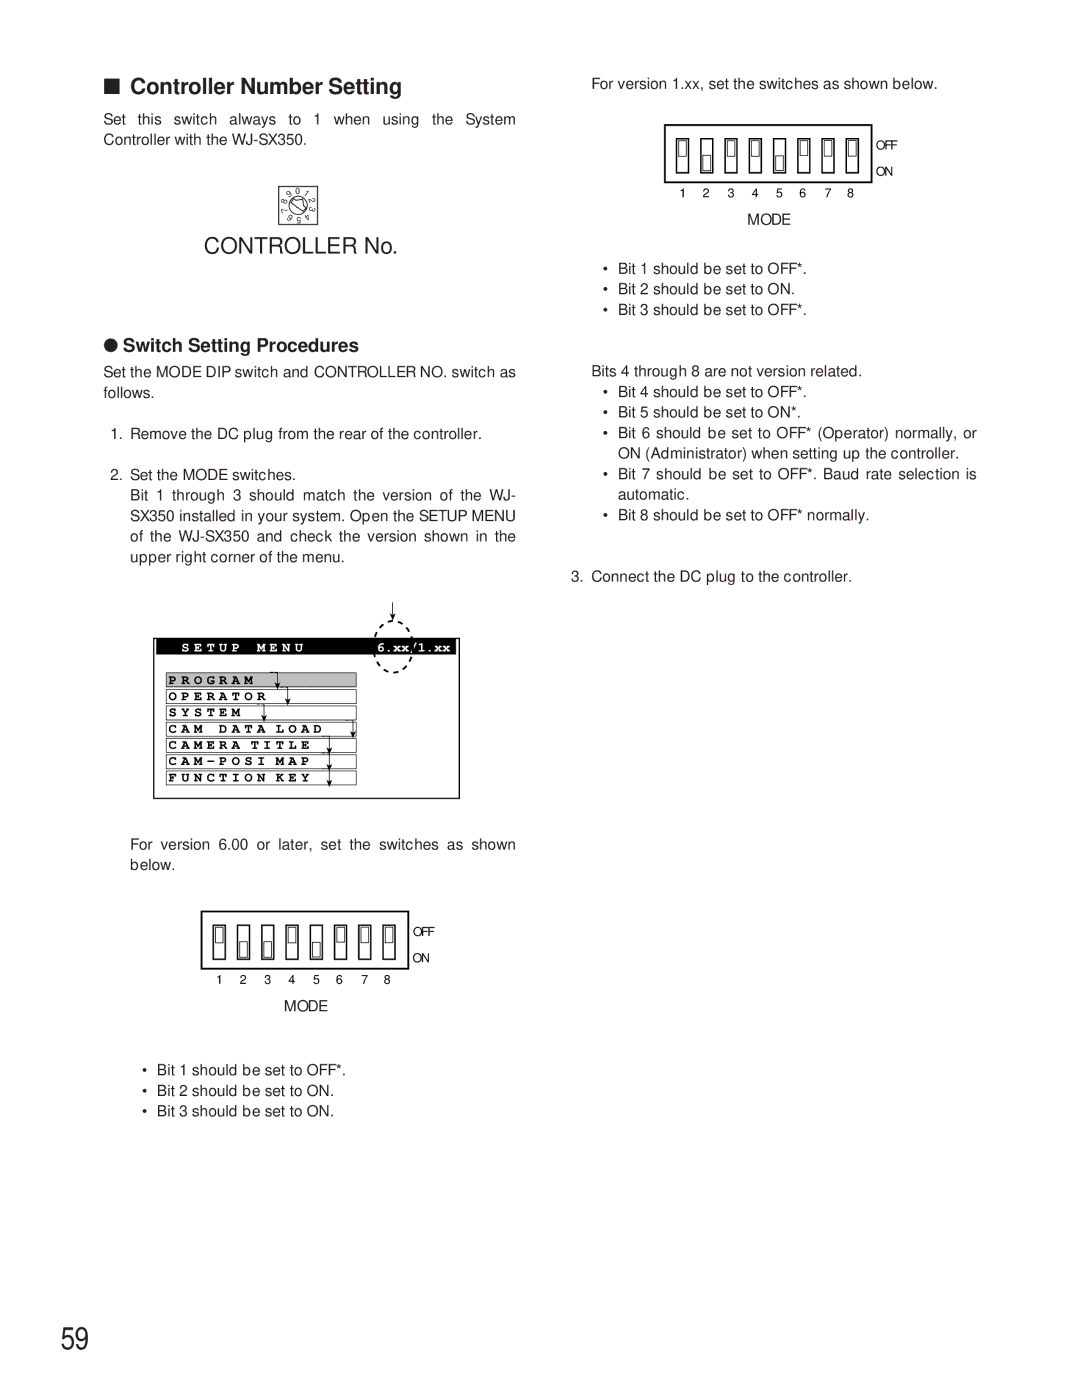
Bit 1 through 3 should match the version of the WJ- SX350 installed in your system. Open the SETUP MENU of the
S E T U P M E N U | 6.xx/1.xx |
P R O G R A M
O P E R A T O R
S Y S T E M
C A M D A T A L O A D
C A M E R A T I T L E
C A M – P O S I M A P
F U N C T I O N K E Y
For version 6.00 or later, set the switches as shown below.
OFF
ON
1 2 3 4 5 6 7 8
MODE
•Bit 1 should be set to OFF*.
•Bit 2 should be set to ON.
•Bit 3 should be set to ON.
For version 1.xx, set the switches as shown below.
OFF
ON
1 2 3 4 5 6 7 8
MODE
•Bit 1 should be set to OFF*.
•Bit 2 should be set to ON.
•Bit 3 should be set to OFF*.
Bits 4 through 8 are not version related.
•Bit 4 should be set to OFF*.
•Bit 5 should be set to ON*.
•Bit 6 should be set to OFF* (Operator) normally, or ON (Administrator) when setting up the controller.
•Bit 7 should be set to OFF*. Baud rate selection is automatic.
•Bit 8 should be set to OFF* normally.
3.Connect the DC plug to the controller.
59
