Pelco manual INSTALLING VIDEO INPUT CARDS CM9770-VCC, How to Turn On the Pelco V-Sync Signal

Models: 9770

1 66
Download 66 pages 18.23 Kb
Page 14
Image 14
INSTALLING VIDEO INPUT CARDS (CM9770-VCC)

INSTALLING VIDEO INPUT CARDS (CM9770-VCC)

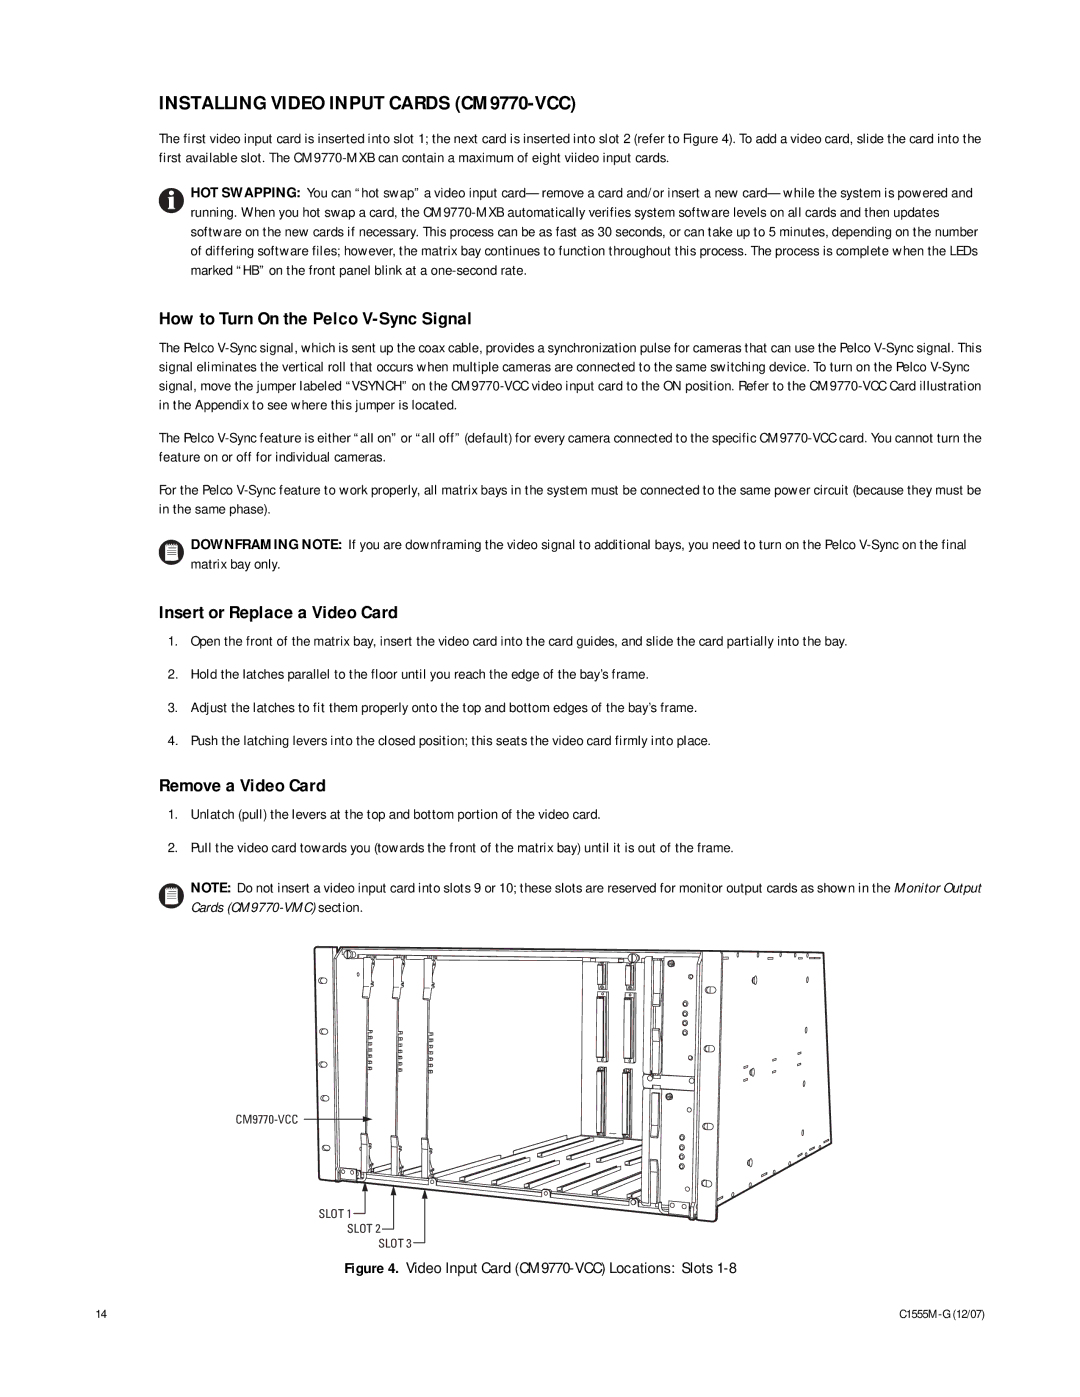
The first video input card is inserted into slot 1; the next card is inserted into slot 2 (refer to Figure 4). To add a video card, slide the card into the first available slot. The CM9770-MXB can contain a maximum of eight viideo input cards.

HOT SWAPPING: You can “hot swap” a video input card—remove a card and/or insert a new card—while the system is powered and running. When you hot swap a card, the CM9770-MXB automatically verifies system software levels on all cards and then updates software on the new cards if necessary. This process can be as fast as 30 seconds, or can take up to 5 minutes, depending on the number of differing software files; however, the matrix bay continues to function throughout this process. The process is complete when the LEDs marked “HB” on the front panel blink at a one-second rate.

How to Turn On the Pelco V-Sync Signal

The Pelco V-Sync signal, which is sent up the coax cable, provides a synchronization pulse for cameras that can use the Pelco V-Sync signal. This signal eliminates the vertical roll that occurs when multiple cameras are connected to the same switching device. To turn on the Pelco V-Sync signal, move the jumper labeled “VSYNCH” on the CM9770-VCC video input card to the ON position. Refer to the CM9770-VCC Card illustration in the Appendix to see where this jumper is located.

The Pelco V-Sync feature is either “all on” or “all off” (default) for every camera connected to the specific CM9770-VCC card. You cannot turn the feature on or off for individual cameras.

For the Pelco V-Sync feature to work properly, all matrix bays in the system must be connected to the same power circuit (because they must be in the same phase).

DOWNFRAMING NOTE: If you are downframing the video signal to additional bays, you need to turn on the Pelco V-Sync on the final matrix bay only.

Insert or Replace a Video Card

1.Open the front of the matrix bay, insert the video card into the card guides, and slide the card partially into the bay.

2.Hold the latches parallel to the floor until you reach the edge of the bay’s frame.

3.Adjust the latches to fit them properly onto the top and bottom edges of the bay’s frame.

4.Push the latching levers into the closed position; this seats the video card firmly into place.

Remove a Video Card

1.Unlatch (pull) the levers at the top and bottom portion of the video card.

2.Pull the video card towards you (towards the front of the matrix bay) until it is out of the frame.

NOTE: Do not insert a video input card into slots 9 or 10; these slots are reserved for monitor output cards as shown in the Monitor Output Cards (CM9770-VMC)section.

CM9770-VCC

SLOT 1 How to Turn On the Pelco V-Sync Signal

SLOT 2

SLOT 3

Figure 4. Video Input Card (CM9770-VCC) Locations: Slots 1-8

14

C1555M-G (12/07)

Page 14
Image 14
Pelco INSTALLING VIDEO INPUT CARDS CM9770-VCC, How to Turn On the Pelco V-Sync Signal, Insert or Replace a Video Card