Setup
Assembling the Printer (continued)
2. Install the Shock
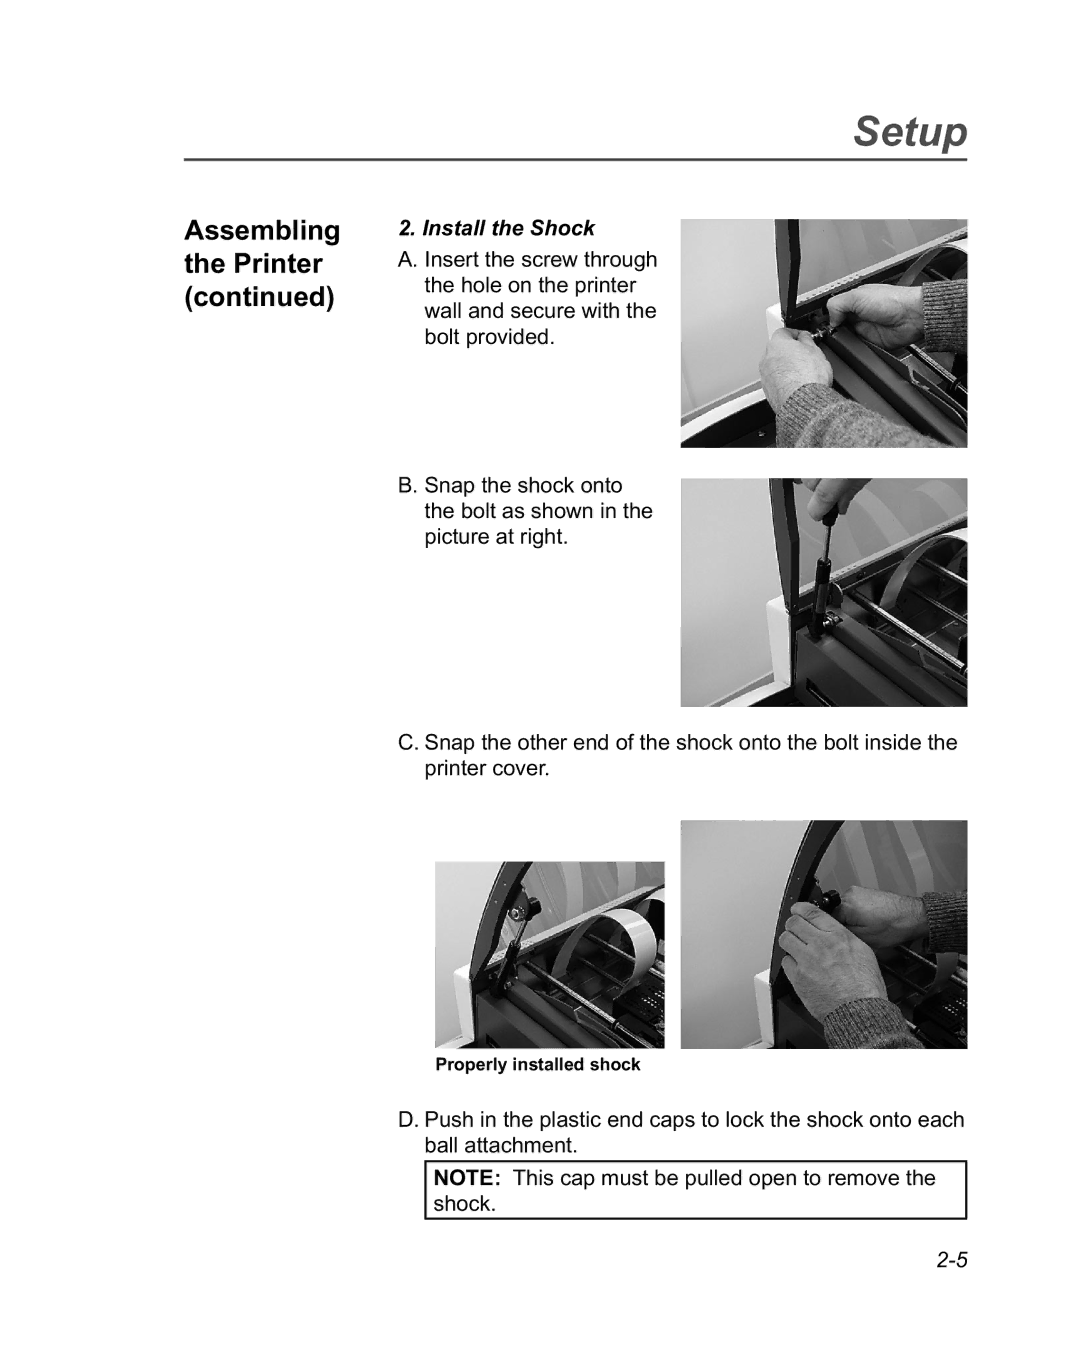
A. Insert the screw through the hole on the printer wall and secure with the bolt provided.
B. Snap the shock onto the bolt as shown in the picture at right.
C. Snap the other end of the shock onto the bolt inside the printer cover.
Properly installed shock
D. Push in the plastic end caps to lock the shock onto each ball attachment.
NOTE: This cap must be pulled open to remove the shock.
