Unit 6: Maintenance
5 |
4 |
![]() 3
3
2![]()
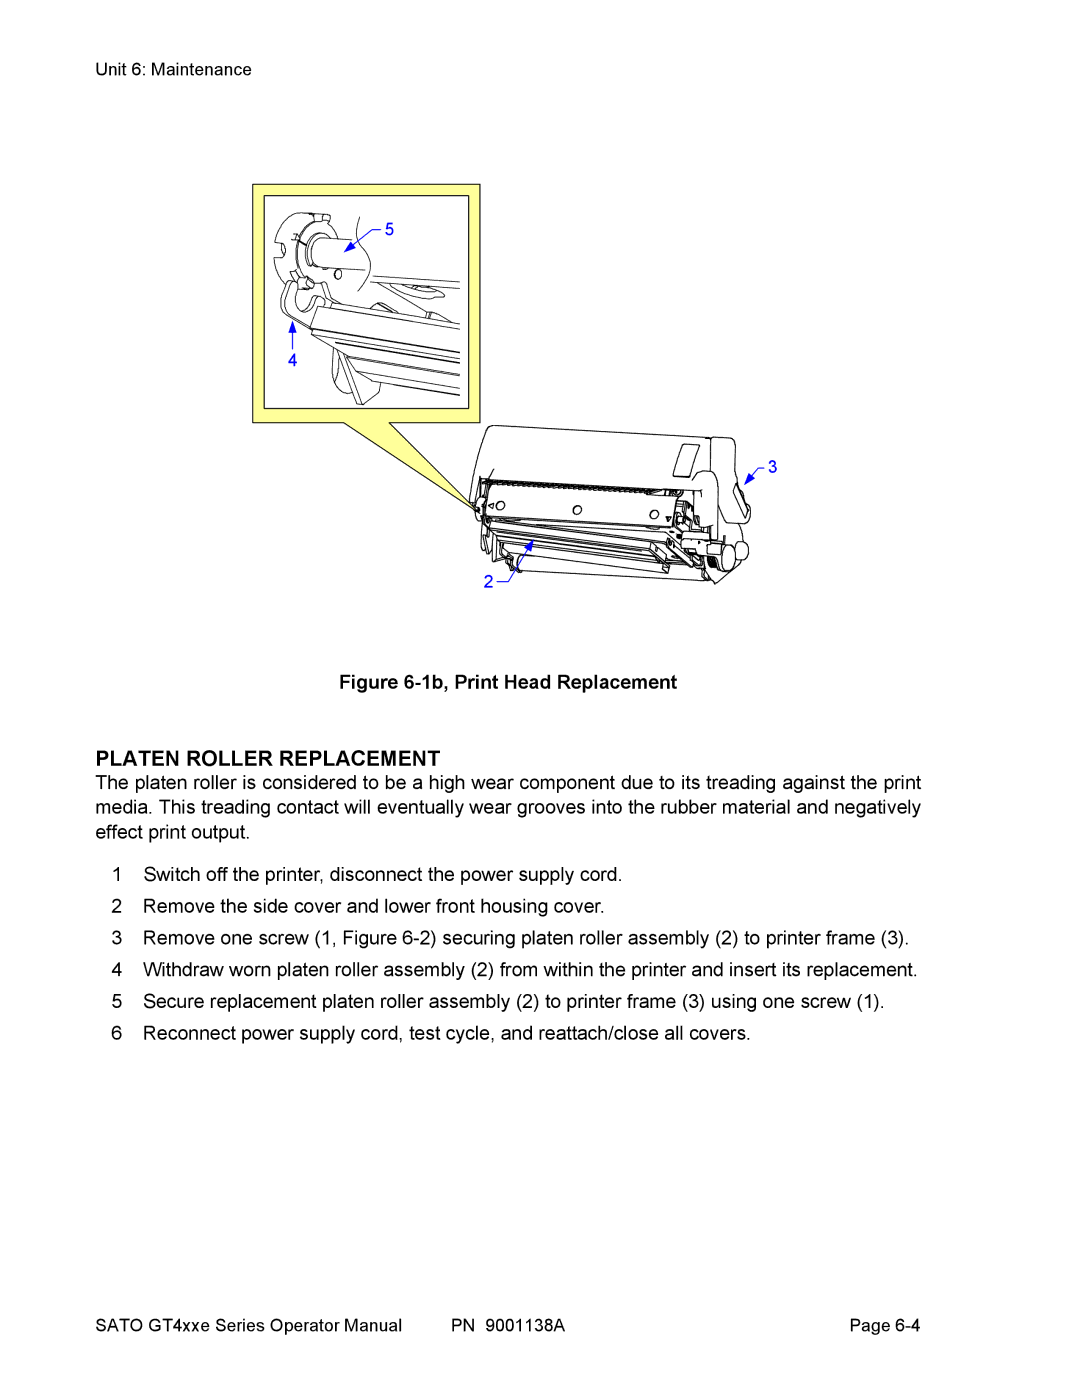
Figure 6-1b, Print Head Replacement
PLATEN ROLLER REPLACEMENT
The platen roller is considered to be a high wear component due to its treading against the print media. This treading contact will eventually wear grooves into the rubber material and negatively effect print output.
1Switch off the printer, disconnect the power supply cord.
2Remove the side cover and lower front housing cover.
3Remove one screw (1, Figure
4Withdraw worn platen roller assembly (2) from within the printer and insert its replacement.
5Secure replacement platen roller assembly (2) to printer frame (3) using one screw (1).
6Reconnect power supply cord, test cycle, and reattach/close all covers.
SATO GT4xxe Series Operator Manual | PN 9001138A | Page |