To upload Marks from the chart plotter to the PC, a serial
PC DB 9 connection | Chart plotter connection Chart plotter connection | |
| to NMEA 1 | to NMEA 2 |
Pin 2 Receive | Brown | White |
Pin 3 Transmit | Blue | Gray |
Pin 5 Signal ground | Green | Green |
|
|
|
After the Marks have been entered into the GPS Utility program and the program has been setup to output NMEA 4800 Baud data:
A. Receive points from the GPS Utility Program
1.Press “MENU” and select USER POINTS LIST, press “ENTER” .
2.Move the ShuttlePoint knob and select RECEIVE, press “ENTER” .
3.On the GPS Utility program send the Marks.
B. Transmit saved Marks to the GPS Utility program (good for backup)
1.Press “MENU” and select USER POINTS LIST, press “ENTER” .
2.Move the ShuttlePoint knob and select SEND, press “ENTER” .
3.On the GPS Utility program receive the Marks.
2.16 SELECTING NORTH UP OR COURSE UP
Press “MENU” + ADVANCED SETUP + “ENTER” + NAVIGATE + “ENTER” + MAP ORIENTATION + “ENTER” + COURSE UP + “ENTER”. Press “CLEAR” 3 times to go back to the Chart page.
2.17 CUSTOMIZING DATA WINDOWS ON CHART PAGE
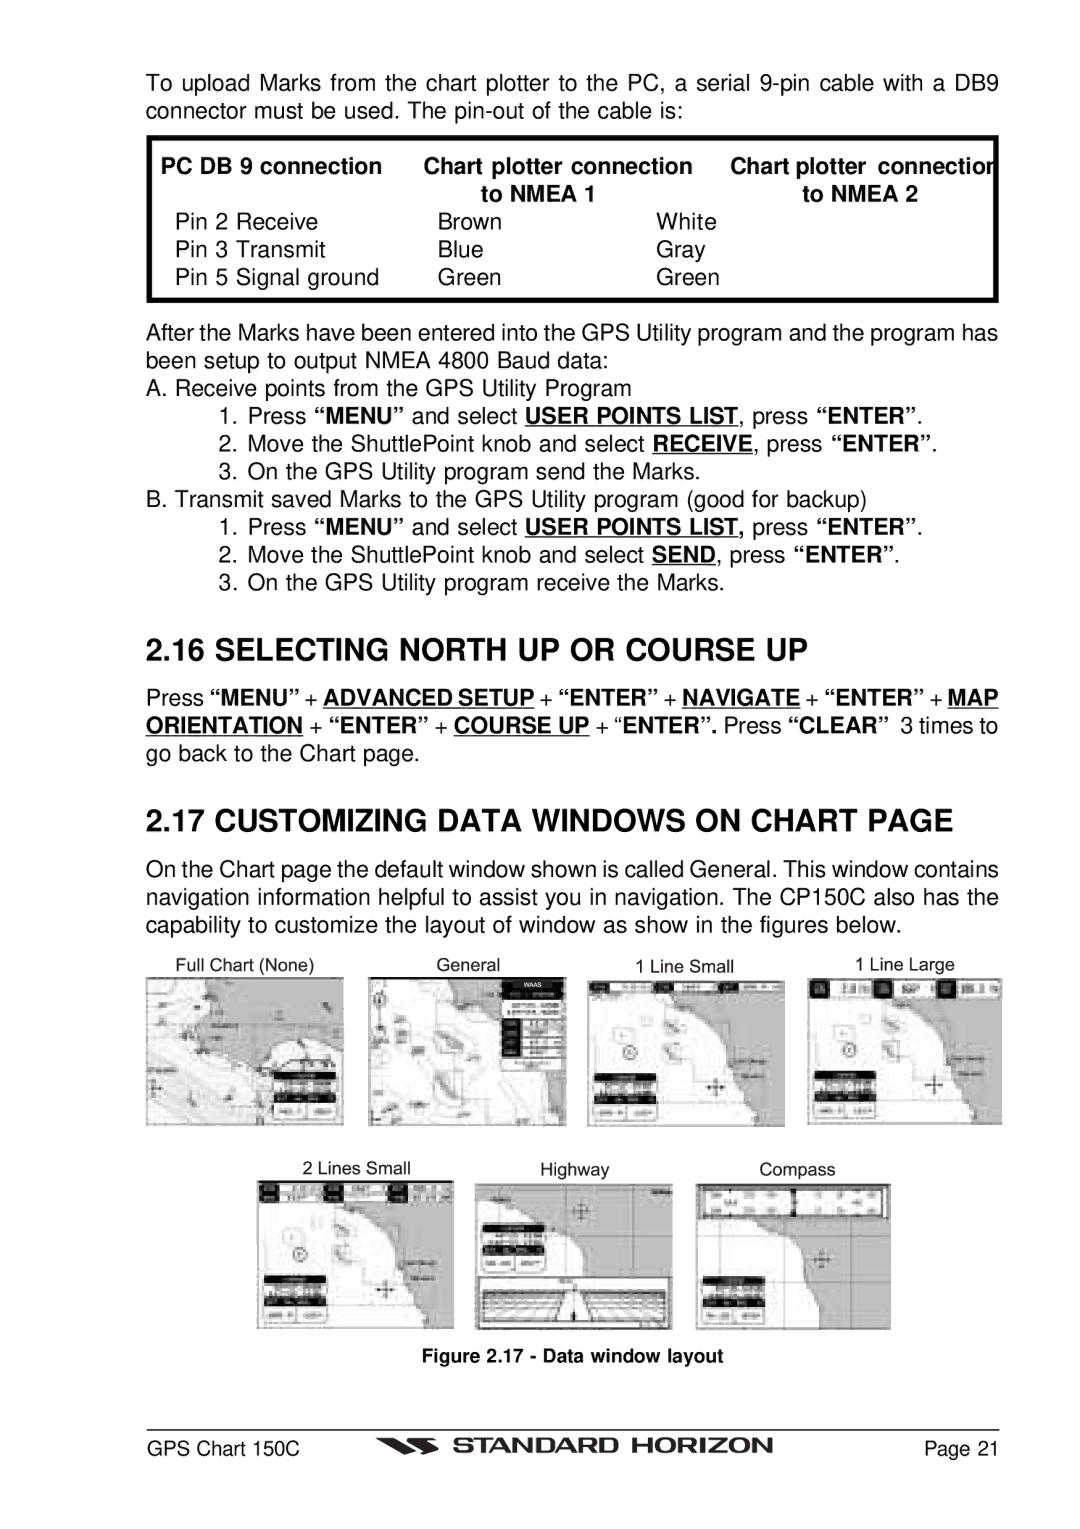
On the Chart page the default window shown is called General. This window contains navigation information helpful to assist you in navigation. The CP150C also has the capability to customize the layout of window as show in the figures below.
Figure 2.17 - Data window layout
GPS Chart 150C |
| Page 21 |
|