6.5 CHECKING GPS CONNECTIONS
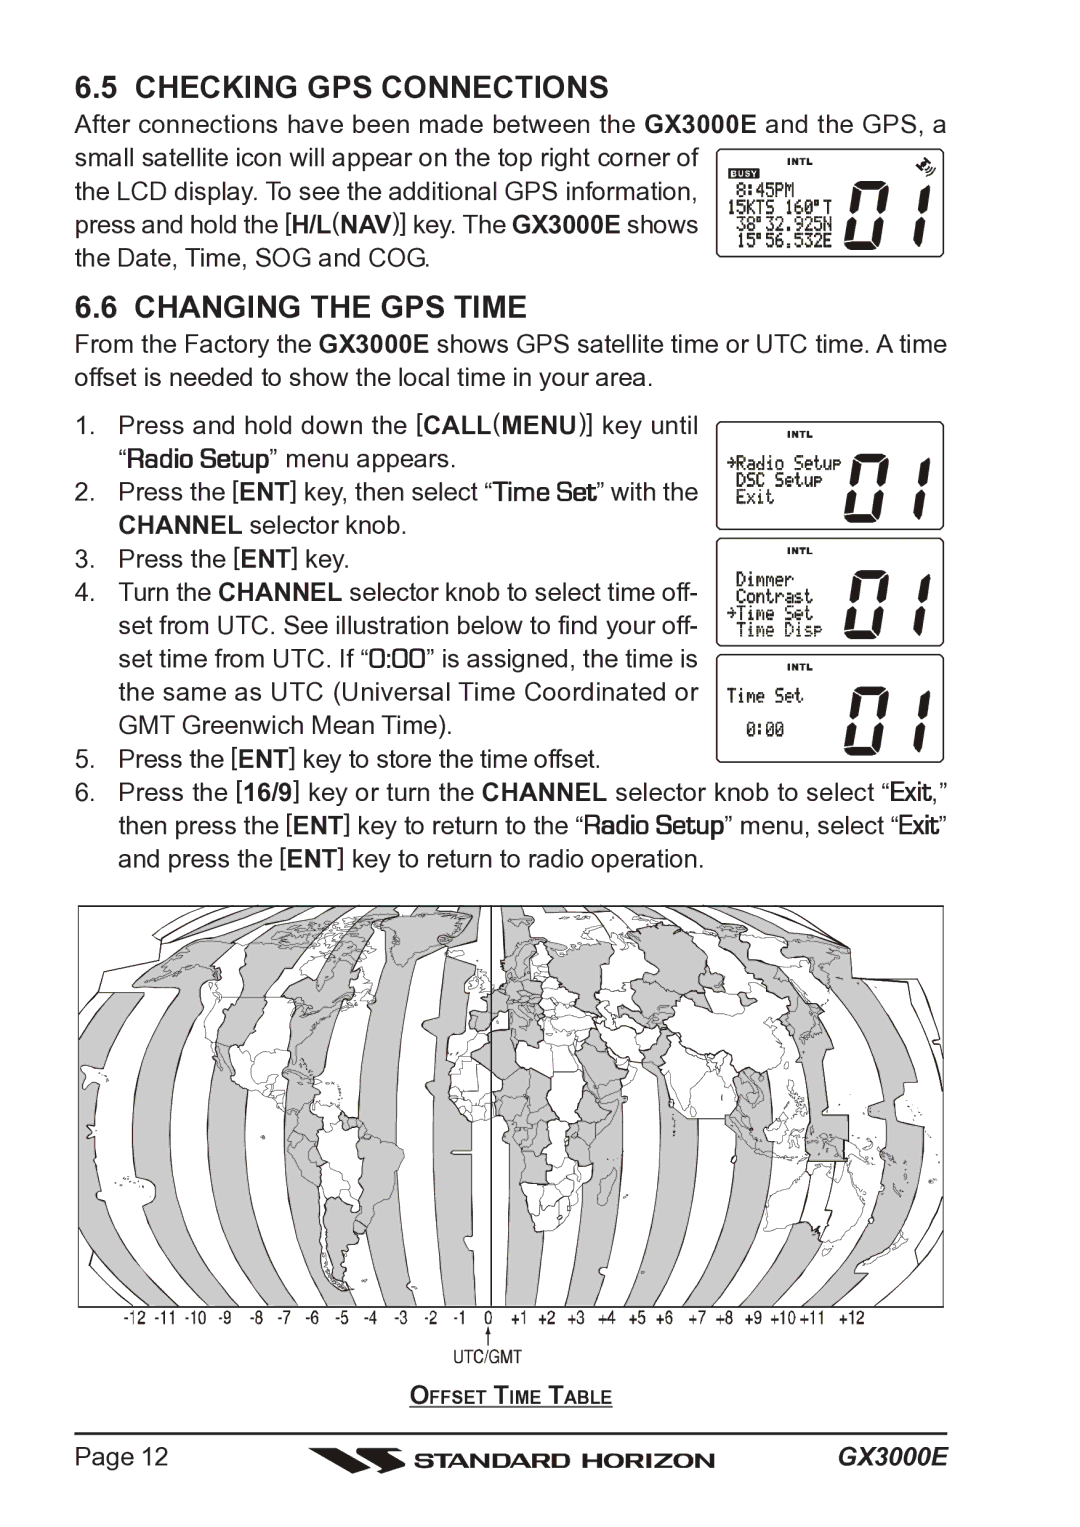
After connections have been made between the GX3000E and the GPS, a small satellite icon will appear on the top right corner of ![]()
![]()
![]()
![]() the LCD display. To see the additional GPS information,
the LCD display. To see the additional GPS information, ![]()
![]()
![]()
![]()
![]()
![]()
![]()
![]()
![]()
![]()
![]()
![]()
![]()
![]()
![]() press and hold the [H/L(NAV)] key. The GX3000E shows
press and hold the [H/L(NAV)] key. The GX3000E shows ![]()
![]()
![]()
![]()
![]()
![]()
![]()
![]()
![]()
![]()
![]()
![]()
![]()
![]()
![]()
![]()
![]()
![]()
the Date, Time, SOG and COG.
6.6 CHANGING THE GPS TIME
From the Factory the GX3000E shows GPS satellite time or UTC time. A time offset is needed to show the local time in your area.
1. Press and hold down the [CALL(MENU)] key until
“Radio Setup” menu appears. 2. Press the [ENT] key, then select “Time Set” with the
CHANNEL selector knob. 3. Press the [ENT] key.
4. Turn the CHANNEL selector knob to select time off- set from UTC. See illustration below to find your off- set time from UTC. If “0:00” is assigned, the time is
the same as UTC (Universal Time Coordinated or GMT Greenwich Mean Time).
5. Press the [ENT] key to store the time offset.
6.Press the [16/9] key or turn the CHANNEL selector knob to select “Exit,” then press the [ENT] key to return to the “Radio Setup” menu, select “Exit” and press the [ENT] key to return to radio operation.
OFFSET TIME TABLE
Page 12 |
| GX3000E |
|