8.Tighten down the 3 plastic screws. Make sure that the wiper is fitted parallel to the dosing plate (Use only plastic screws to avoid damage to the extruder or molding machine screw should the mounting screws ever come loose.)
9.Install the dosing container along with the dosing hopper on the dosing housing (pay attention to the guide pins).
10.Mount the profile clamp.
11.Mount the screw at the profile clamp.
5.6Cleaning the DT Dosing Station
1.Empty the dosing station.
2.Switch the control unit off by means of the on/off switch.
3.Disconnect from mains voltage.
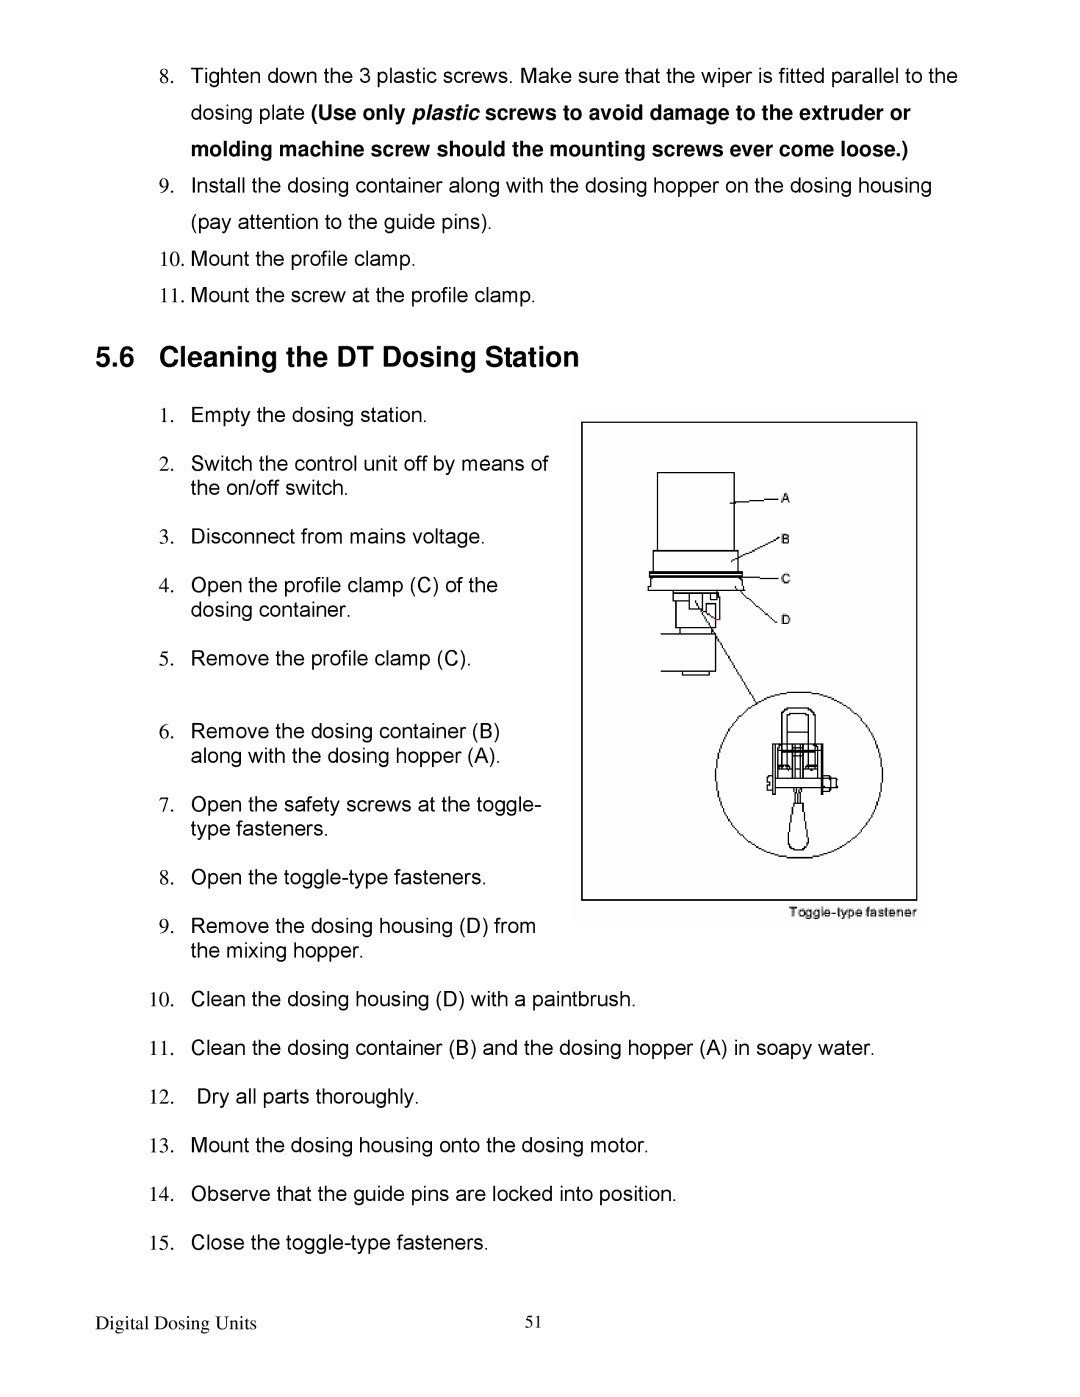
4.Open the profile clamp (C) of the dosing container.
5.Remove the profile clamp (C).
6.Remove the dosing container (B) along with the dosing hopper (A).
7.Open the safety screws at the toggle- type fasteners.
8.Open the
9.Remove the dosing housing (D) from the mixing hopper.
10.Clean the dosing housing (D) with a paintbrush.
11.Clean the dosing container (B) and the dosing hopper (A) in soapy water.
12.Dry all parts thoroughly.
13.Mount the dosing housing onto the dosing motor.
14.Observe that the guide pins are locked into position.
15.Close the
Digital Dosing Units | 51 |
