Interface Connections
Interface Connections and Powering Up
Interface Connectors
CAREFUL!
Properly secure the cable to the printer interface using the correct connectors.
Shielded I/O cables must be used on all installations to comply with regulatory requirements.
Connecting the I/O
After connecting each interface to your printer, run a print job from the Host Computer to verify proper function of the printer.
Serial/Parallel Interfaces
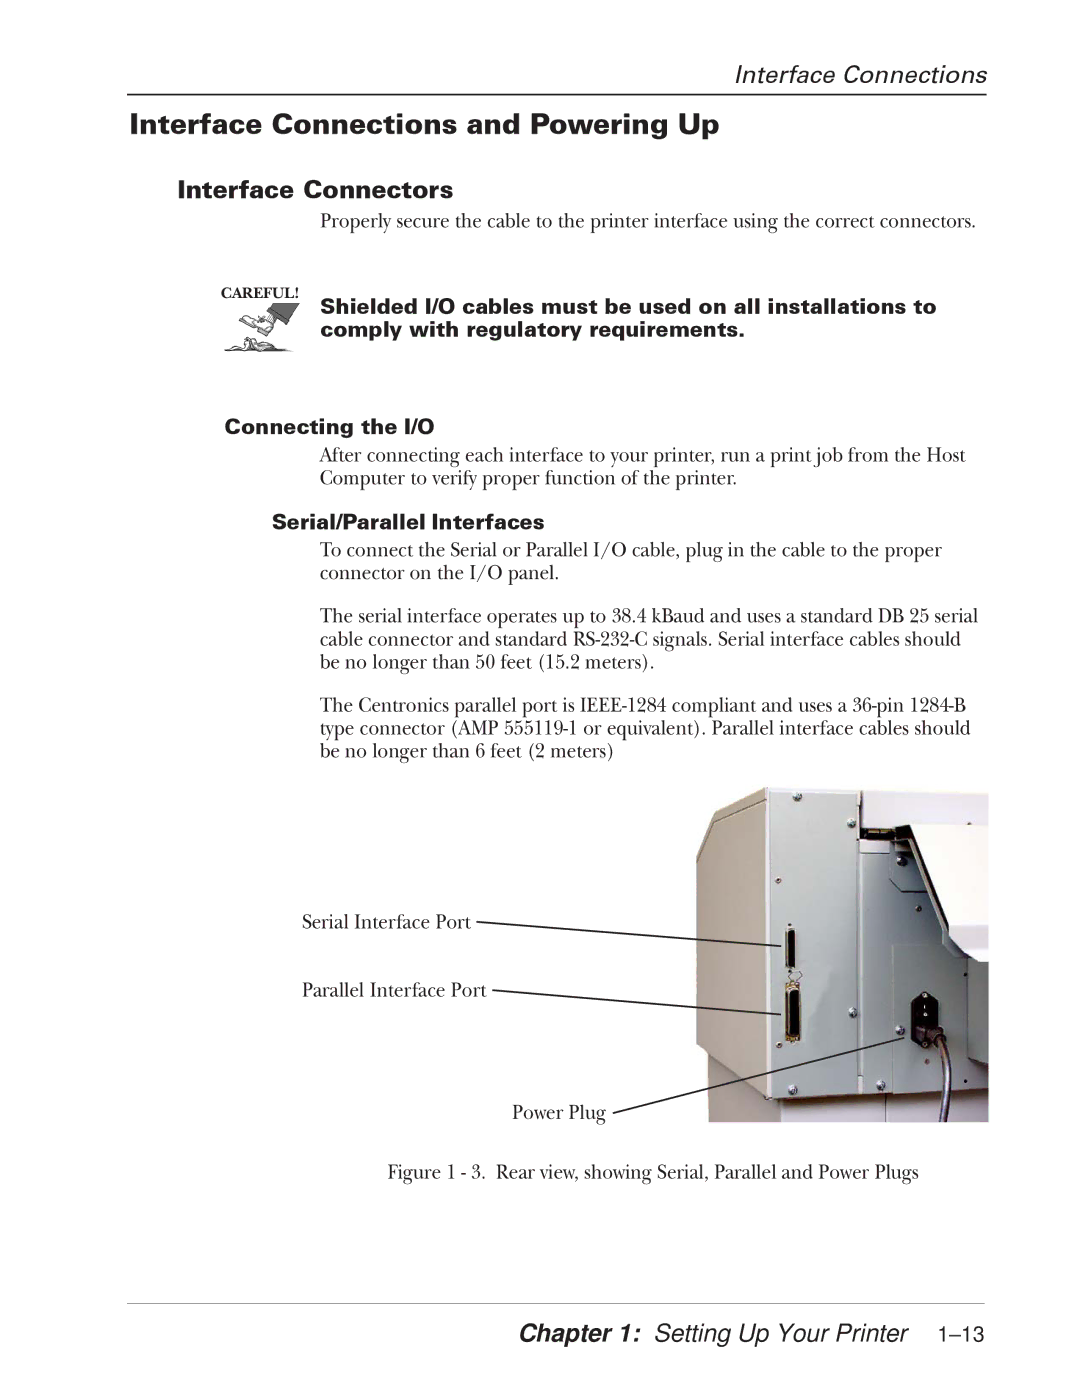
To connect the Serial or Parallel I/O cable, plug in the cable to the proper connector on the I/O panel.
The serial interface operates up to 38.4 kBaud and uses a standard DB 25 serial cable connector and standard
The Centronics parallel port is
Serial Interface Port
Parallel Interface Port
Power Plug