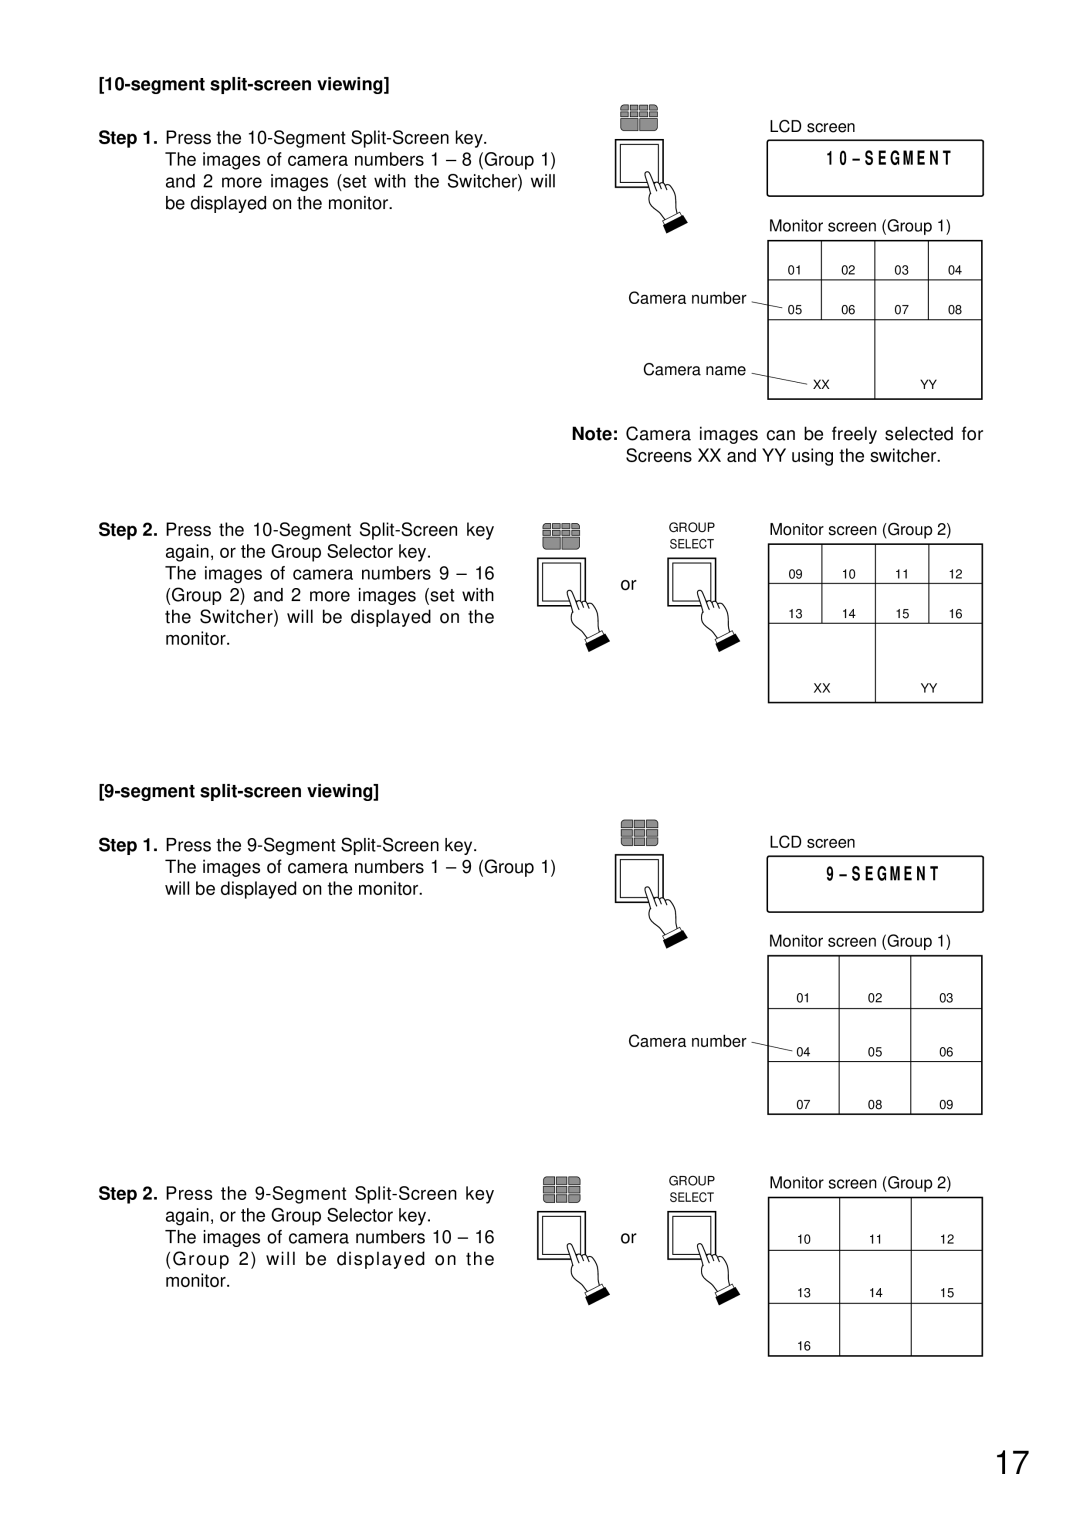
Step 1. Press the
The images of camera numbers 1 – 8 (Group 1) and 2 more images (set with the Switcher) will be displayed on the monitor.
LCD screen
1 0 – S E G M E N T
Monitor screen (Group 1)
01 | 02 | 03 | 04 |
Camera number | 06 | 07 | 08 | |
| 05 | |||
Camera name | XX |
| YY | |
|
|
| ||
Note: Camera images can be freely selected for Screens XX and YY using the switcher.
Step 2. Press the
The images of camera numbers 9 – 16 (Group 2) and 2 more images (set with the Switcher) will be displayed on the monitor.
Step 1. Press the
The images of camera numbers 1 – 9 (Group 1) will be displayed on the monitor.
GROUP
SELECT
or
Monitor screen (Group 2)
09 |
| 10 | 11 |
| 12 |
|
|
|
|
|
|
13 |
| 14 | 15 |
| 16 |
|
|
|
|
|
|
| XX |
| YY | ||
|
|
|
|
|
|
LCD screen
9 – S E G M E N T
Monitor screen (Group 1)
01 | 02 | 03 |
Camera number | 05 | 06 | |
| 04 | ||
07 | 08 | 09 | |
Step 2. Press the
The images of camera numbers 10 – 16 (Group 2) will be displayed on the monitor.
GROUP
SELECT
or
Monitor screen (Group 2)
10 | 11 | 12 |
|
|
|
13 | 14 | 15 |
|
|
|
16 |
|
|
|
|
|
17