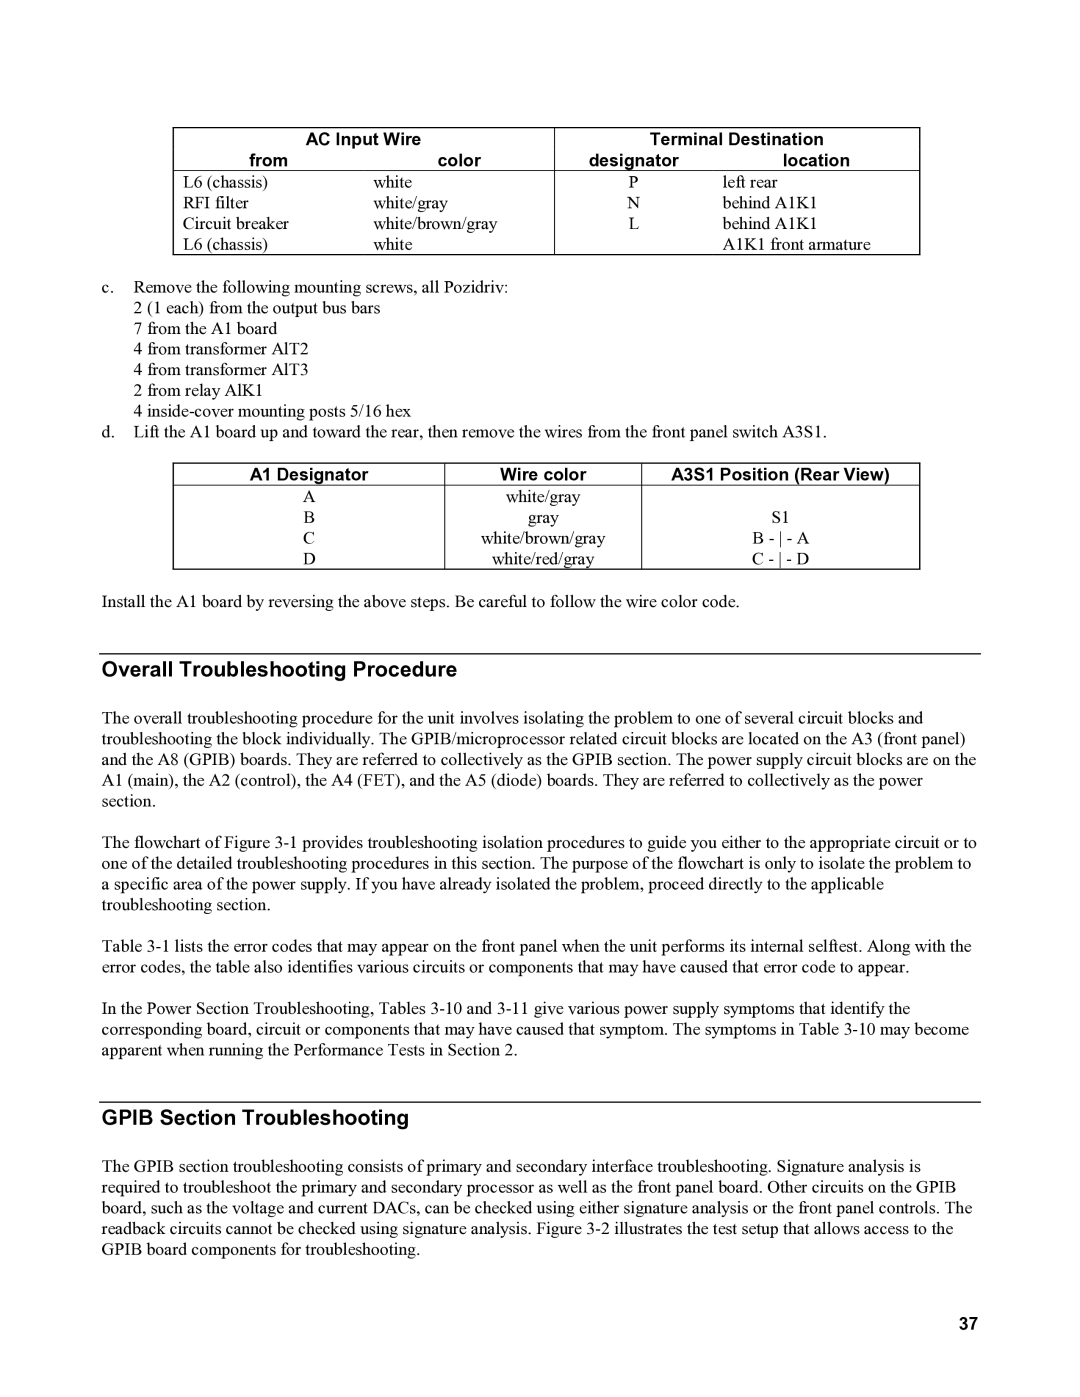
| AC Input Wire | Terminal Destination | |
from | color | designator | location |
L6 (chassis) | white | P | left rear |
RFI filter | white/gray | N | behind A1K1 |
Circuit breaker | white/brown/gray | L | behind A1K1 |
L6 (chassis) | white |
| A1K1 front armature |
c.Remove the following mounting screws, all Pozidriv:
2 (1 each) from the output bus bars
7 from the A1 board
4 from transformer AlT2
4 from transformer AlT3
2 from relay AlK1
4
d.Lift the A1 board up and toward the rear, then remove the wires from the front panel switch A3S1.
A1 Designator | Wire color | A3S1 Position (Rear View) |
A | white/gray |
|
B | gray | S1 |
C | white/brown/gray | B - - A |
D | white/red/gray | C - - D |
Install the A1 board by reversing the above steps. Be careful to follow the wire color code.
Overall Troubleshooting Procedure
The overall troubleshooting procedure for the unit involves isolating the problem to one of several circuit blocks and troubleshooting the block individually. The GPIB/microprocessor related circuit blocks are located on the A3 (front panel) and the A8 (GPIB) boards. They are referred to collectively as the GPIB section. The power supply circuit blocks are on the A1 (main), the A2 (control), the A4 (FET), and the A5 (diode) boards. They are referred to collectively as the power section.
The flowchart of Figure
Table
In the Power Section Troubleshooting, Tables
GPIB Section Troubleshooting
The GPIB section troubleshooting consists of primary and secondary interface troubleshooting. Signature analysis is required to troubleshoot the primary and secondary processor as well as the front panel board. Other circuits on the GPIB board, such as the voltage and current DACs, can be checked using either signature analysis or the front panel controls. The readback circuits cannot be checked using signature analysis. Figure
37