Replacing HDDs in MAX Servers
Also note that the LED on the degraded drive should blink to indicate that it needs to be replaced.
Once you have determined which drive needs to be replaced, you can proceed to physically removing the bad drive, and installing the replacement drive.
Step 2: Physical Removal and Replacement of the Drives
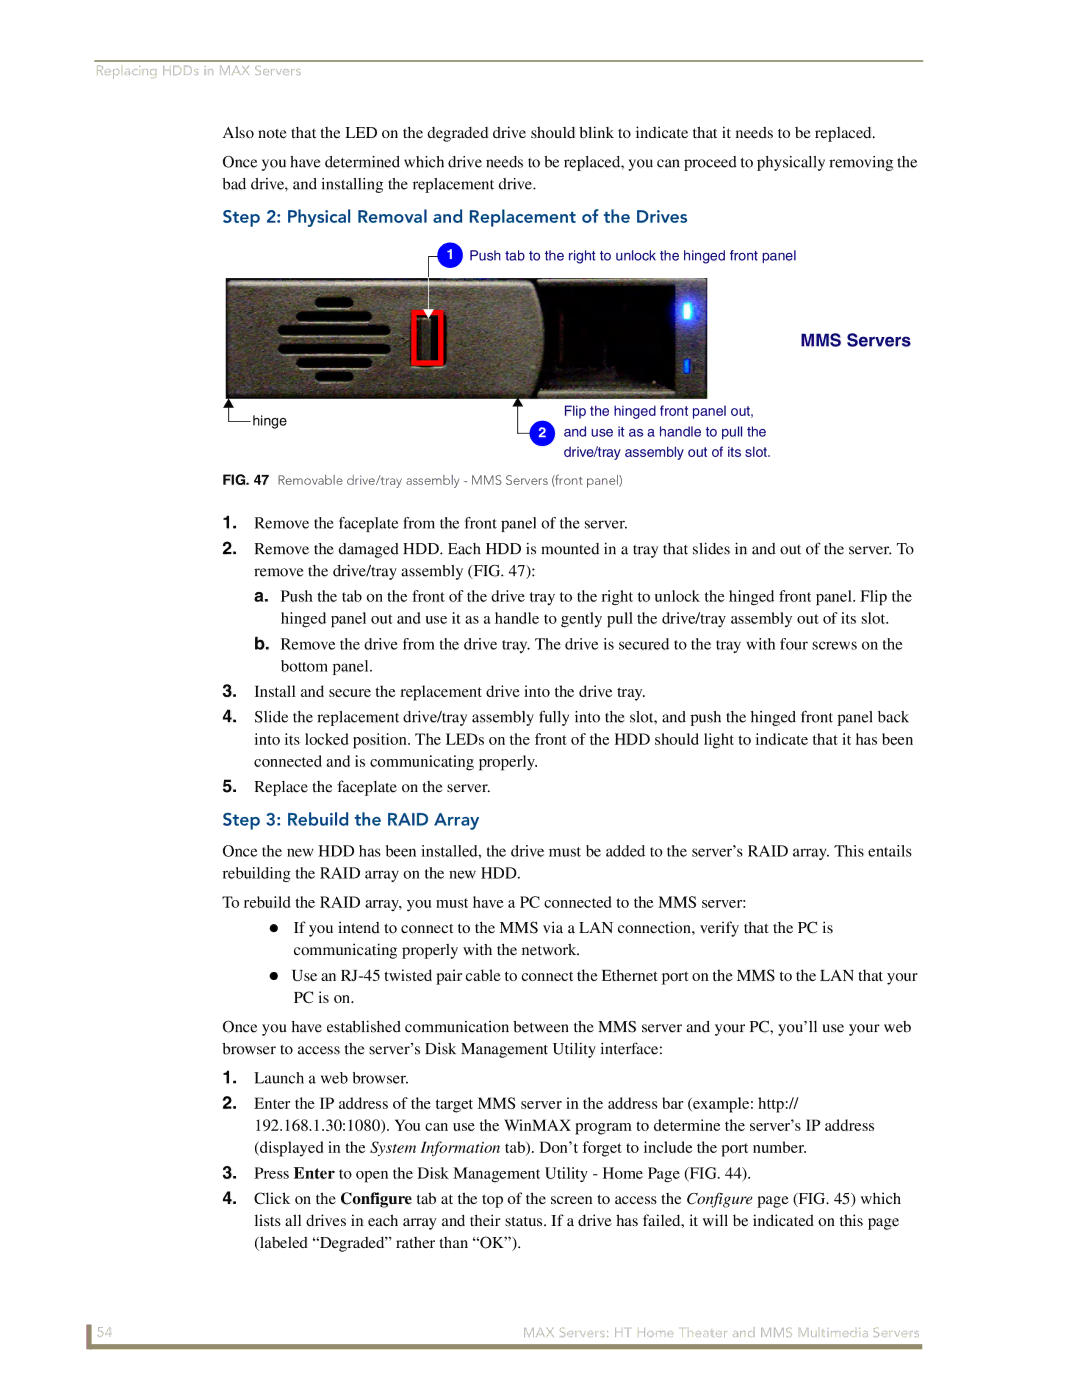
1Push tab to the right to unlock the hinged front panel
MMS Servers
![]() hinge
hinge
Flip the hinged front panel out,
2and use it as a handle to pull the drive/tray assembly out of its slot.
FIG. 47 Removable drive/tray assembly - MMS Servers (front panel)
1.Remove the faceplate from the front panel of the server.
2.Remove the damaged HDD. Each HDD is mounted in a tray that slides in and out of the server. To remove the drive/tray assembly (FIG. 47):
a.Push the tab on the front of the drive tray to the right to unlock the hinged front panel. Flip the hinged panel out and use it as a handle to gently pull the drive/tray assembly out of its slot.
b.Remove the drive from the drive tray. The drive is secured to the tray with four screws on the bottom panel.
3.Install and secure the replacement drive into the drive tray.
4.Slide the replacement drive/tray assembly fully into the slot, and push the hinged front panel back into its locked position. The LEDs on the front of the HDD should light to indicate that it has been connected and is communicating properly.
5.Replace the faceplate on the server.
Step 3: Rebuild the RAID Array
Once the new HDD has been installed, the drive must be added to the server’s RAID array. This entails rebuilding the RAID array on the new HDD.
To rebuild the RAID array, you must have a PC connected to the MMS server:
If you intend to connect to the MMS via a LAN connection, verify that the PC is communicating properly with the network.
Use an
Once you have established communication between the MMS server and your PC, you’ll use your web browser to access the server’s Disk Management Utility interface:
1.Launch a web browser.
2.Enter the IP address of the target MMS server in the address bar (example: http:// 192.168.1.30:1080). You can use the WinMAX program to determine the server’s IP address (displayed in the System Information tab). Don’t forget to include the port number.
3.Press Enter to open the Disk Management Utility - Home Page (FIG. 44).
4.Click on the Configure tab at the top of the screen to access the Configure page (FIG. 45) which lists all drives in each array and their status. If a drive has failed, it will be indicated on this page (labeled “Degraded” rather than “OK”).
54 | MAX Servers: HT Home Theater and MMS Multimedia Servers |