Rack Mounting MAX Servers
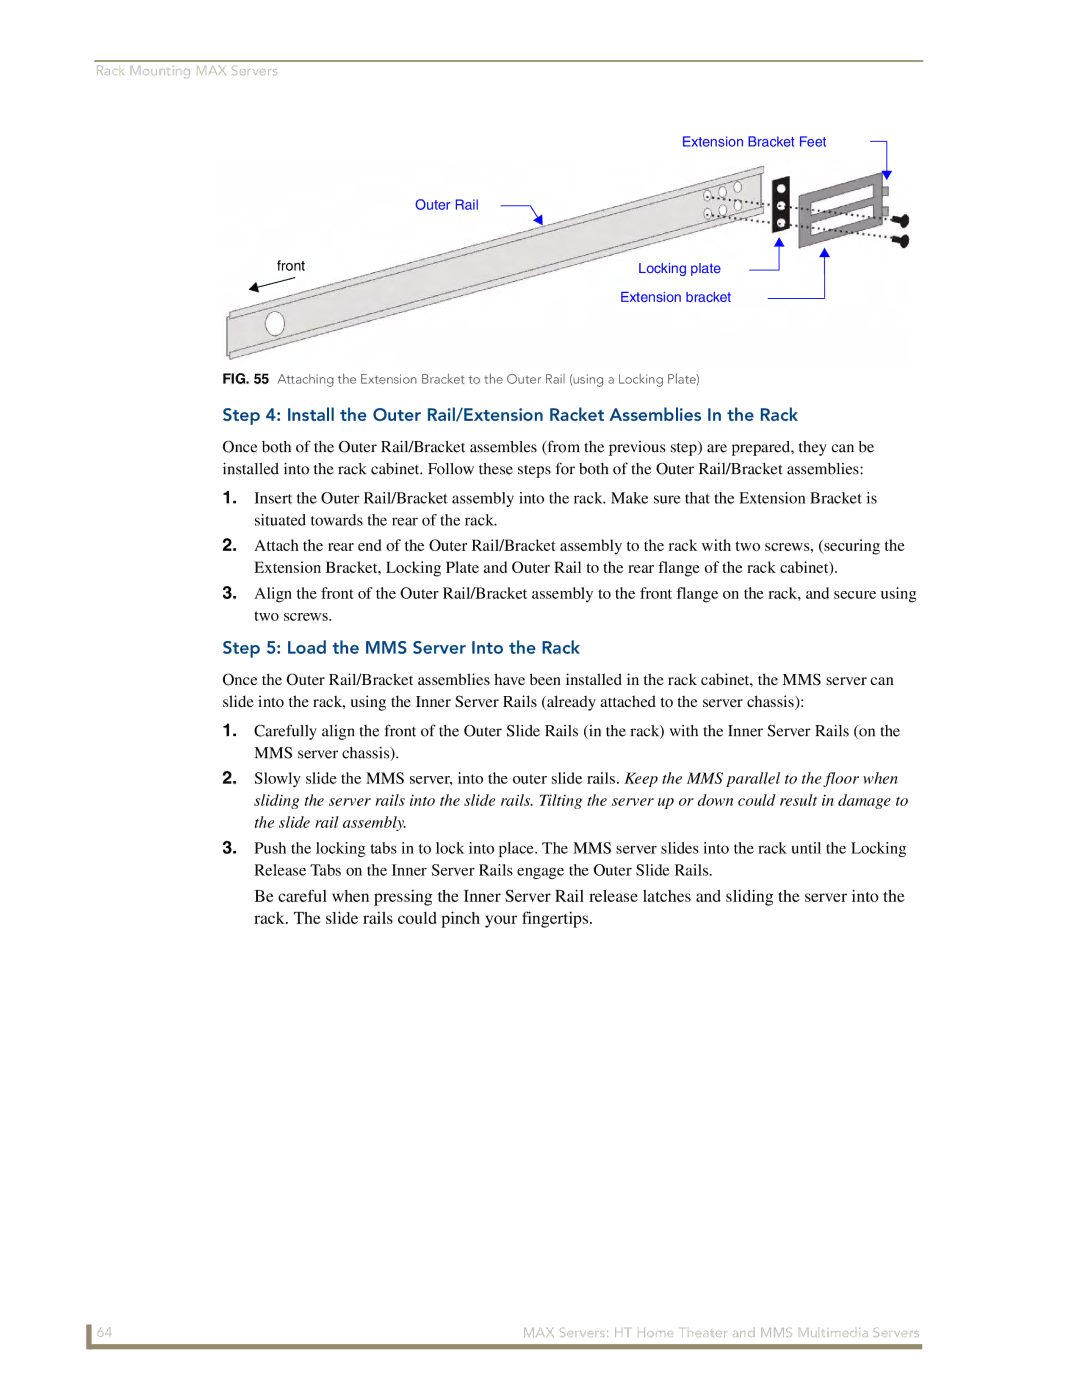
Extension Bracket Feet
front | Outer Rail |
| Locking plate |
| |||
|
| ||
|
|
| Extension bracket |
FIG. 55 Attaching the Extension Bracket to the Outer Rail (using a Locking Plate)
Step 4: Install the Outer Rail/Extension Racket Assemblies In the Rack
Once both of the Outer Rail/Bracket assembles (from the previous step) are prepared, they can be installed into the rack cabinet. Follow these steps for both of the Outer Rail/Bracket assemblies:
1.Insert the Outer Rail/Bracket assembly into the rack. Make sure that the Extension Bracket is situated towards the rear of the rack.
2.Attach the rear end of the Outer Rail/Bracket assembly to the rack with two screws, (securing the Extension Bracket, Locking Plate and Outer Rail to the rear flange of the rack cabinet).
3.Align the front of the Outer Rail/Bracket assembly to the front flange on the rack, and secure using two screws.
Step 5: Load the MMS Server Into the Rack
Once the Outer Rail/Bracket assemblies have been installed in the rack cabinet, the MMS server can slide into the rack, using the Inner Server Rails (already attached to the server chassis):
1.Carefully align the front of the Outer Slide Rails (in the rack) with the Inner Server Rails (on the MMS server chassis).
2.Slowly slide the MMS server, into the outer slide rails. Keep the MMS parallel to the floor when sliding the server rails into the slide rails. Tilting the server up or down could result in damage to the slide rail assembly.
3.Push the locking tabs in to lock into place. The MMS server slides into the rack until the Locking Release Tabs on the Inner Server Rails engage the Outer Slide Rails.
Be careful when pressing the Inner Server Rail release latches and sliding the server into the rack. The slide rails could pinch your fingertips.
64 | MAX Servers: HT Home Theater and MMS Multimedia Servers |