Mounting and Installation
8.Install the (provided) Ferrite clip onto the Ethernet cable (see FIG. 8 on page 12).
9.Connect the Ethernet cable in the back of the Metreau Entry Communicator.
10.Insert and fasten the Metreau Entry Communicator into the wall box.
Installing Into a Flat Surface Using Mounting Screws
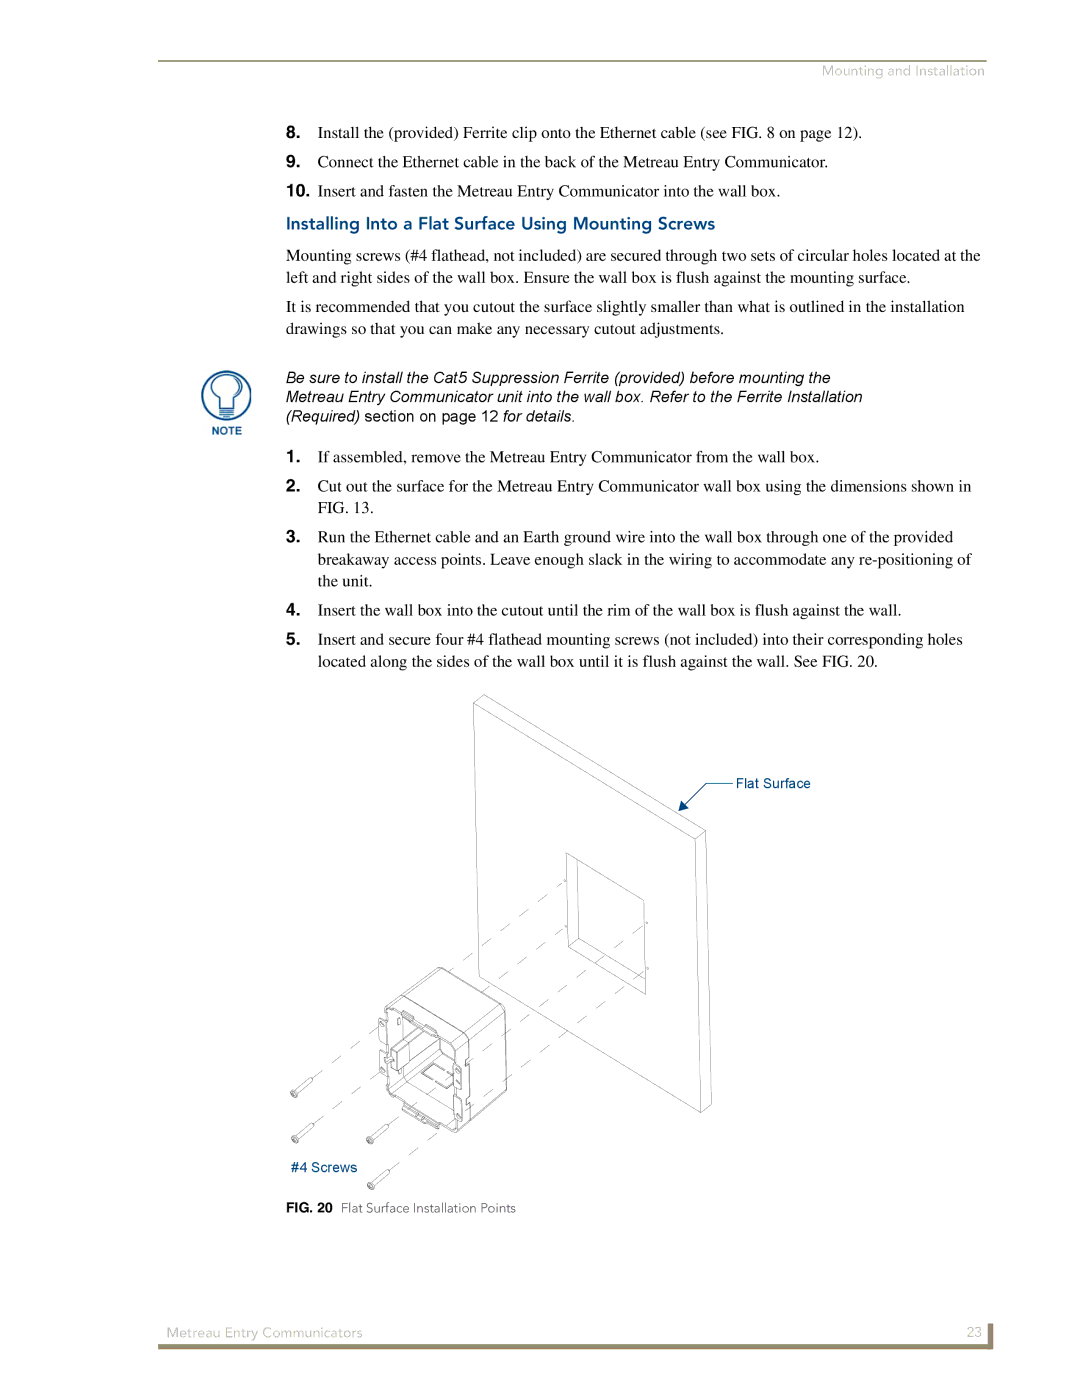
Mounting screws (#4 flathead, not included) are secured through two sets of circular holes located at the left and right sides of the wall box. Ensure the wall box is flush against the mounting surface.
It is recommended that you cutout the surface slightly smaller than what is outlined in the installation drawings so that you can make any necessary cutout adjustments.
Be sure to install the Cat5 Suppression Ferrite (provided) before mounting the Metreau Entry Communicator unit into the wall box. Refer to the Ferrite Installation (Required) section on page 12 for details.
1.If assembled, remove the Metreau Entry Communicator from the wall box.
2.Cut out the surface for the Metreau Entry Communicator wall box using the dimensions shown in FIG. 13.
3.Run the Ethernet cable and an Earth ground wire into the wall box through one of the provided breakaway access points. Leave enough slack in the wiring to accommodate any
4.Insert the wall box into the cutout until the rim of the wall box is flush against the wall.
5.Insert and secure four #4 flathead mounting screws (not included) into their corresponding holes located along the sides of the wall box until it is flush against the wall. See FIG. 20.
Flat Surface
#4 Screws
FIG. 20 Flat Surface Installation Points
Metreau Entry Communicators | 23 |
|
|