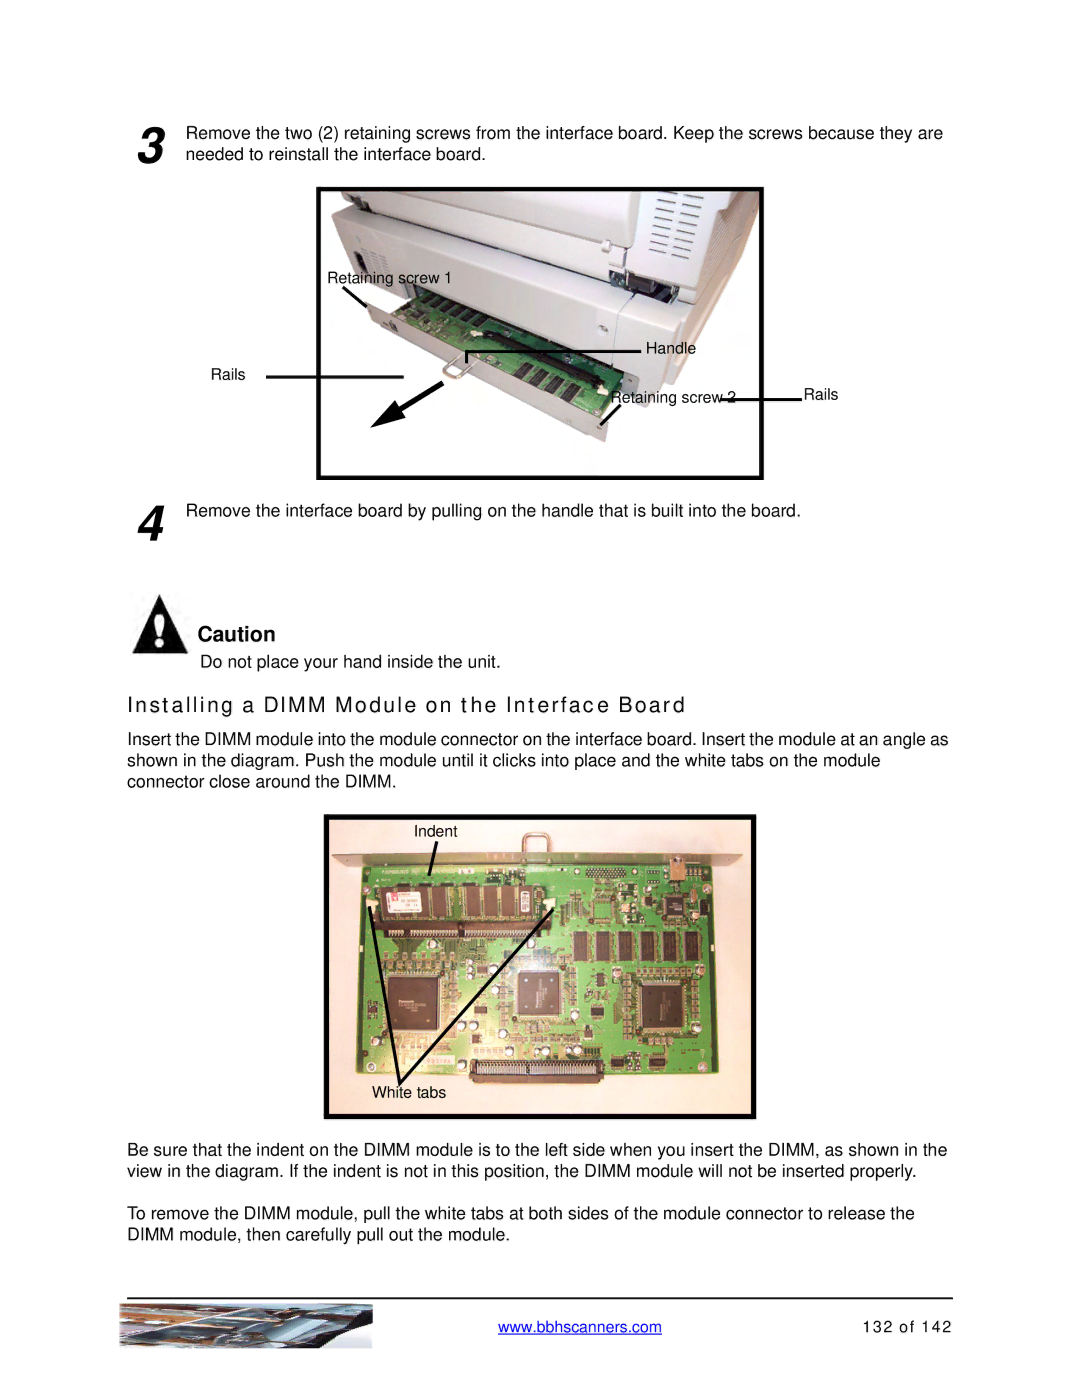
3 | Remove the two (2) retaining screws from the interface board. Keep the screws because they are |
| |
| needed to reinstall the interface board. |
Rails
Retaining screw 1
Handle
Retaining screw 2
Rails
4 Remove the interface board by pulling on the handle that is built into the board.
Caution
Do not place your hand inside the unit.
Installing a DIMM Module on the Interface Board
Insert the DIMM module into the module connector on the interface board. Insert the module at an angle as shown in the diagram. Push the module until it clicks into place and the white tabs on the module connector close around the DIMM.
Indent
White tabs
Be sure that the indent on the DIMM module is to the left side when you insert the DIMM, as shown in the view in the diagram. If the indent is not in this position, the DIMM module will not be inserted properly.
To remove the DIMM module, pull the white tabs at both sides of the module connector to release the DIMM module, then carefully pull out the module.
www.bbhscanners.com | 132 of 142 |
