5. Setting Exposure Compensation
Exposure compensation is used to alter the camera’s standard exposure setting. While looking through the viewfinder, you can use either the < ![]() > dial or <
> dial or < ![]() > button to set the exposure compensation amount. Any exposure compensation amount that you set can later be changed or canceled with the <
> button to set the exposure compensation amount. Any exposure compensation amount that you set can later be changed or canceled with the < ![]() > dial or <
> dial or < ![]() > button. The exposure compensation amount can be set up to ±3 stops in
> button. The exposure compensation amount can be set up to ±3 stops in
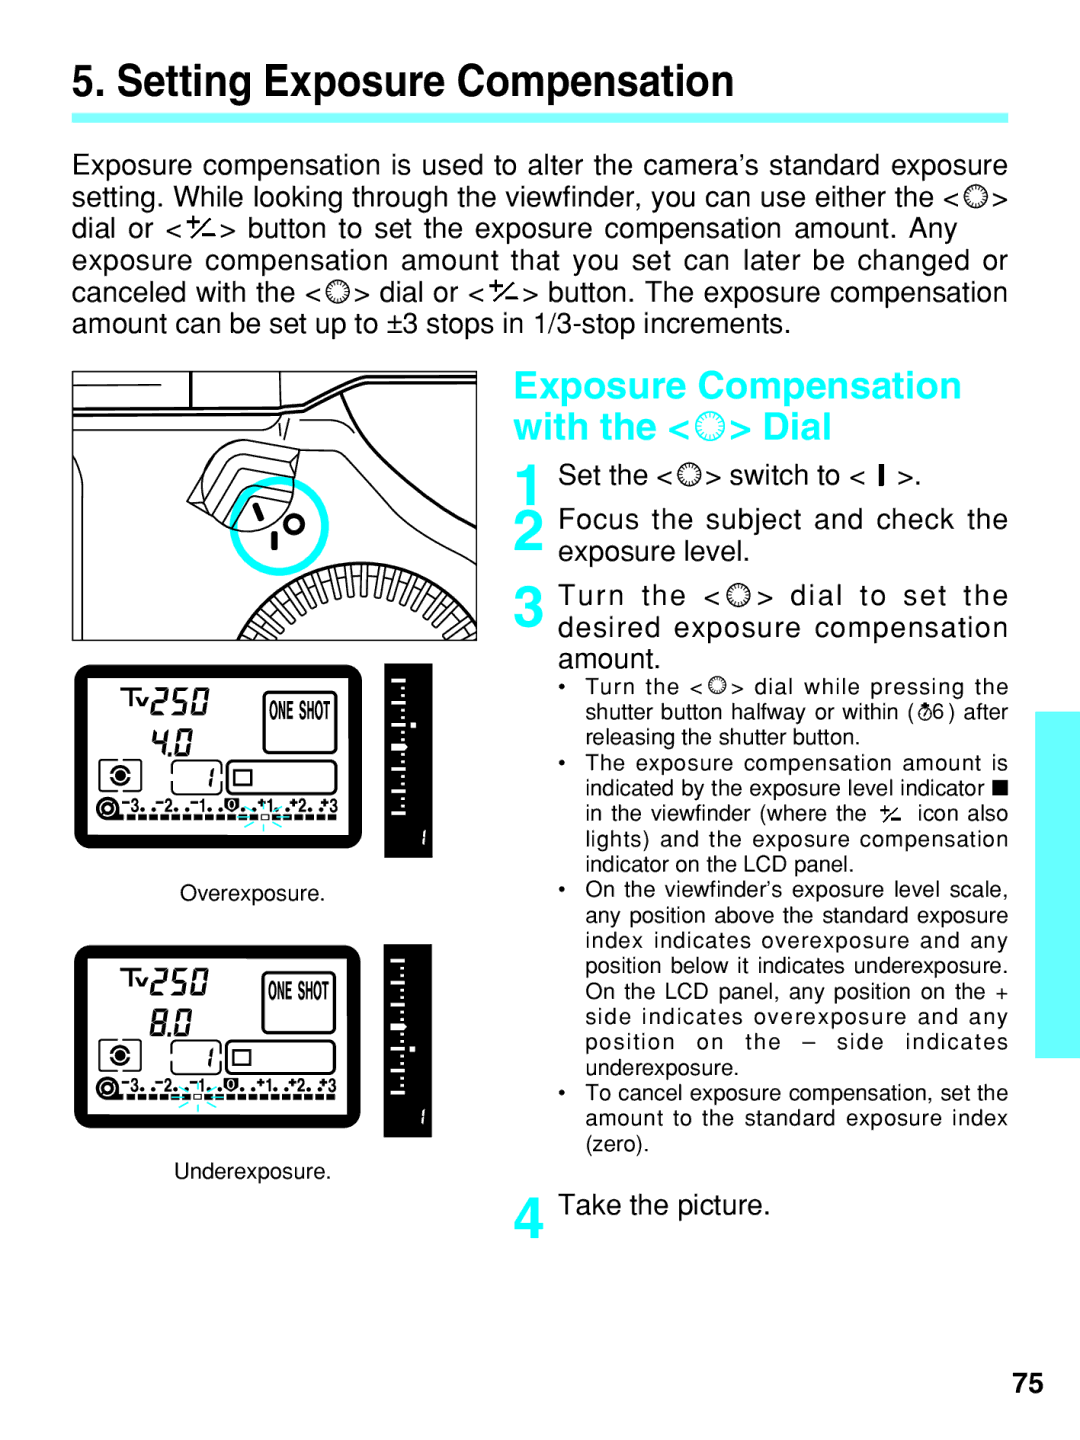
Overexposure.
Underexposure.
Exposure Compensation with the <  > Dial
1 Set the < ![]() > switch to <
> switch to < ![]() >.
>.
2 Focus the subject and check the exposure level.
3 Turn the < ![]() > dial to set the desired exposure compensation amount.
> dial to set the desired exposure compensation amount.
•Turn the < ![]() > dial while pressing the shutter button halfway or within (
> dial while pressing the shutter button halfway or within ( ![]() 6 ) after releasing the shutter button.
6 ) after releasing the shutter button.
•The exposure compensation amount is indicated by the exposure level indicator ■
in the viewfinder (where the ![]() icon also lights) and the exposure compensation indicator on the LCD panel.
icon also lights) and the exposure compensation indicator on the LCD panel.
•On the viewfinder’s exposure level scale, any position above the standard exposure index indicates overexposure and any position below it indicates underexposure. On the LCD panel, any position on the + side indicates overexposure and any position on the – side indicates underexposure.
•To cancel exposure compensation, set the amount to the standard exposure index (zero).
4 Take the picture.
75
