Installing the Battery and Checking the Battery Level
Checking the Battery Level
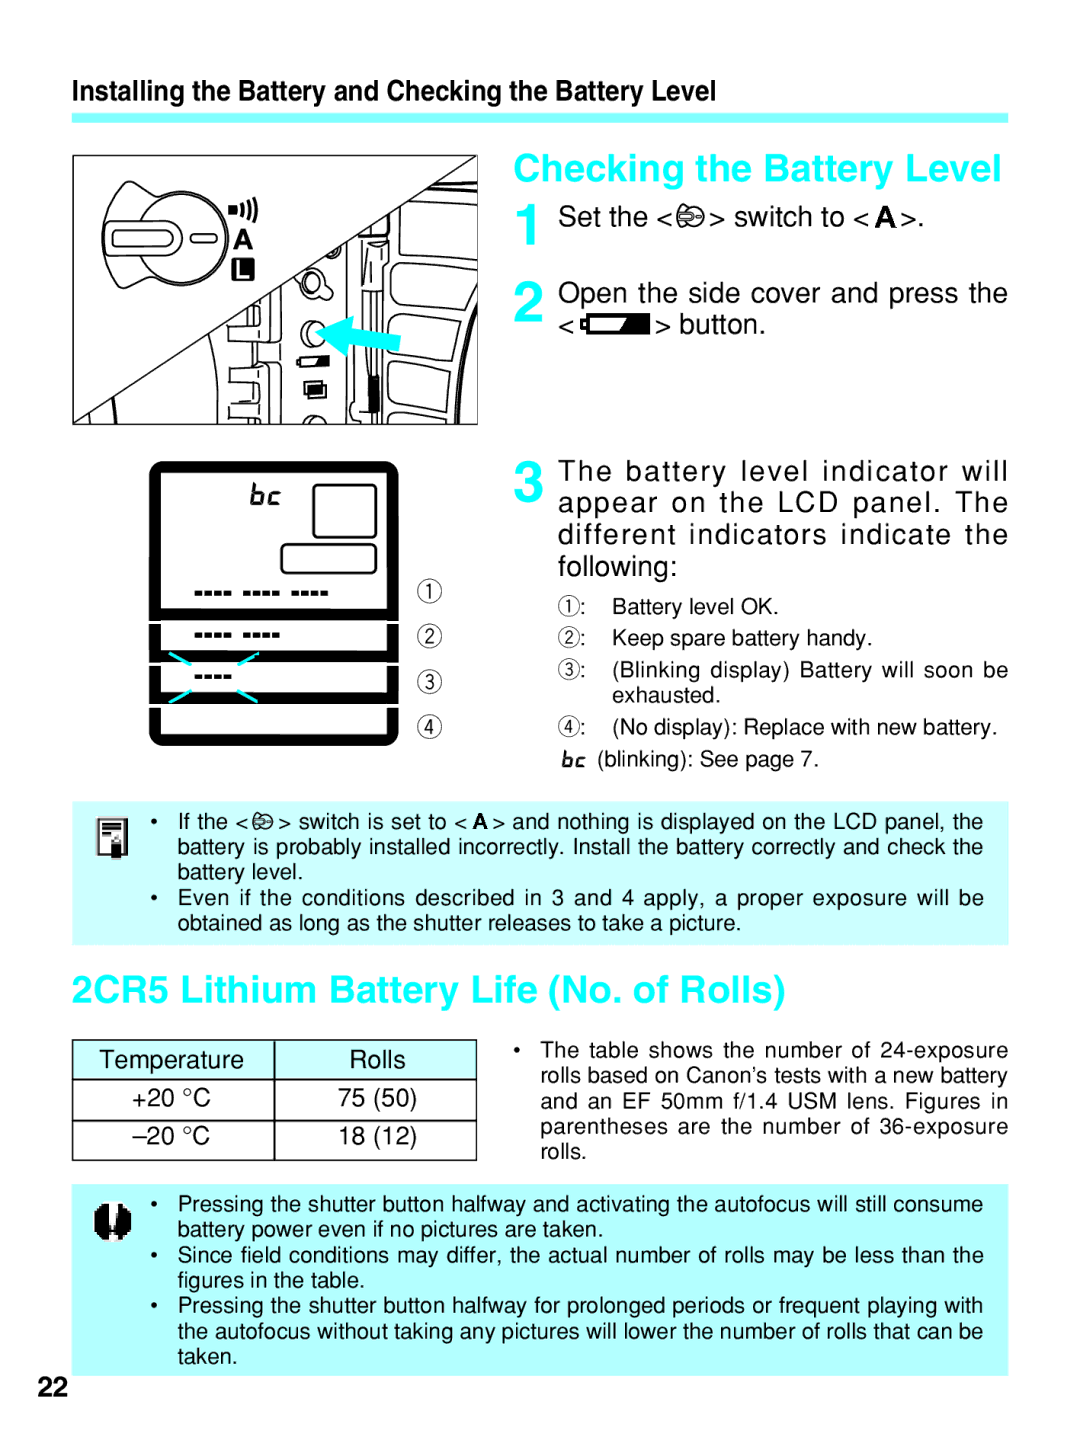
| 1 Set the < > switch to < >. | ||
2 | Open the side cover and press the | ||
< | > button. | ||
|
| The battery level indicator will | |
|
| ||
| 3 appear on the LCD panel. The | ||
|
| different indicators indicate the | |
1 |
| following: | |
| 1: Battery level OK. | ||
|
| ||
2 |
| 2: Keep spare battery handy. | |
3 |
| 3: (Blinking display) Battery will soon be | |
|
| exhausted. | |
|
|
| |
44: (No display): Replace with new battery.
![]()
![]()
![]() (blinking): See page 7.
(blinking): See page 7.
•If the < ![]() > switch is set to <
> switch is set to < ![]() > and nothing is displayed on the LCD panel, the battery is probably installed incorrectly. Install the battery correctly and check the battery level.
> and nothing is displayed on the LCD panel, the battery is probably installed incorrectly. Install the battery correctly and check the battery level.
•Even if the conditions described in 3 and 4 apply, a proper exposure will be obtained as long as the shutter releases to take a picture.
2CR5 Lithium Battery Life (No. of Rolls)
Temperature | Rolls |
+20 °C | 75 (50) |
18 (12) |
•The table shows the number of
•Pressing the shutter button halfway and activating the autofocus will still consume battery power even if no pictures are taken.
•Since field conditions may differ, the actual number of rolls may be less than the figures in the table.
•Pressing the shutter button halfway for prolonged periods or frequent playing with the autofocus without taking any pictures will lower the number of rolls that can be taken.
22