Chapter 4 Removal and Replacement Procedures
Removing and Installing the
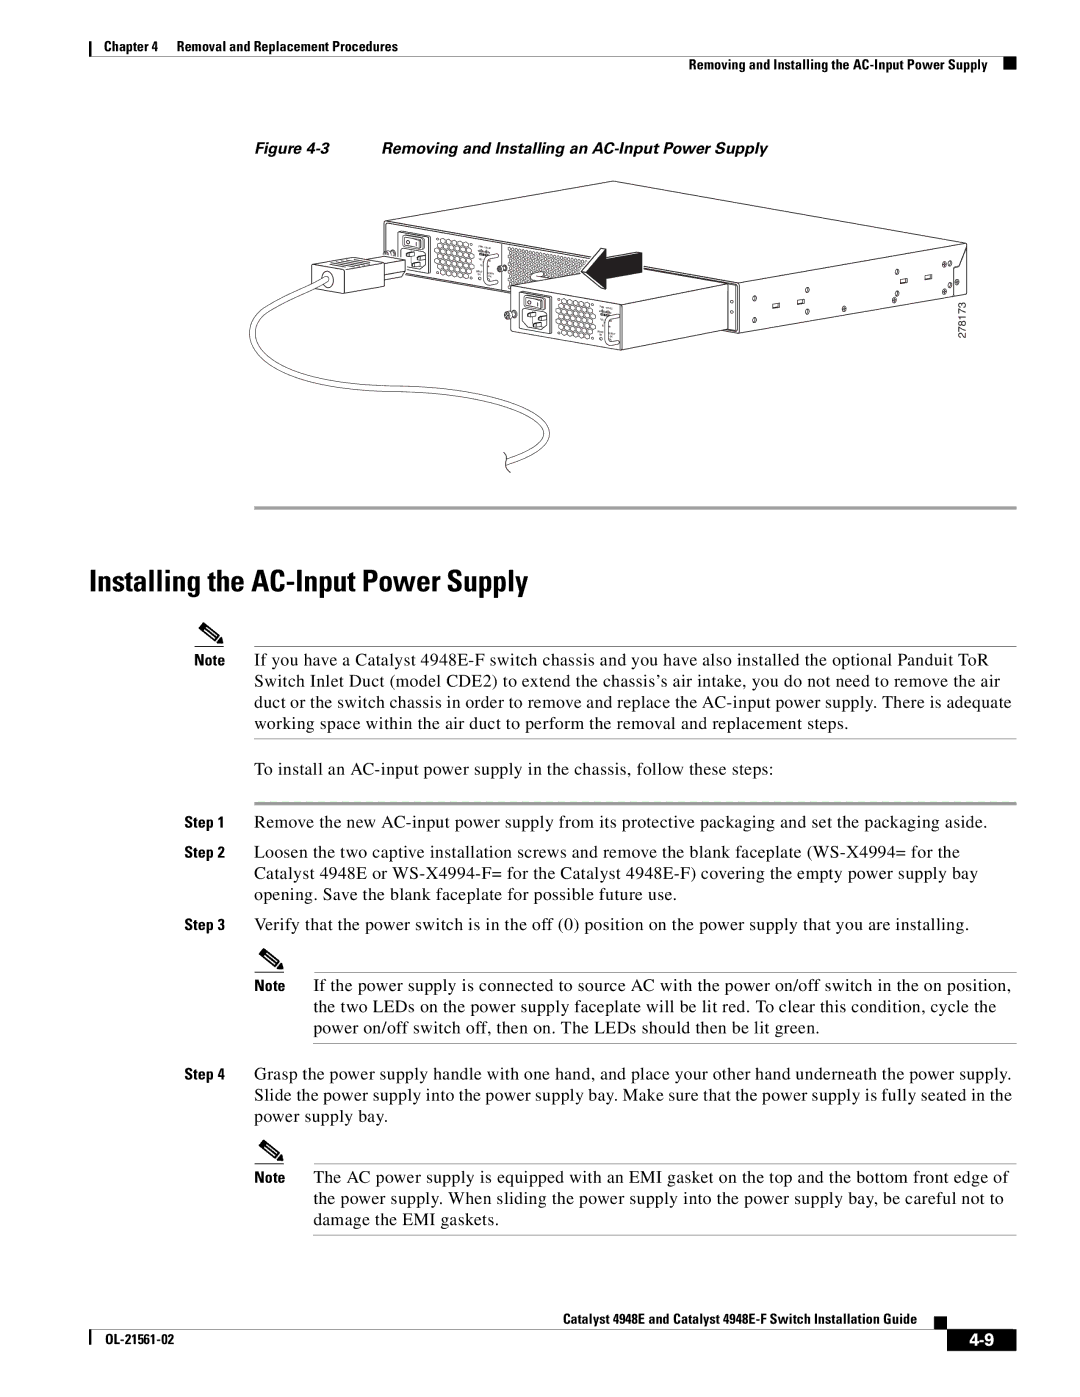
Figure 4-3 Removing and Installing an AC-Input Power Supply
PWR - 540 AC | |
100 - 240 VAC | |
| 7 - 3A |
50 - 60 Hz | |
INPUT | OUTPUT |
OK | |
| OK |
PWR - 540 AC | |
100 - 240 VAC | |
| 7 - 3A |
50 - 60 Hz | |
INPUT | OUTPUT |
OK | |
| OK |
278173
Installing the AC-Input Power Supply
Note If you have a Catalyst
To install an
Step 1 Remove the new
Step 2 Loosen the two captive installation screws and remove the blank faceplate
Step 3 Verify that the power switch is in the off (0) position on the power supply that you are installing.
Note If the power supply is connected to source AC with the power on/off switch in the on position, the two LEDs on the power supply faceplate will be lit red. To clear this condition, cycle the power on/off switch off, then on. The LEDs should then be lit green.
Step 4 Grasp the power supply handle with one hand, and place your other hand underneath the power supply. Slide the power supply into the power supply bay. Make sure that the power supply is fully seated in the power supply bay.
Note The AC power supply is equipped with an EMI gasket on the top and the bottom front edge of the power supply. When sliding the power supply into the power supply bay, be careful not to damage the EMI gaskets.
Catalyst 4948E and Catalyst
|
| ||
|
|
