Compuprint PageMaster 402N User Guide
Replacing Printer Components
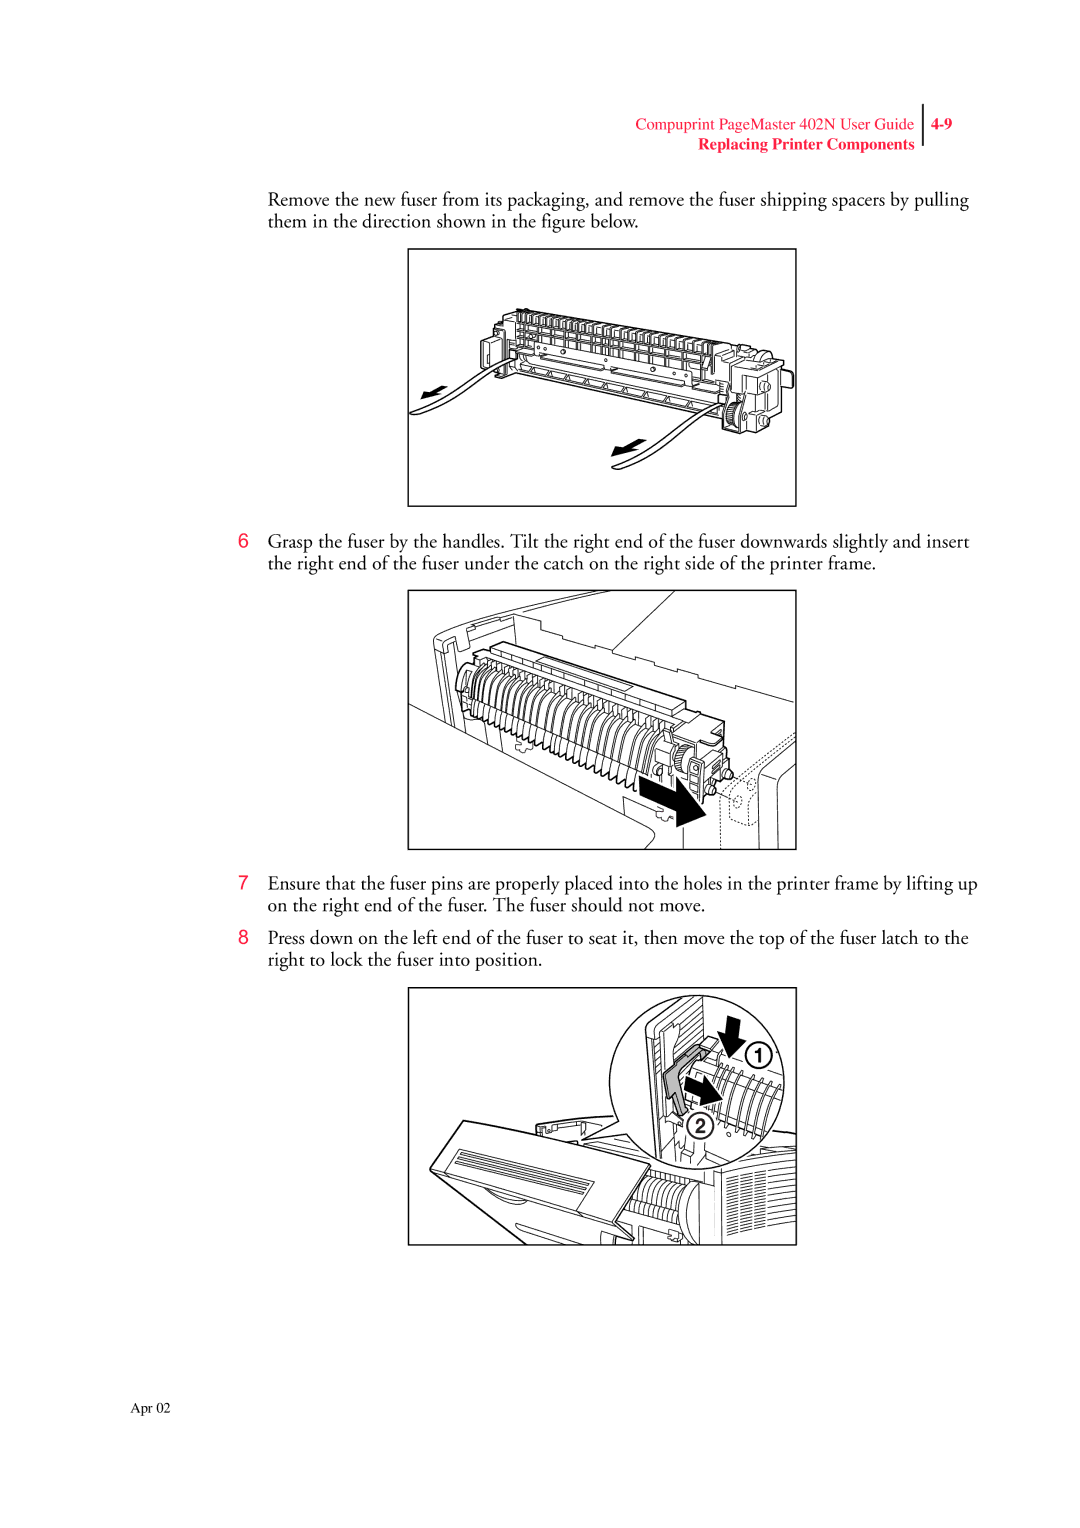
5.Remove the new fuser from its packaging, and remove the fuser shipping spacers by pulling them in the direction shown in the figure below.
6.Grasp the fuser by the handles. Tilt the right end of the fuser downwards slightly and insert the right end of the fuser under the catch on the right side of the printer frame.
7.Ensure that the fuser pins are properly placed into the holes in the printer frame by lifting up on the right end of the fuser. The fuser should not move.
8.Press down on the left end of the fuser to seat it, then move the top of the fuser latch to the right to lock the fuser into position.
Apr 02