WARNING: Do not place any physical obstructions in the front or rear of the chassis. This may cause a decrease in airflow, resulting in an
Removing A Cooling Fan
WARNING: Opening or removing the system cover when the system is on may expose you to a risk of electric shock. Exercise utmost care while removing or installing cooling fans.
WARNING: Do not operate the system without the cooling fans or the cover.
CAUTION: Many repairs may only be done by a certified service technician. You should only perform troubleshooting and simple repairs as authorized in your product documentation, or as directed by the online or telephone service and support team. Damage due to servicing that is not authorized by Dell is not covered by your warranty. Read and follow the safety instructions that came with the product.
CAUTION: The cooling fans are
NOTE: The procedure for removing each fan is identical.
1.Open the system.
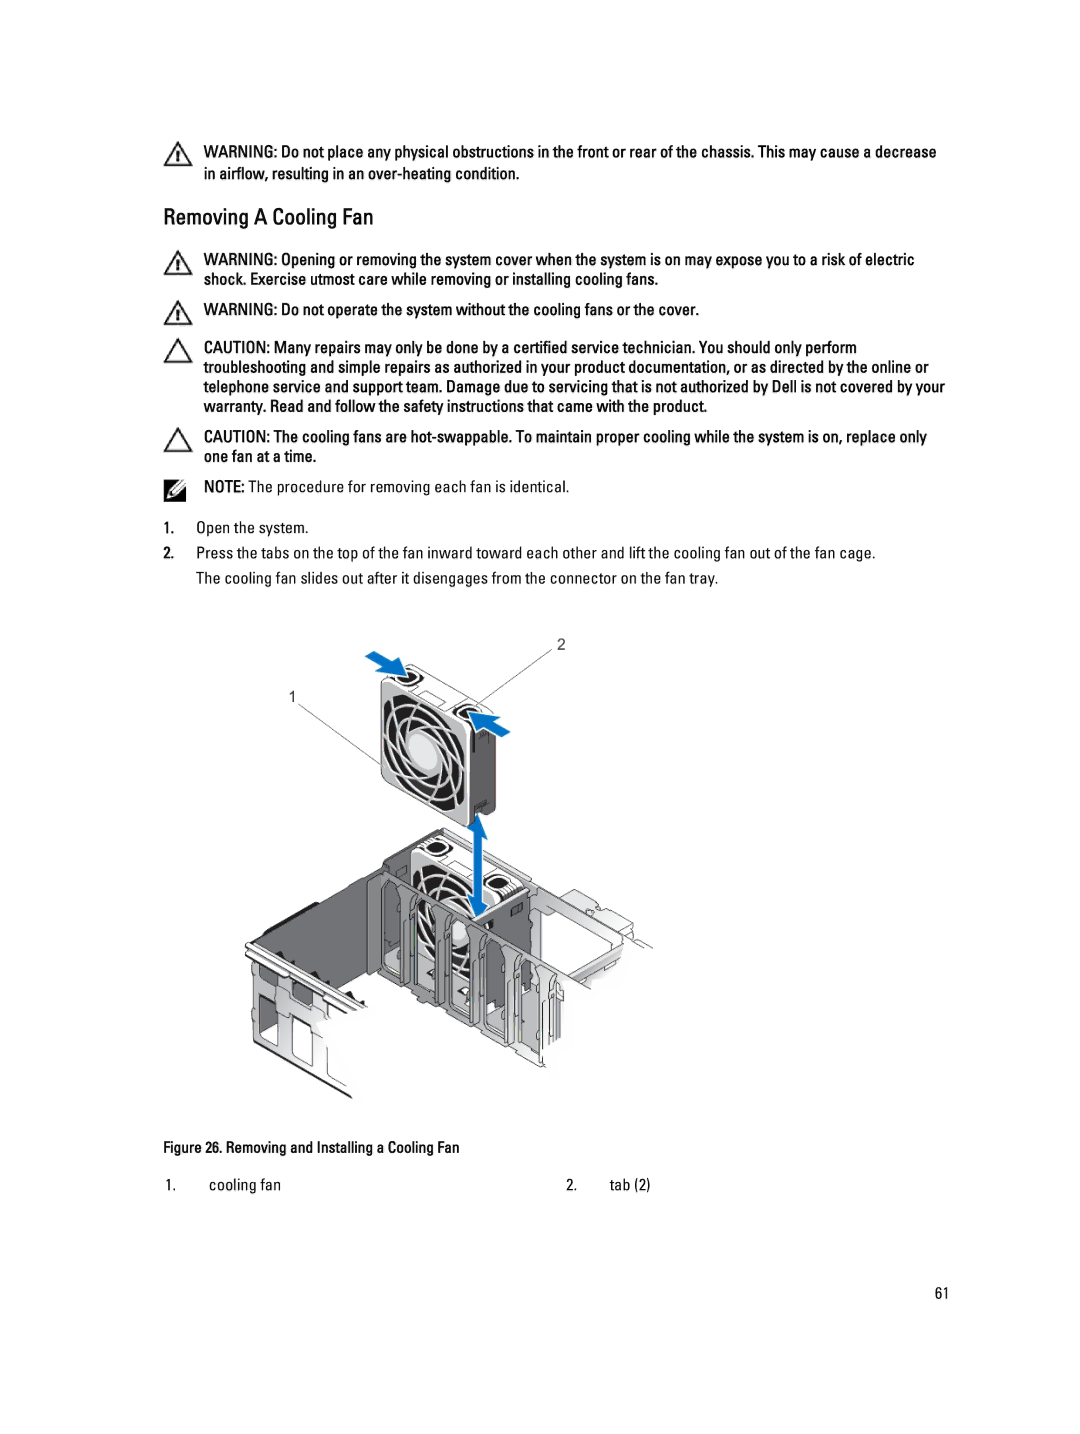
2.Press the tabs on the top of the fan inward toward each other and lift the cooling fan out of the fan cage. The cooling fan slides out after it disengages from the connector on the fan tray.
Figure 26. Removing and Installing a Cooling Fan
1. | cooling fan | 2. | tab (2) |
61
