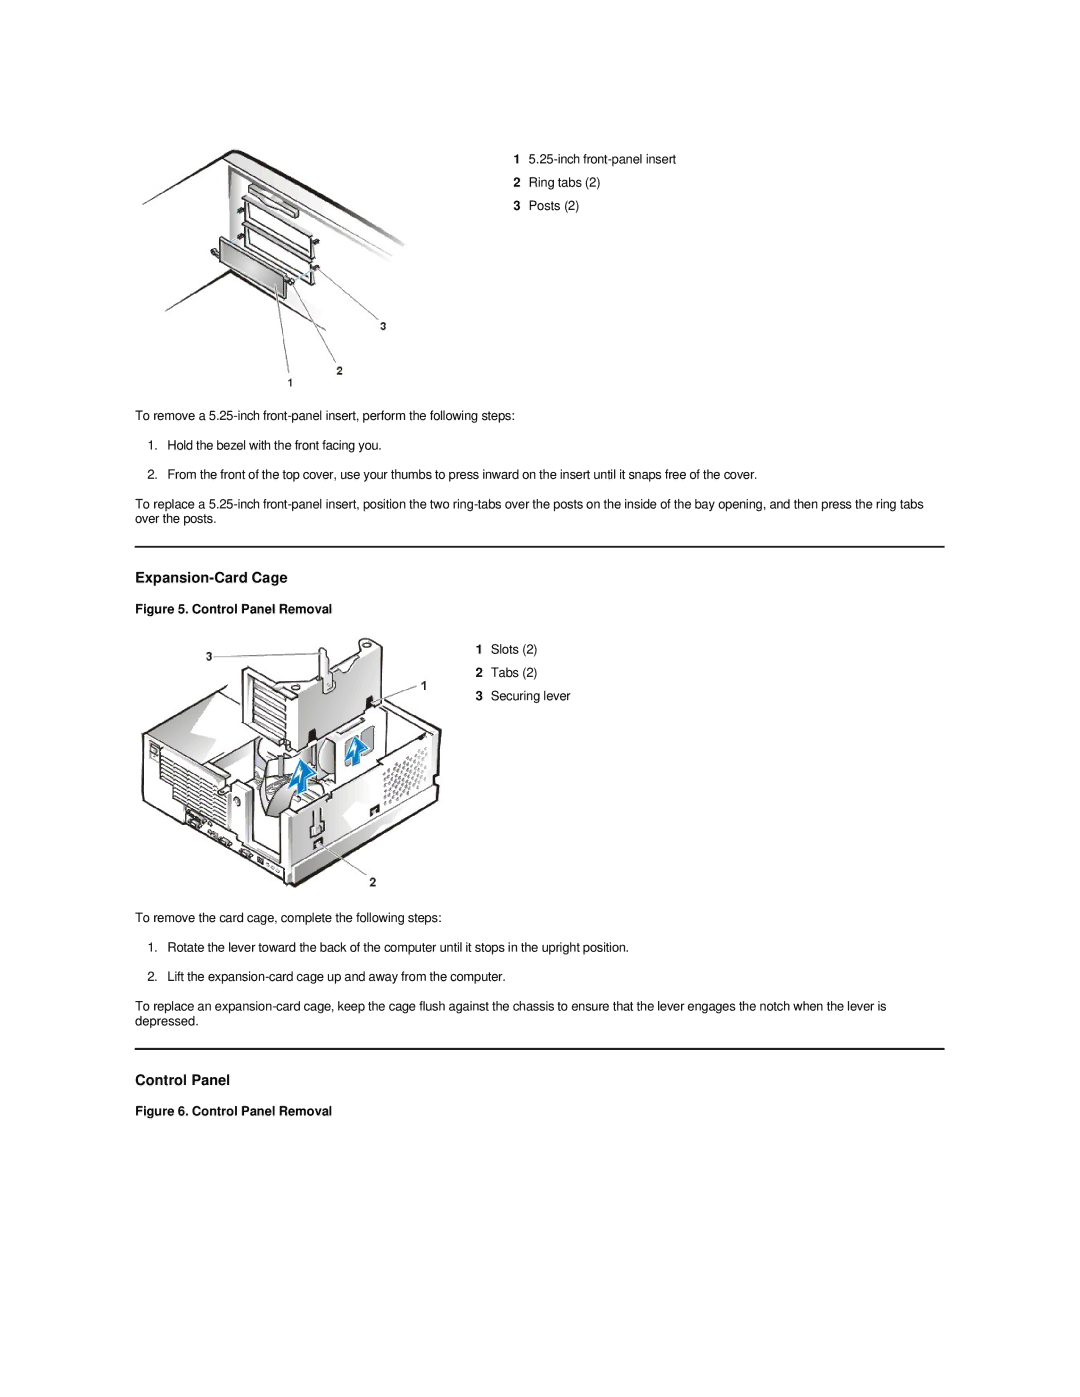
Dell GX200 manual Expansion-Card Cage

Models: GX200

1 79
Download 79 pages 30.45 Kb
Page 23
Image 23

15.25-inch front-panel insert

2Ring tabs (2)

3Posts (2)

To remove a 5.25-inch front-panel insert, perform the following steps:

1.Hold the bezel with the front facing you.

2.From the front of the top cover, use your thumbs to press inward on the insert until it snaps free of the cover.

To replace a 5.25-inch front-panel insert, position the two ring-tabs over the posts on the inside of the bay opening, and then press the ring tabs over the posts.

Expansion-Card Cage

Figure 5. Control Panel Removal

1Slots (2)

2Tabs (2)

3Securing lever

To remove the card cage, complete the following steps:

1.Rotate the lever toward the back of the computer until it stops in the upright position.

2.Lift the expansion-card cage up and away from the computer.

To replace an expansion-card cage, keep the cage flush against the chassis to ensure that the lever engages the notch when the lever is depressed.

Control Panel

Figure 6. Control Panel Removal

Page 23
Image 23
Dell GX200 manual Expansion-Card Cage