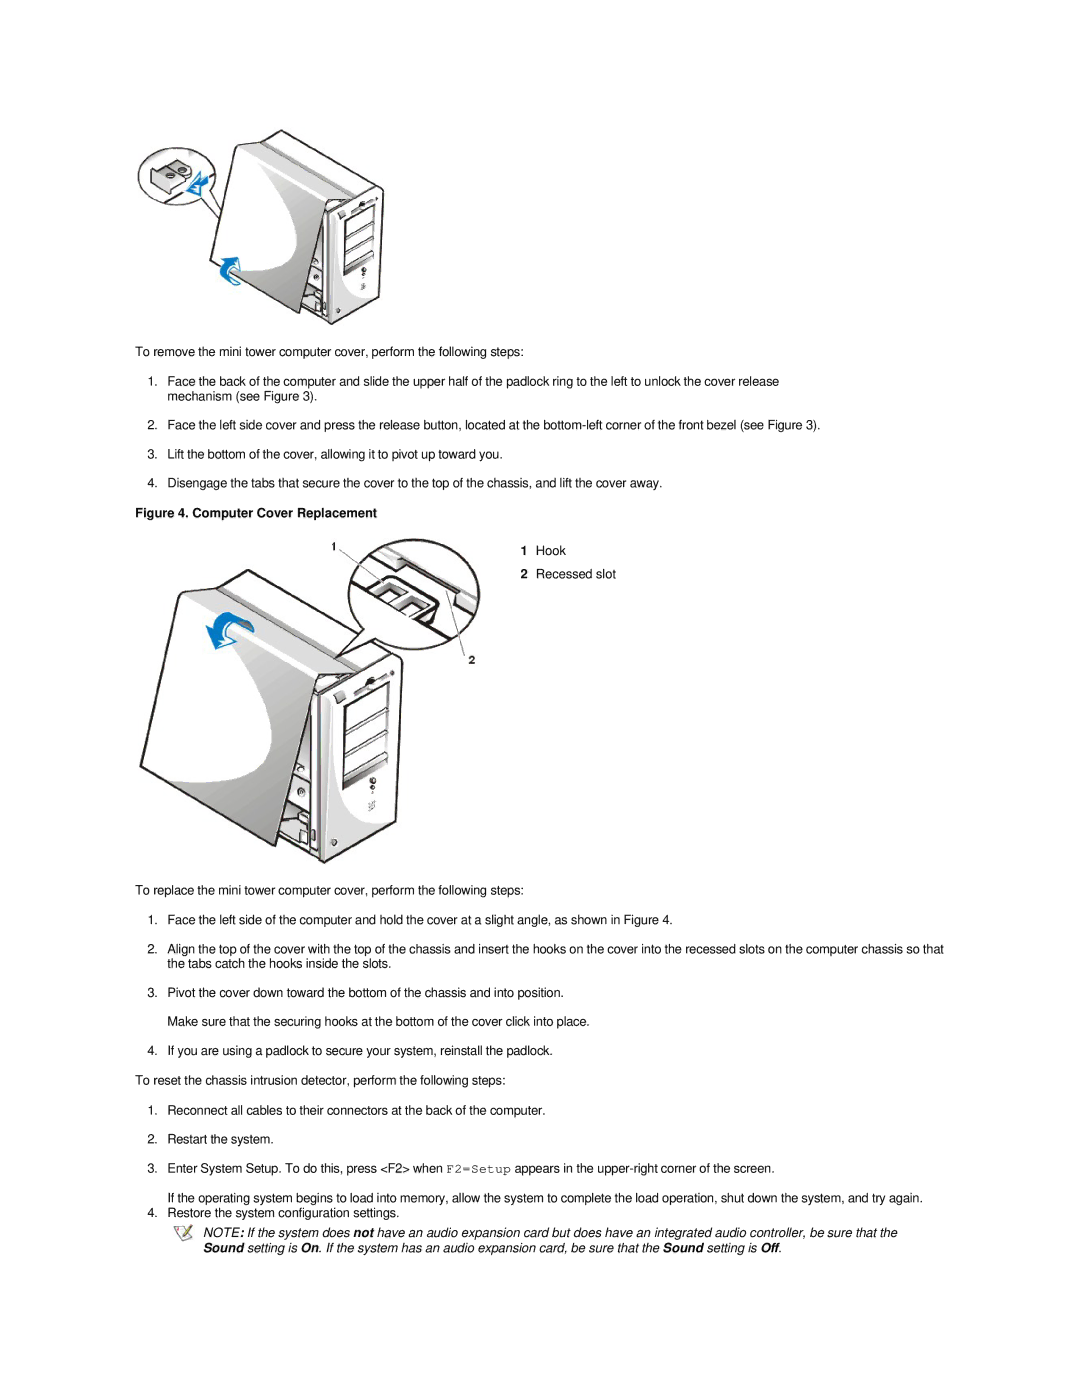
To remove the mini tower computer cover, perform the following steps:
1.Face the back of the computer and slide the upper half of the padlock ring to the left to unlock the cover release mechanism (see Figure 3).
2.Face the left side cover and press the release button, located at the
3.Lift the bottom of the cover, allowing it to pivot up toward you.
4.Disengage the tabs that secure the cover to the top of the chassis, and lift the cover away.
Figure 4. Computer Cover Replacement
1Hook
2Recessed slot
To replace the mini tower computer cover, perform the following steps:
1.Face the left side of the computer and hold the cover at a slight angle, as shown in Figure 4.
2.Align the top of the cover with the top of the chassis and insert the hooks on the cover into the recessed slots on the computer chassis so that the tabs catch the hooks inside the slots.
3.Pivot the cover down toward the bottom of the chassis and into position. Make sure that the securing hooks at the bottom of the cover click into place.
4.If you are using a padlock to secure your system, reinstall the padlock.
To reset the chassis intrusion detector, perform the following steps:
1.Reconnect all cables to their connectors at the back of the computer.
2.Restart the system.
3.Enter System Setup. To do this, press <F2> when F2=Setup appears in the
If the operating system begins to load into memory, allow the system to complete the load operation, shut down the system, and try again.
4.Restore the system configuration settings.
NOTE: If the system does not have an audio expansion card but does have an integrated audio controller, be sure that the Sound setting is On. If the system has an audio expansion card, be sure that the Sound setting is Off.
