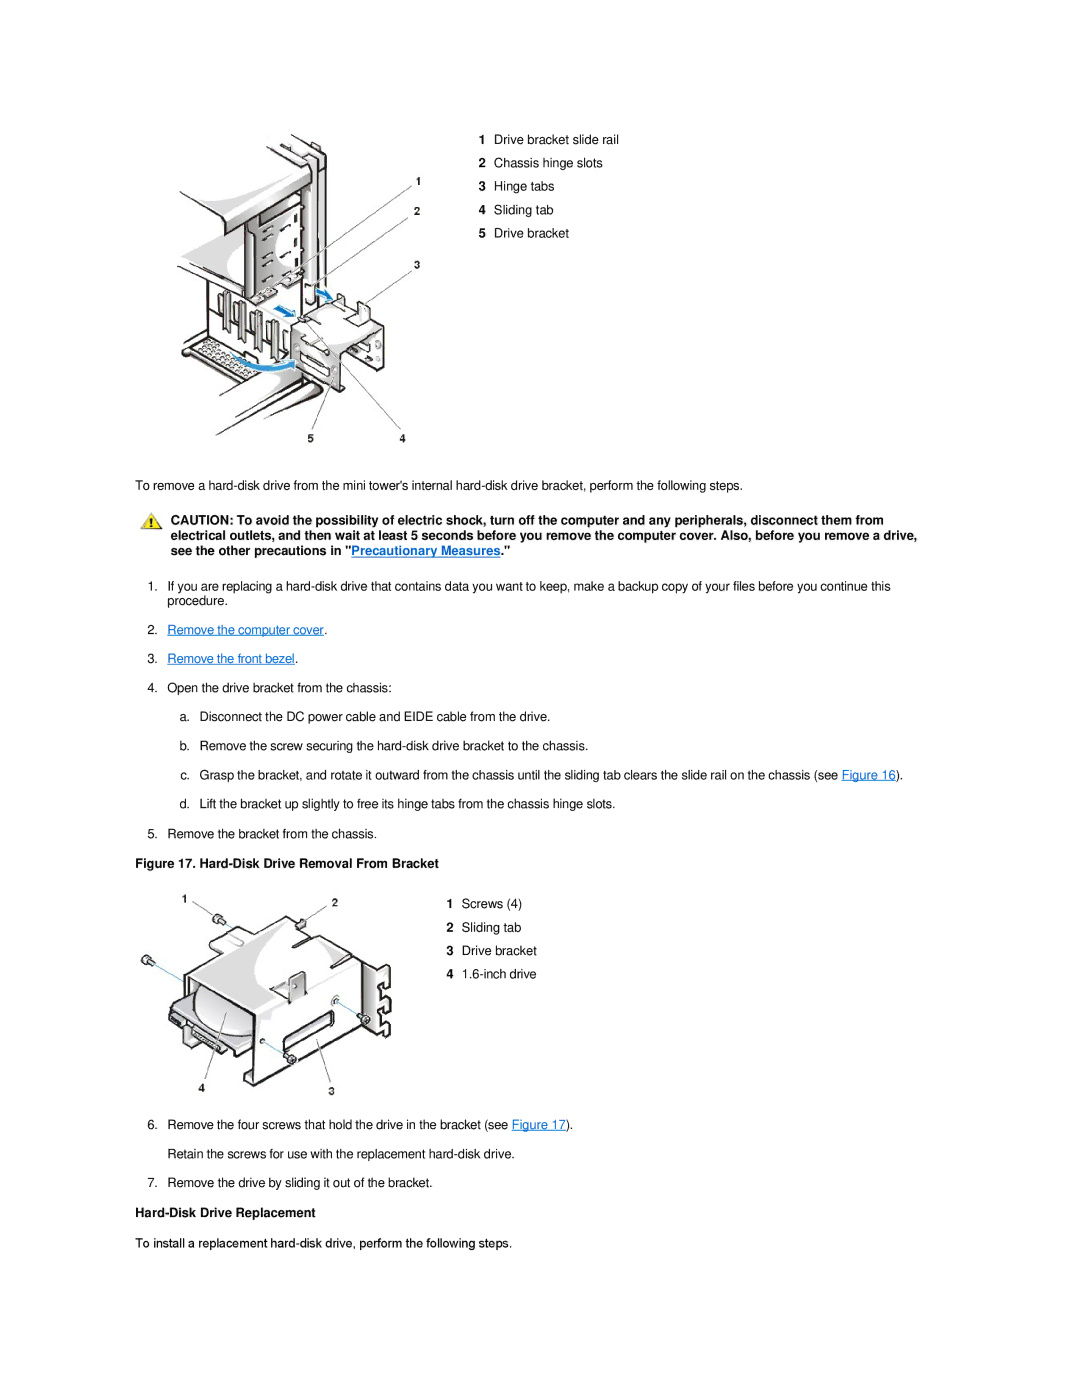
1Drive bracket slide rail
2Chassis hinge slots
3Hinge tabs
4Sliding tab
5Drive bracket
To remove a
CAUTION: To avoid the possibility of electric shock, turn off the computer and any peripherals, disconnect them from electrical outlets, and then wait at least 5 seconds before you remove the computer cover. Also, before you remove a drive, see the other precautions in "Precautionary Measures."
1.If you are replacing a
2.Remove the computer cover.
3.Remove the front bezel.
4.Open the drive bracket from the chassis:
a.Disconnect the DC power cable and EIDE cable from the drive.
b.Remove the screw securing the
c.Grasp the bracket, and rotate it outward from the chassis until the sliding tab clears the slide rail on the chassis (see Figure 16).
d.Lift the bracket up slightly to free its hinge tabs from the chassis hinge slots.
5.Remove the bracket from the chassis.
Figure 17. Hard-Disk Drive Removal From Bracket
1Screws (4)
2Sliding tab
3Drive bracket
41.6-inch drive
6.Remove the four screws that hold the drive in the bracket (see Figure 17). Retain the screws for use with the replacement
7.Remove the drive by sliding it out of the bracket.
Hard-Disk Drive Replacement
To install a replacement