When you replace the
5.25-Inch Drive
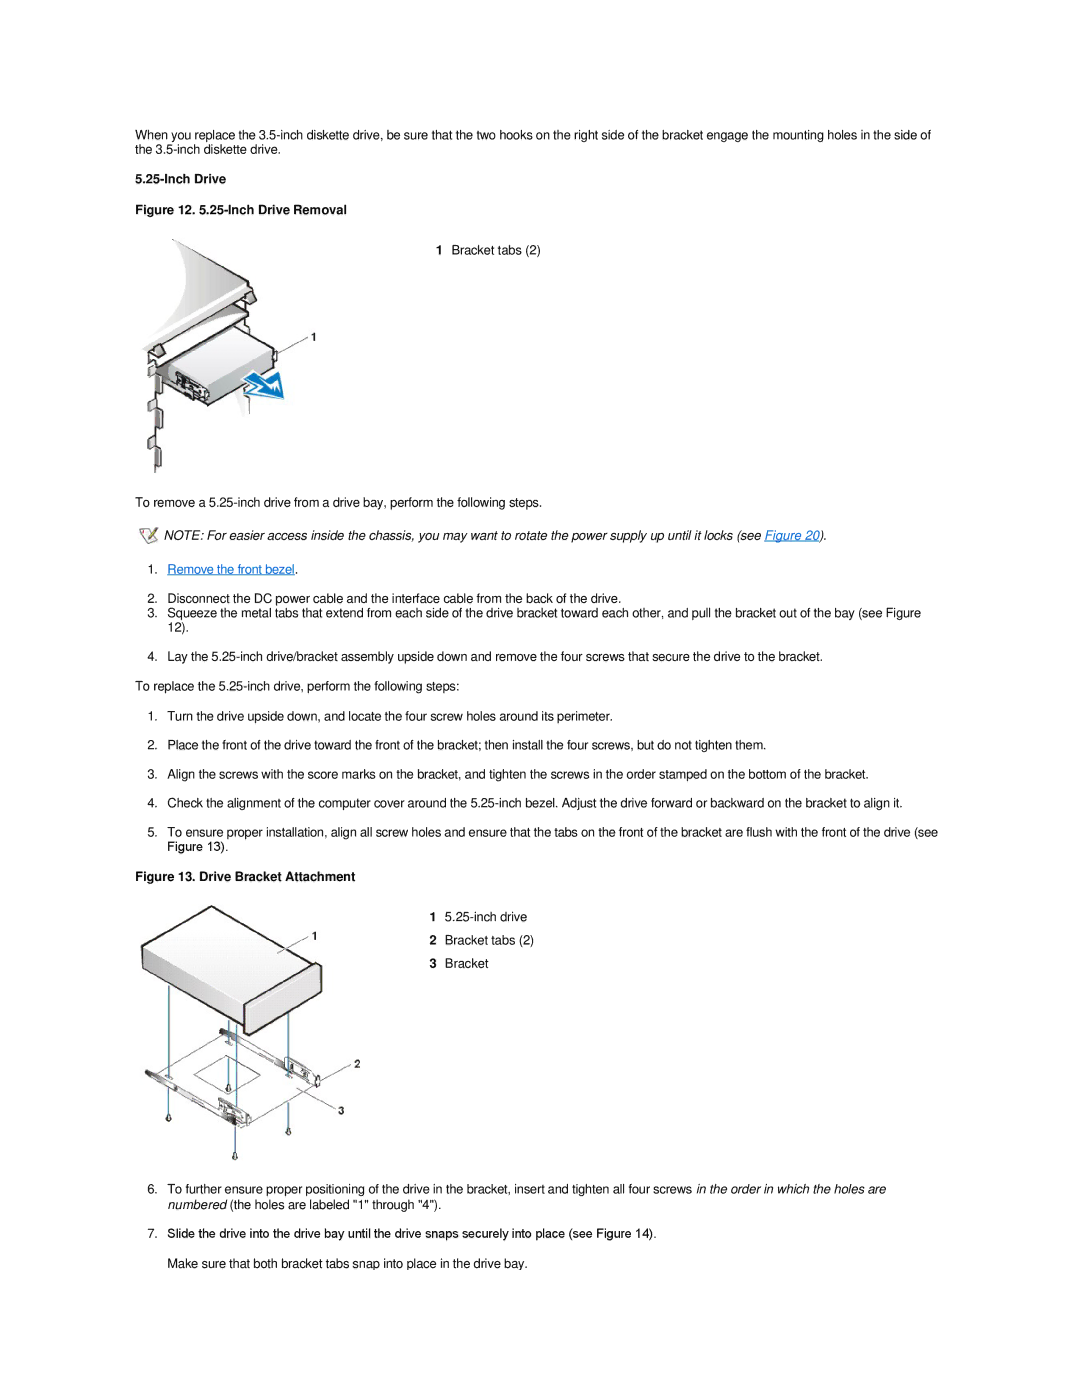
Figure 12. 5.25-Inch Drive Removal
1Bracket tabs (2)
To remove a
![]() NOTE: For easier access inside the chassis, you may want to rotate the power supply up until it locks (see Figure 20).
NOTE: For easier access inside the chassis, you may want to rotate the power supply up until it locks (see Figure 20).
1.Remove the front bezel.
2.Disconnect the DC power cable and the interface cable from the back of the drive.
3.Squeeze the metal tabs that extend from each side of the drive bracket toward each other, and pull the bracket out of the bay (see Figure 12).
4.Lay the
To replace the
1.Turn the drive upside down, and locate the four screw holes around its perimeter.
2.Place the front of the drive toward the front of the bracket; then install the four screws, but do not tighten them.
3.Align the screws with the score marks on the bracket, and tighten the screws in the order stamped on the bottom of the bracket.
4.Check the alignment of the computer cover around the
5.To ensure proper installation, align all screw holes and ensure that the tabs on the front of the bracket are flush with the front of the drive (see
Figure 13).
Figure 13. Drive Bracket Attachment
1
2Bracket tabs (2)
3Bracket
6.To further ensure proper positioning of the drive in the bracket, insert and tighten all four screws in the order in which the holes are numbered (the holes are labeled "1" through "4").
7.Slide the drive into the drive bay until the drive snaps securely into place (see Figure 14).
Make sure that both bracket tabs snap into place in the drive bay.