1Control panel
2Control panel connector
3Chassis intrusion cable connector
4Chassis intrusion switch
To remove the control panel, perform the following steps:
1.Disconnect the control panel cable from the control panel connector on the system board (see "System Board Labels" for the location of the PANEL connector).
Note the routing of the control panel cable as you remove it from the chassis.
2.Disconnect the the chassis intrusion switch cable connector from the control panel.
3.Remove the mounting screw that secures the control panel to the chassis.
4.Remove the control panel cable.
5.Pull the control panel cable through the opening in the front wall, and carefully remove the cable from the routing tab in the chassis.
6.Pull out on the control panel to detach it from the chassis.
Note the routing of the control panel cable as you remove it from the chassis.
Chassis Intrusion Switch
Figure 9. Chassis Intrusion Switch Removal
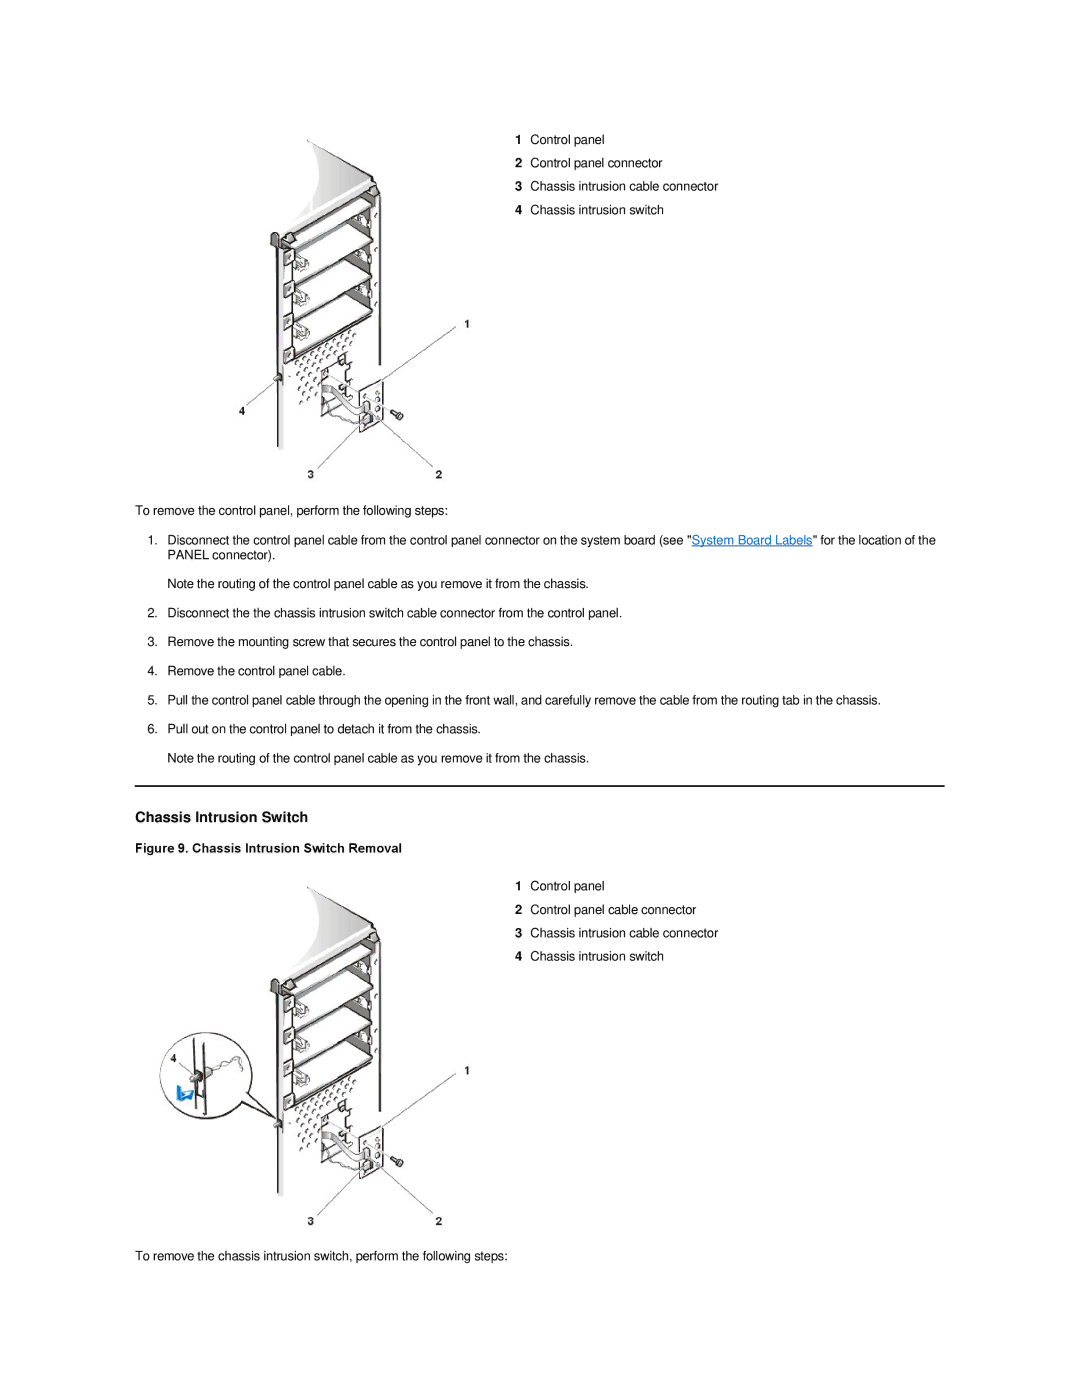
1Control panel
2Control panel cable connector
3Chassis intrusion cable connector
4Chassis intrusion switch
To remove the chassis intrusion switch, perform the following steps: