Replacing a BlackDiamond 12804 PSU/Fan Controller
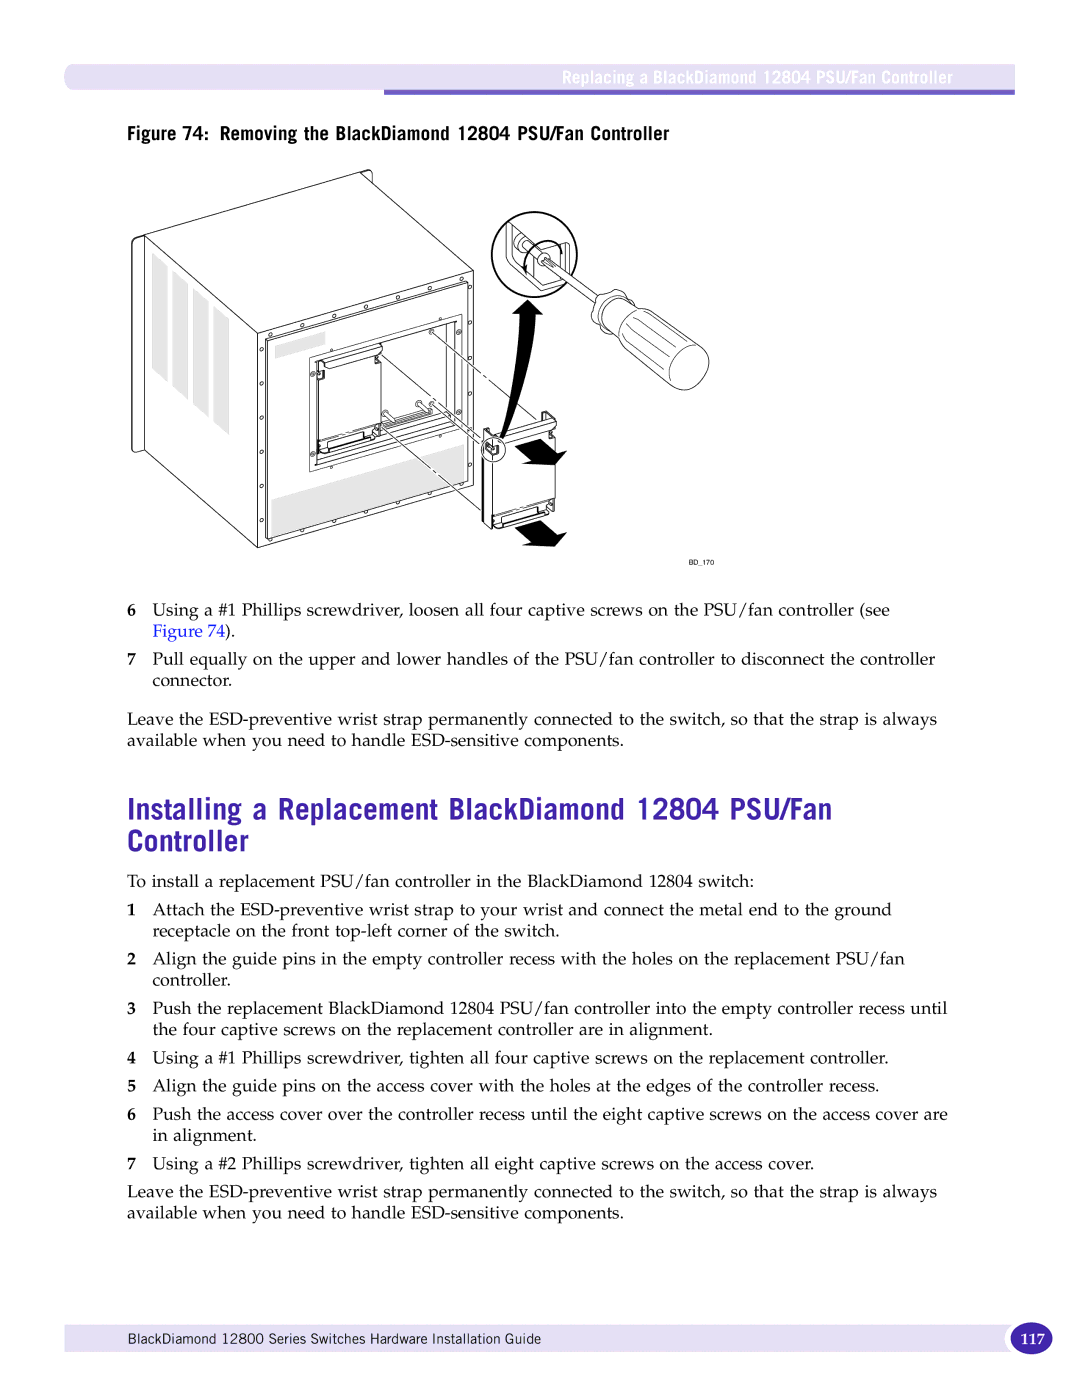
Figure 74: Removing the BlackDiamond 12804 PSU/Fan Controller
BD_170
6Using a #1 Phillips screwdriver, loosen all four captive screws on the PSU/fan controller (see Figure 74).
7Pull equally on the upper and lower handles of the PSU/fan controller to disconnect the controller connector.
Leave the
Installing a Replacement BlackDiamond 12804 PSU/Fan
Controller
To install a replacement PSU/fan controller in the BlackDiamond 12804 switch:
1Attach the
2Align the guide pins in the empty controller recess with the holes on the replacement PSU/fan controller.
3Push the replacement BlackDiamond 12804 PSU/fan controller into the empty controller recess until the four captive screws on the replacement controller are in alignment.
4Using a #1 Phillips screwdriver, tighten all four captive screws on the replacement controller.
5Align the guide pins on the access cover with the holes at the edges of the controller recess.
6Push the access cover over the controller recess until the eight captive screws on the access cover are in alignment.
7Using a #2 Phillips screwdriver, tighten all eight captive screws on the access cover.
Leave the
BlackDiamond 12800 Series Switches Hardware Installation Guide | 117 |
|
|