Installing Power Supply Units
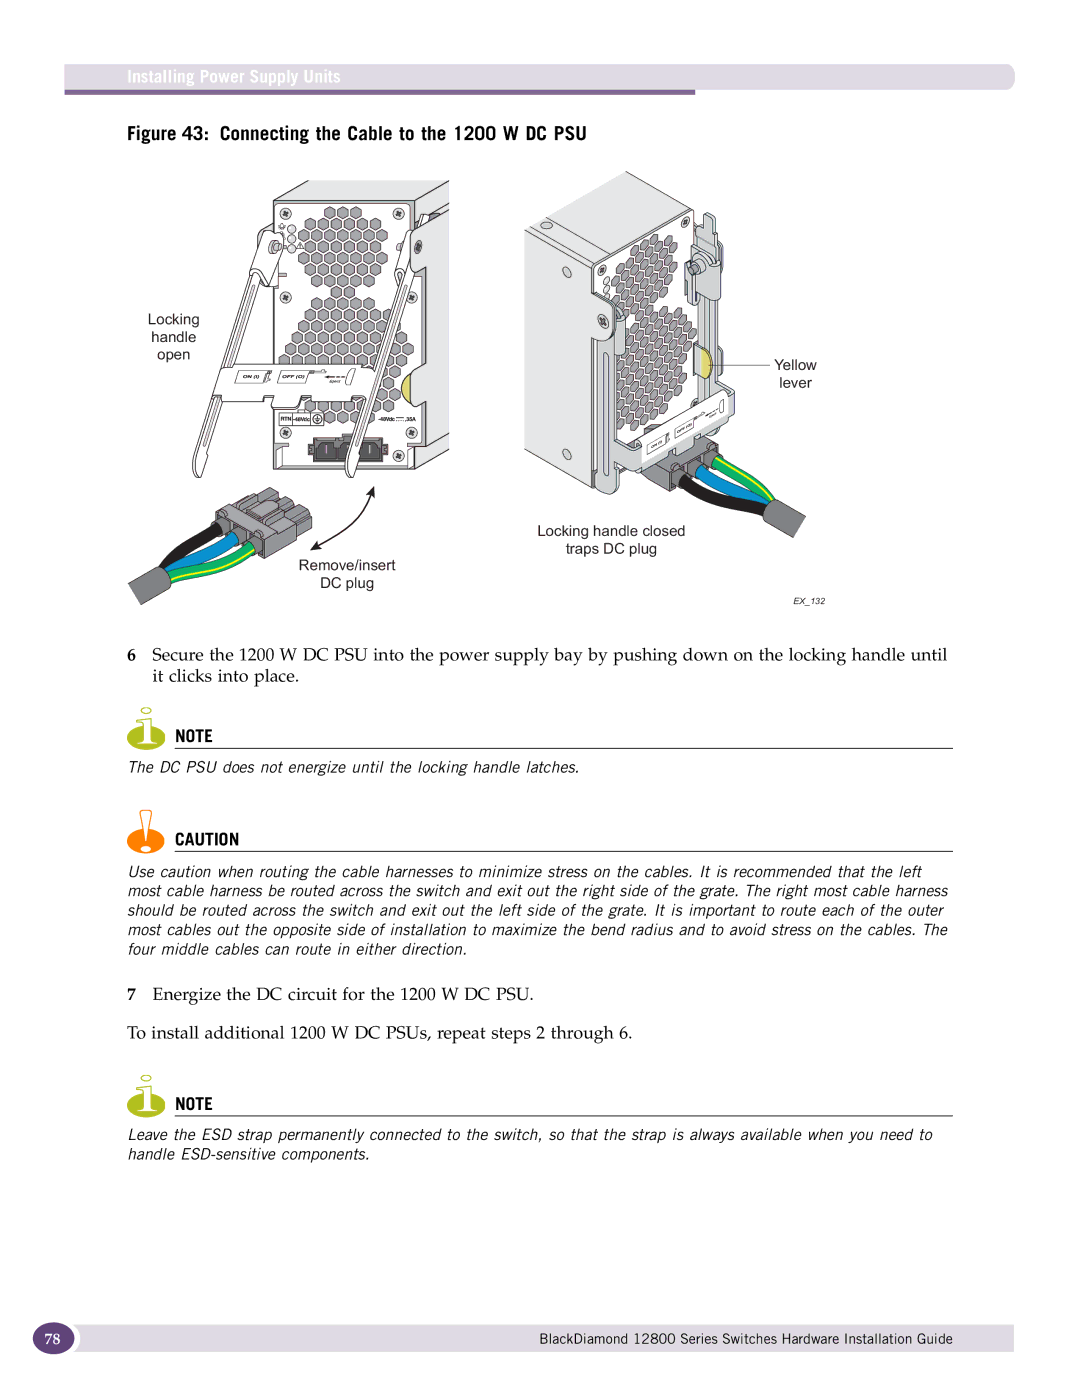
Figure 43: Connecting the Cable to the 1200 W DC PSU
Locking
handle
open
Remove/insert
DC plug
Yellow
lever
Locking handle closed
traps DC plug
EX_132
6Secure the 1200 W DC PSU into the power supply bay by pushing down on the locking handle until it clicks into place.
NOTE
The DC PSU does not energize until the locking handle latches.
CAUTION
Use caution when routing the cable harnesses to minimize stress on the cables. It is recommended that the left most cable harness be routed across the switch and exit out the right side of the grate. The right most cable harness should be routed across the switch and exit out the left side of the grate. It is important to route each of the outer most cables out the opposite side of installation to maximize the bend radius and to avoid stress on the cables. The four middle cables can route in either direction.
7Energize the DC circuit for the 1200 W DC PSU.
To install additional 1200 W DC PSUs, repeat steps 2 through 6.
NOTE
Leave the ESD strap permanently connected to the switch, so that the strap is always available when you need to handle
78 | BlackDiamond 12800 Series Switches Hardware Installation Guide |
|
|