Configuring the VNM Recorder
NOTE: | Initial configuration of the | VNM Recorder requires a mouse, keyboard, and |
monitor. When configuration is | complete, it is not necessary to keep these devices | |
attached to the recorder. The recorder can be completely controlled using the web- | ||
based user interface. |
| |
Default Network Settings
The VNM Recorder is
IP Address: | 192.168.254.254 |
Subnet Mask: | 255.255.255.0 |
Controller IP Address: | 192.168.254.254 |
NOTE: | Using these settings, the |
IP addresses within the range 192.168.254.1 through 192.168.254.253 and use the | |
same subnet mask. The default network settings can also be changed to match an | |
existing network setup. This is explained in the following sections. | |
Configuring the Network and IP Address Settings
Use the following procedure to change the network settings on the VNM Recorder.
Stage 1 — Configure the network settings
1.If the recorder is not turned on already, power up the unit and wait for the login screen to appear on the monitor (approximately two minutes and fifteen seconds).
2.Enter in the administrator username and password at the login screen. See the
"Login Information" section on page 14 for username and password information.
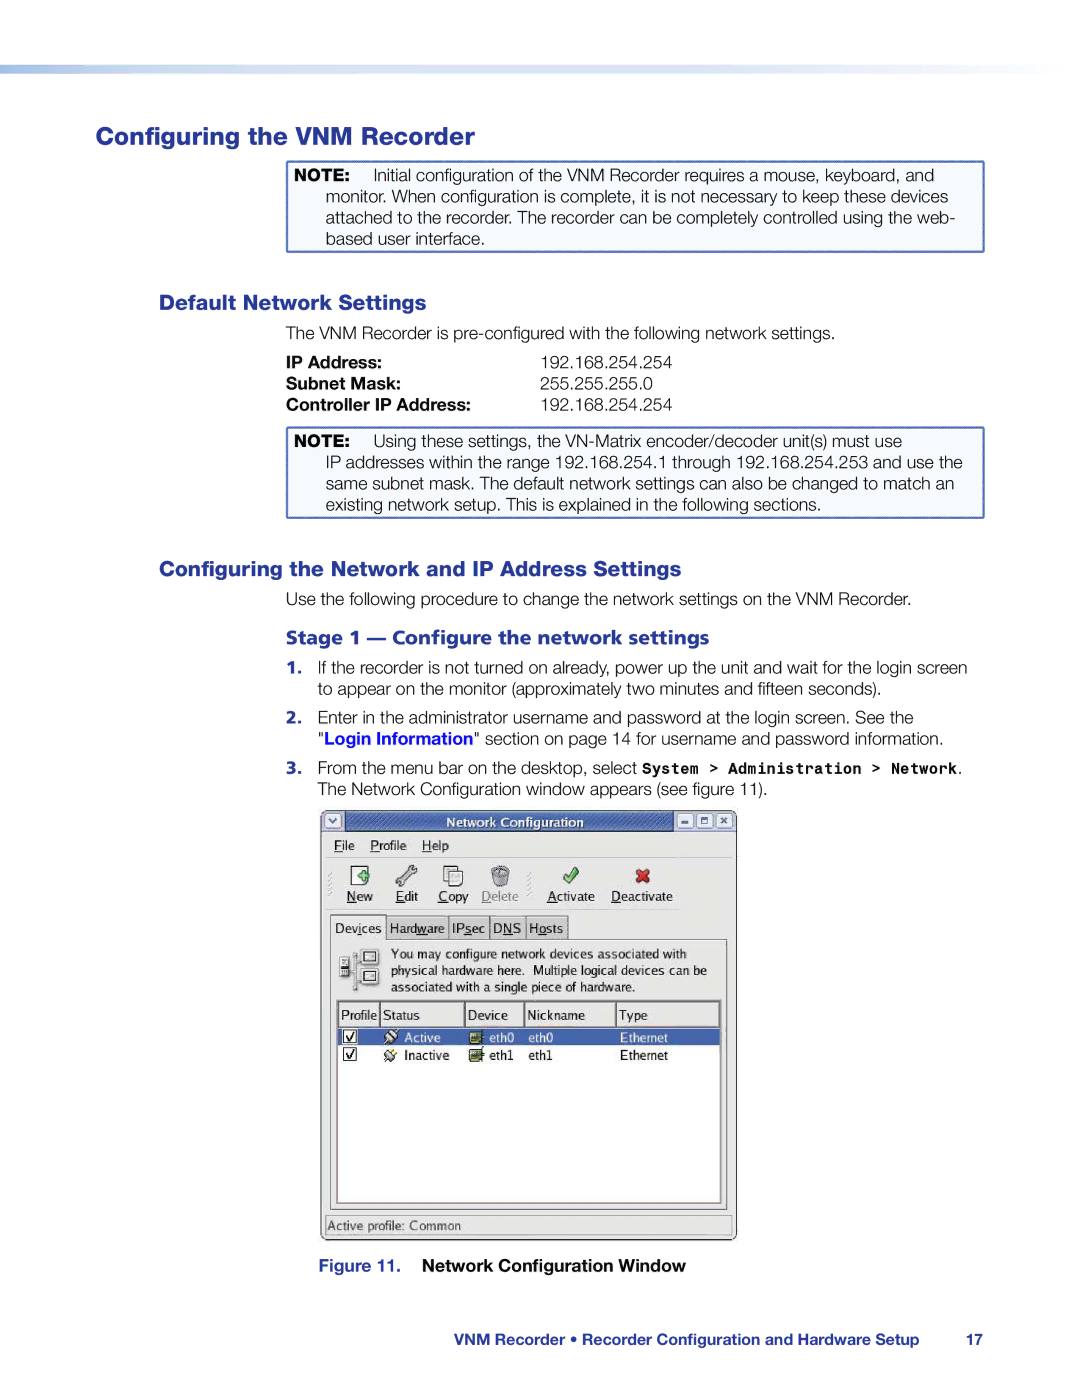
3.From the menu bar on the desktop, select System > Administration > Network. The Network Configuration window appears (see figure 11).
Figure 11. Network Configuration Window
VNM Recorder • Recorder Configuration and Hardware Setup | 17 |