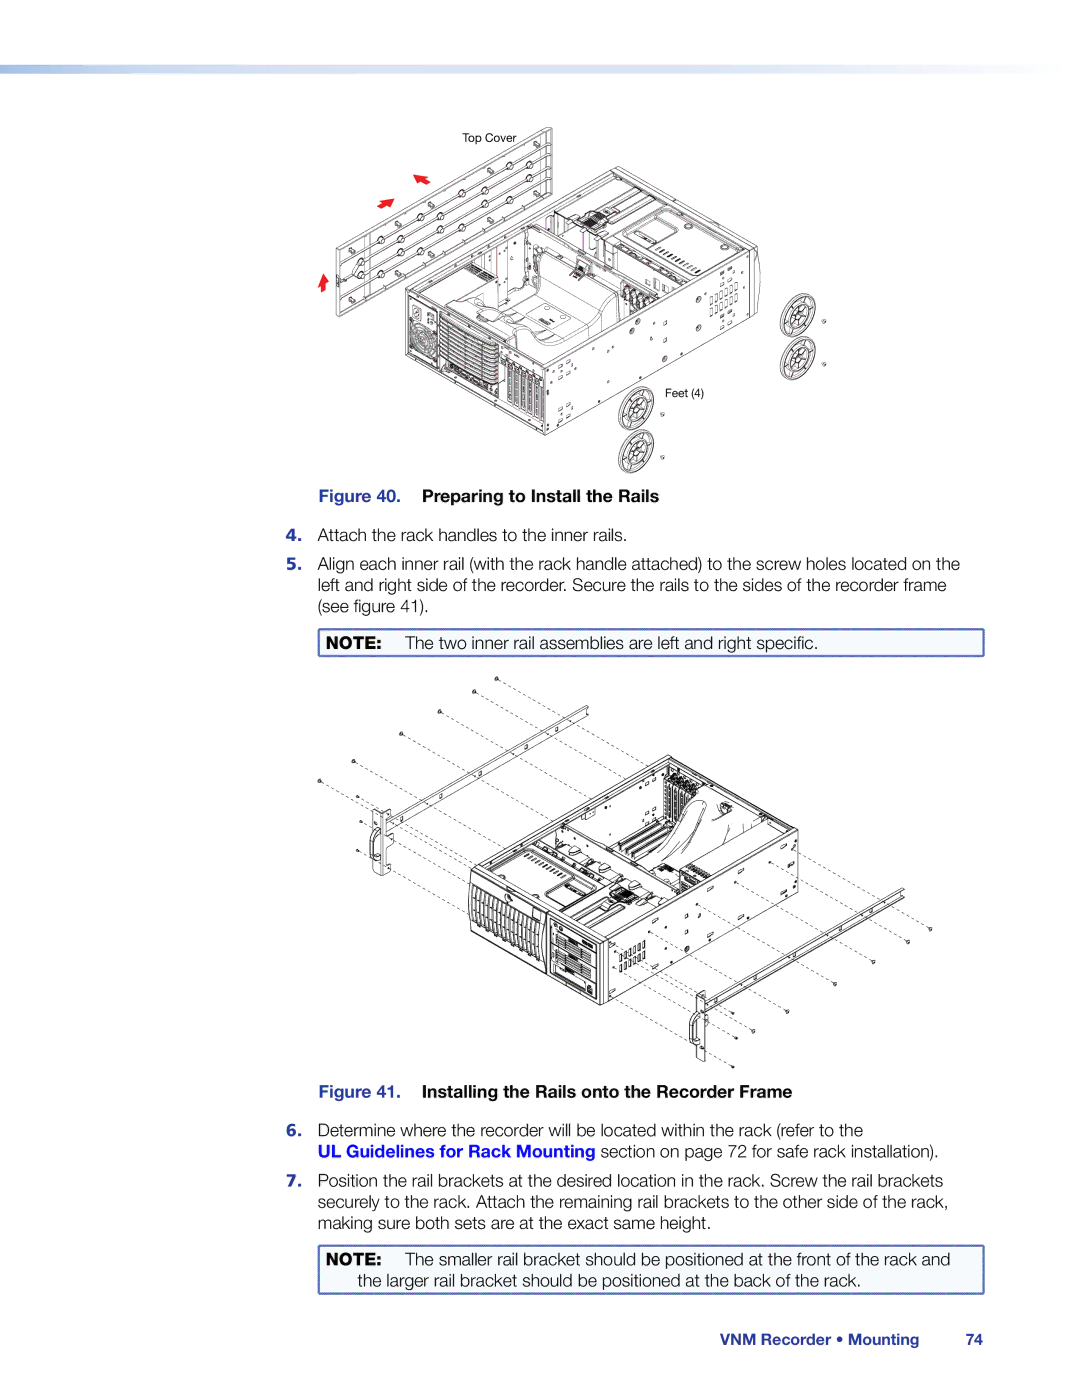
Top Cover
Feet (4)
Figure 40. Preparing to Install the Rails
4.Attach the rack handles to the inner rails.
5.Align each inner rail (with the rack handle attached) to the screw holes located on the left and right side of the recorder. Secure the rails to the sides of the recorder frame (see figure 41).
![]() NOTE: The two inner rail assemblies are left and right specific.
NOTE: The two inner rail assemblies are left and right specific.
Figure 41. Installing the Rails onto the Recorder Frame
6.Determine where the recorder will be located within the rack (refer to the
UL Guidelines for Rack Mounting section on page 72 for safe rack installation).
7.Position the rail brackets at the desired location in the rack. Screw the rail brackets securely to the rack. Attach the remaining rail brackets to the other side of the rack, making sure both sets are at the exact same height.
NOTE: | The smaller rail bracket should be positioned at the front of the rack and |
the larger rail bracket should be positioned at the back of the rack. | |
VNM Recorder • Mounting | 74 |
